April 20, 2024

Starting Seeds With a Soil Cubes and Building Rain Catchment

Here are a couple garden projects we’ve been working on this week. I know some of you are gardeners so I thought I would share them with you.

Soil Cubes

I know its past time to start seeds for many of you but we got a late start on it this year. Over the years I have used many things to start seeds, some worked better than others and some just plain didn’t work. This year I used something called a Soil Cube. While the seeds haven’t sprouted yet, I am pretty impressed. The soil cube is $19.99 +shipping, which gets you the soil cube maker and a tong to move the cubes with.

The problem I have had and seen with several seed starters is that the roots coil around the inside of a container, and are shocked when you transplant the seedling. The idea behind the Soil Cube is that your potting mix is the container. When the time is right you just put the cube in your garden. There is no root shock. Because the soil cube is the container, the roots stop at the edge of the soil, so there is no root coiling. We made fifty cubes in (maybe) thirty minutes and will transplant them to containers later this spring.

You can learn much more by visiting the Soil Cube Site I’ve also posted the intro video below.
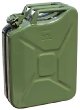
 

Rain Catchment

Rain water is better for a garden than city water, so building a rain catchment system has been something on my to-do list for a while. I finally got to it this week. For every inch of rain that falls on a 1000 square foot roof, you can catch approximately 600 gallons of water. Believe it or not catching rain is actually illegal in some states, so check your local laws before building a rain catchment system.

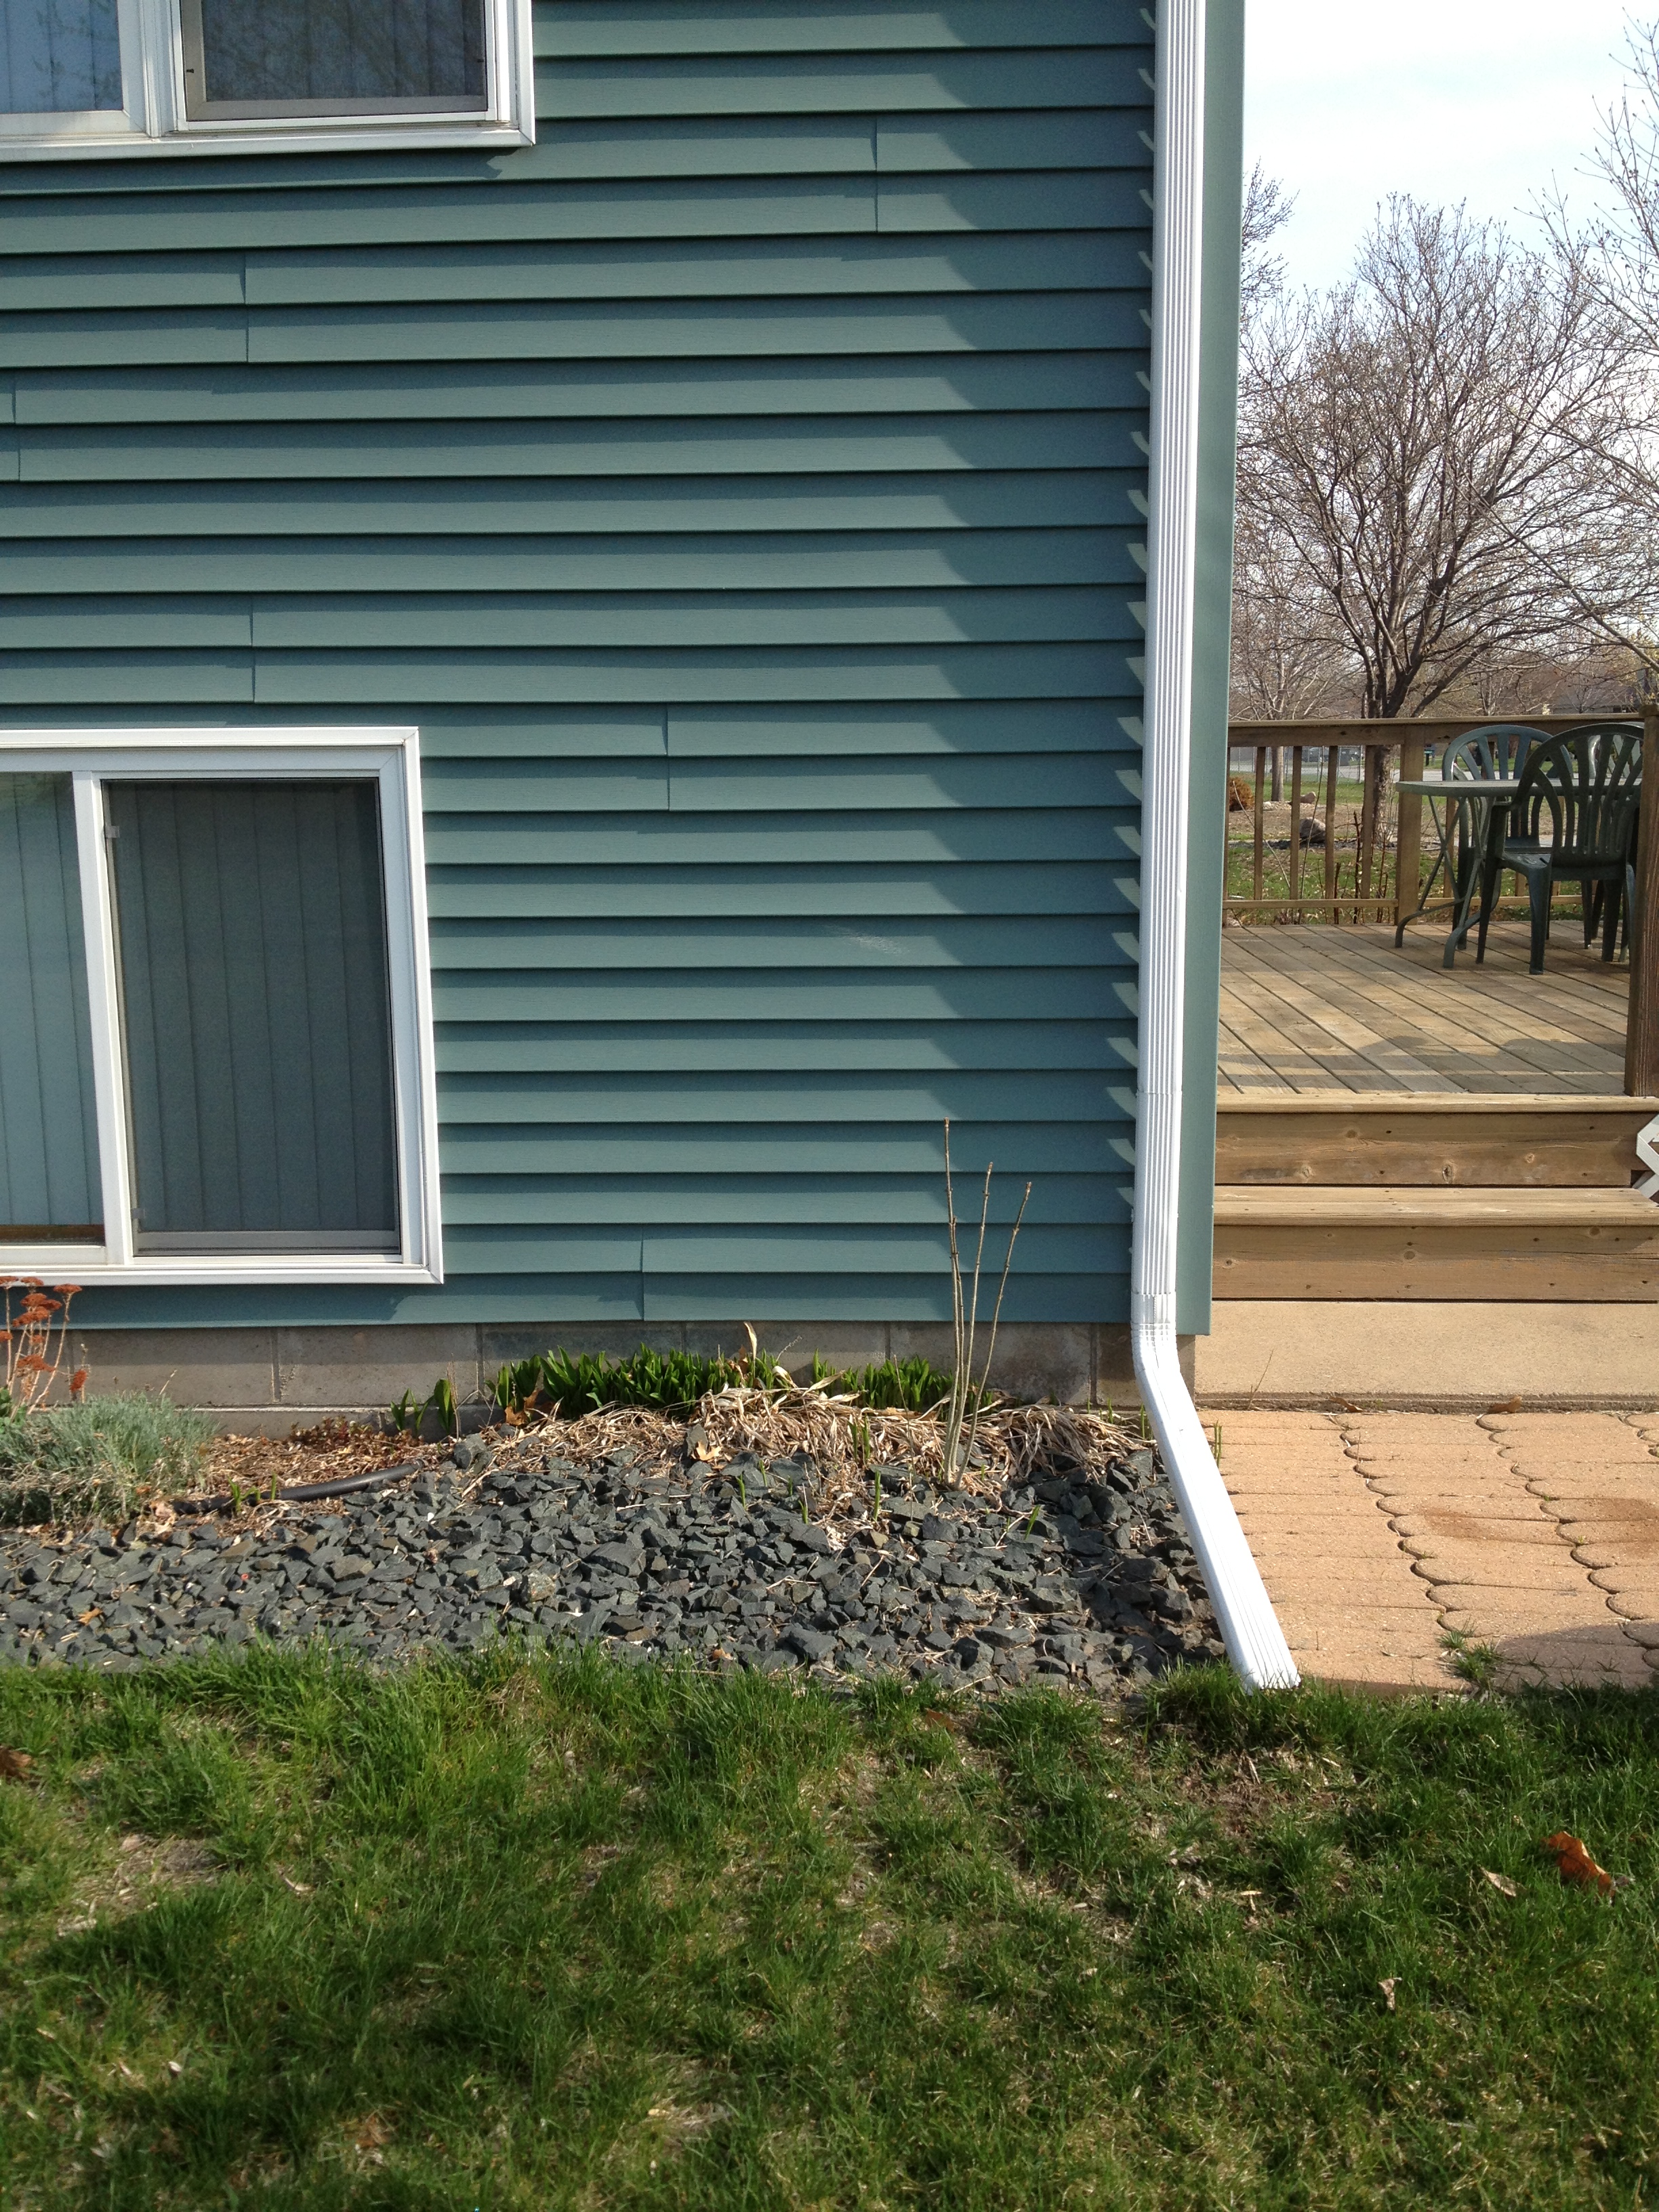
We have two barrels that have holes on the left and right and screened tops. We also purchased a product called a Rain Reserve that you attach to a downspout. It diverts some of the rain water to your barrel. The Rain Reserves are pretty pricey now at $89. But you buy one and get one free. We paid half that at a farmers market a year or two ago.

As you can see from the pictures, we set one barrel up higher than the other. When that one is full, it will then transfer over to the second barrel through the hose. We put them on blocks to add some pressure if we decide to add drip irrigation later.

We’ll use the water for the garden but, if we needed to in a pinch, we could use it to flush the toilet, bathe or even drink. We would need to purify it first if we were going to drink it.

BeforeAfter

Rain Reserve

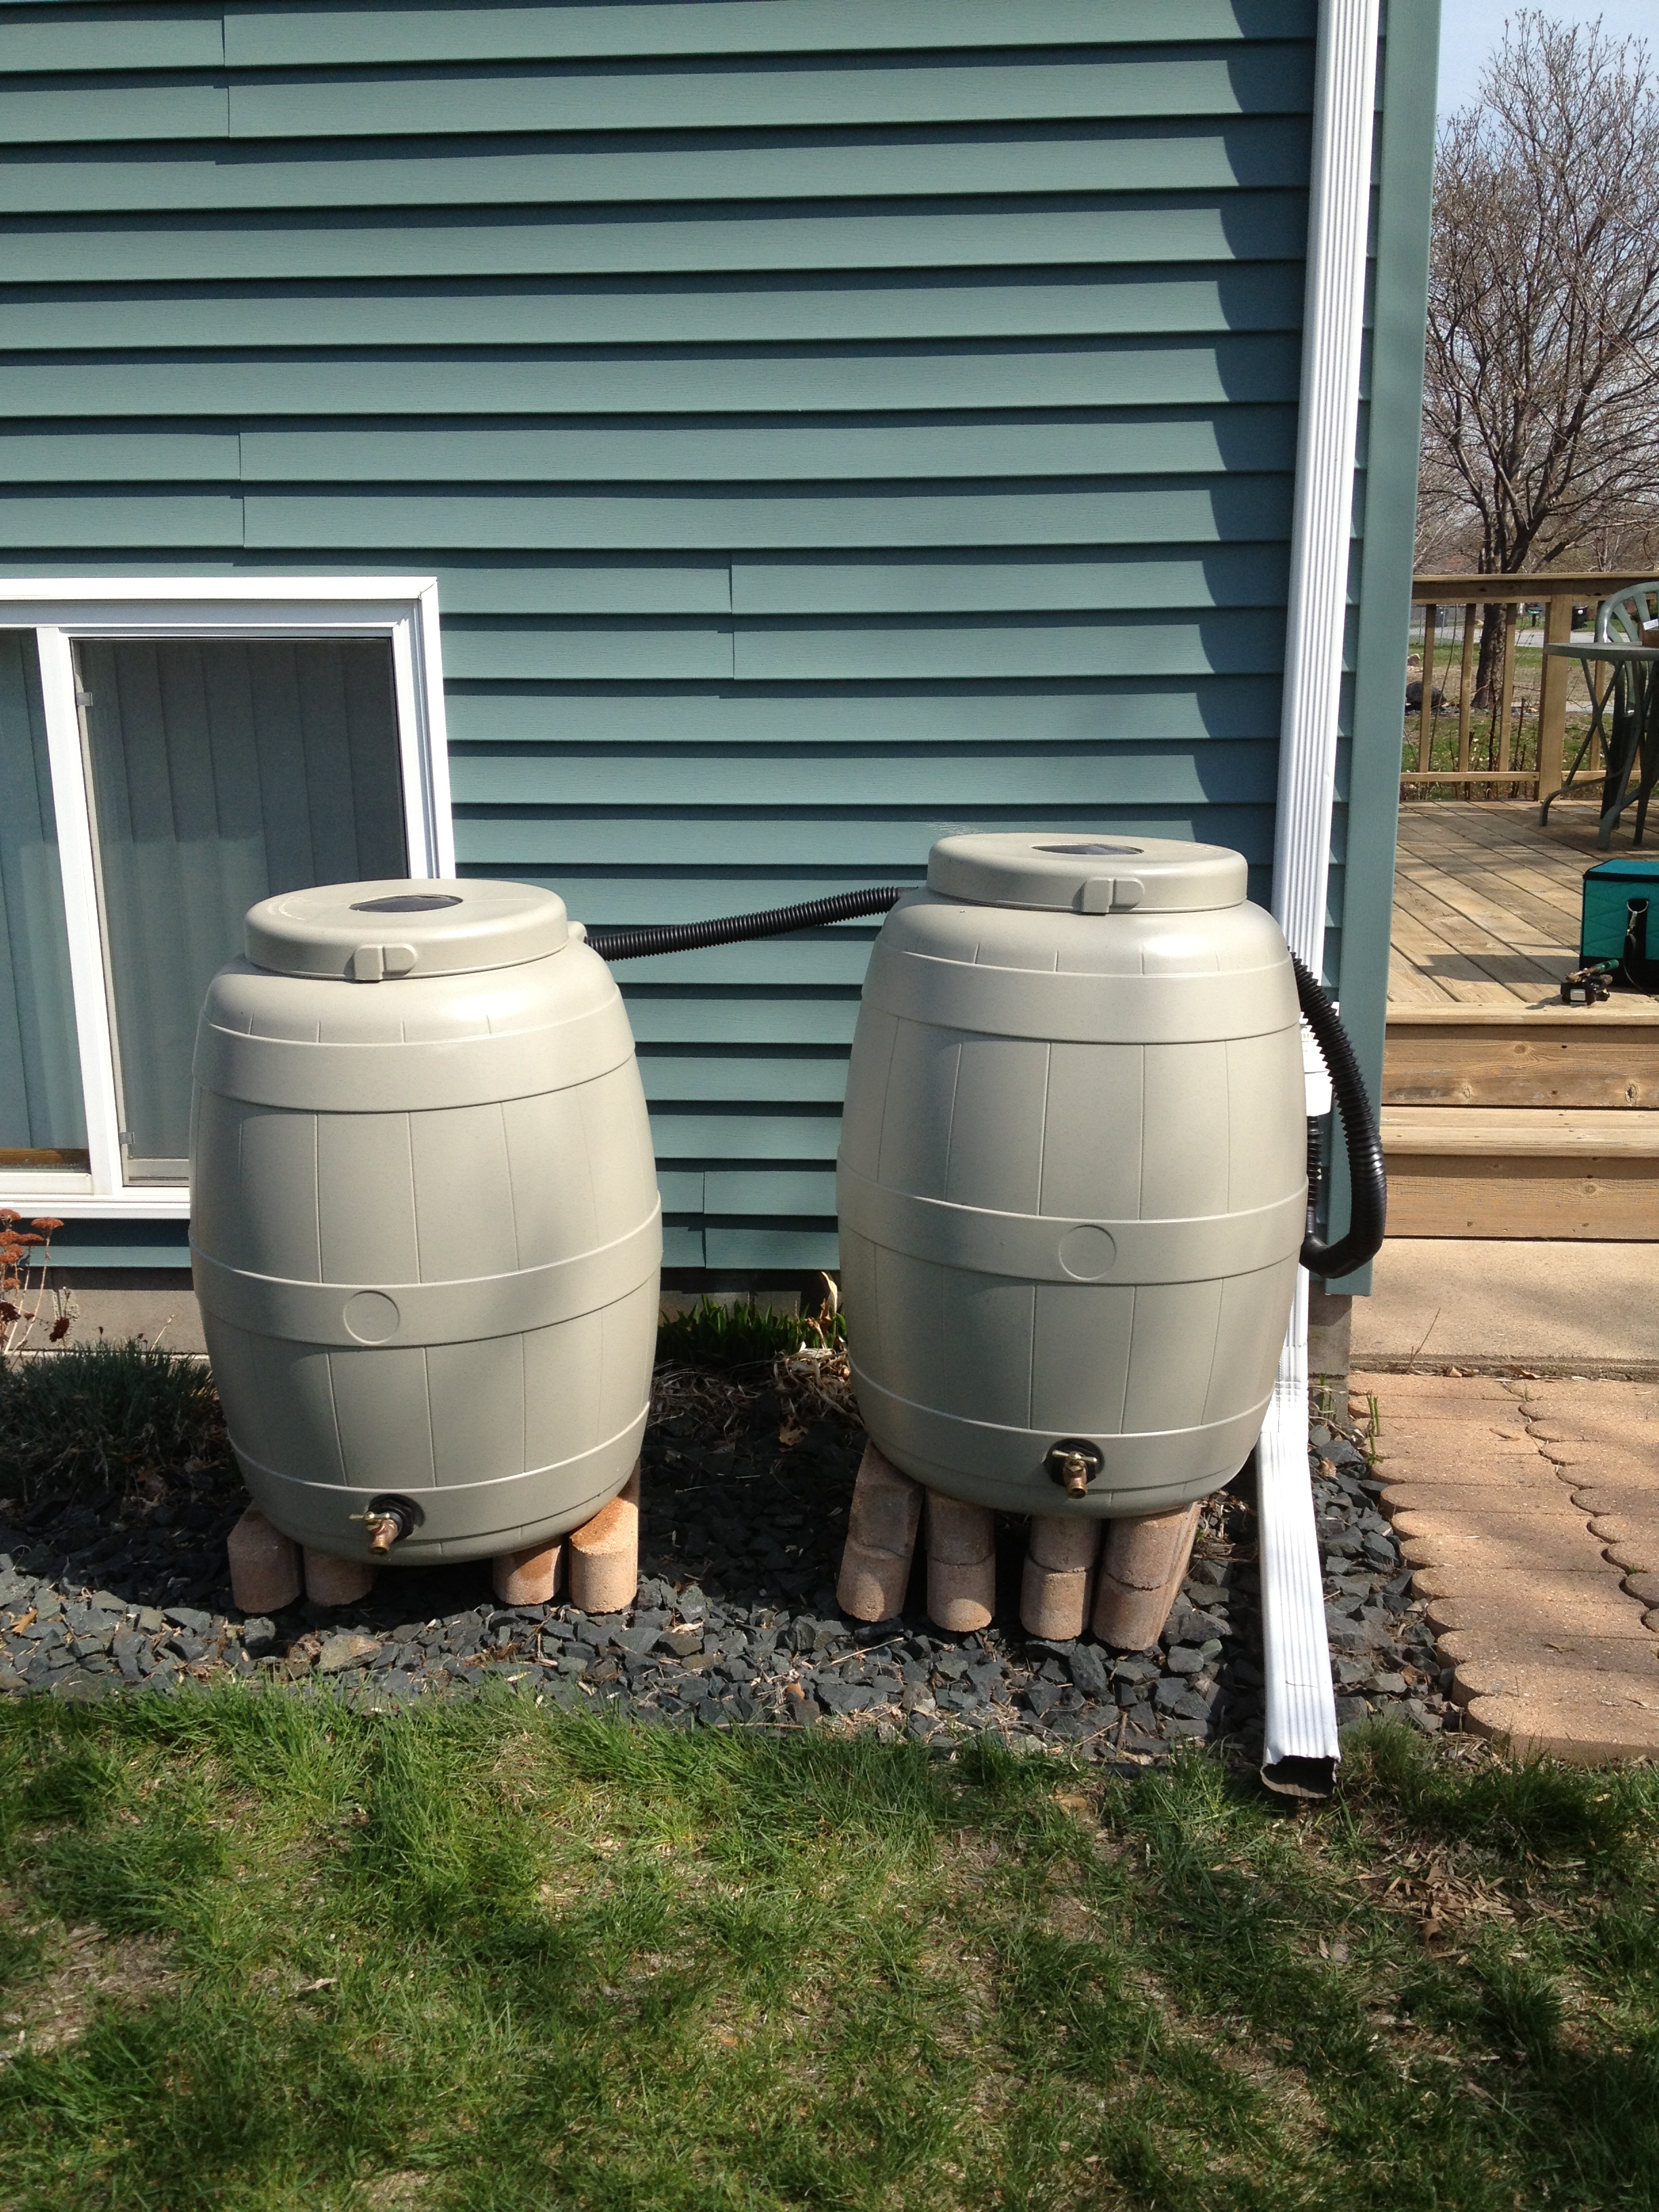
The top right picture shows that the Rain Reserve is pretty low. This is because that is where it was already cut, and I didn’t want to make another one if I could help it. It rained and it turns out I will need to make another cut and raise the rain reserve above the barrel.

If you liked this article please think about sharing it on the social media listed below, thanks!

PreparednessClubOne

Executing a Bug Out Plan

In past articles such as “Bugging Out or Battening Down?” , I have suggested that, in the vast majority of scenarios, staying home and battening down is a far better idea.  However, there are scenarios like fire, flood, extended blackout in an urban environment and multiple others, where bugging out might be a must.  Today I want to give a quick refresher on building a bug out plan, even if you don’t have a Bug Out Location (BOL).  I’ll then give some thoughts on executing your plan.


Making a Bug Out Plan (BOP)

If you have a Bug Out Location (BOL), I suggest you document multiple ways to get there.  If you don’t have a BOL, you still have options.  One option is to have an agreement with a friend or relative that, if needed, you would head there.  You could go one step further and ask to store some food and gear there so you have more than what you were able to BO with.

Another option is to pick small towns, one north, one south, one east and one west of your home.  We picked towns that are 30-60 miles away, had a population of around 5,000 and, if possible, a small hotel.  You don’t have to stay at the hotel but it can serve as a rally point.  Another reason for the hotel is that if you and your family don’t bug out together but agree on which direction to take, if someone is delayed they can call the hotel and ask to leave a message for your family member who is on their way and will be checking in.

The reason I like this idea is that you have a plan to execute and won’t have to try and figure out where to go if things start going sideways.  I like the idea of four directions because you don’t know what direction things might be melting down.  For instance, many Minnesotans might think about heading ”up north” because there are many lakes, woods and plentiful wildlife.  There is a nuclear power plant along one “up north” route for us and a state penitentiary along another.  In a worst case scenario such as an EMP, there is no way I want to go near the nuclear plant, and I’d like to keep my distance from the prison as well.  It might be easier to just go east instead.


Documentation Package

Here is an idea that I got from Jack Spirko of The Survival Podcast; make a travel folder and stick one in each vehicle. Inside this folder you should have three destinations with three routes to each destination. Label them destination 1, 2, 3 and route A, B, C.  If you and your family are separated, you can call them and tell them to head to destination 2, following route 3 and eliminate any confusion.

I also think that you should include information like local towing companies and your insurance agent’s phone number. This is information that you will want quickly and may not have someone to call to give it to you.


When Should You Bug Out?

There isn’t a cut and dry answer.  The best answer I can give is that you should BO when being on the road heading to a BOL or being at the BOL is safer than being at home.  If you BO too early you can just call it a mini vacation.  If you BO too late you might find yourself in gridlock.


Bugging Out on Foot

As I have stated, I think that, in the vast majority of situations, battening down at home is a better solution.  If I have to BO, chances are that I’ll be able to do so in my vehicle.  But what if the worst-case scenario happens and there is an EMP that makes all vehicles with a computer inoperable?

I’ve seen many articles and forum posts that say you need to make sure you can hoof it carrying your BOB.  Ideally everyone would be injury free and in shape enough to do this, but are there options for those of us who just aren’t going to be able to carry a full BOB?

I have a few ideas that might work.  One, as you may have guessed, is the shopping cart.  Just taking one would be stealing.  If we’re talking EMP, there is a chance the store manager might be willing to sell one, if the store is even open.  I have seen bicycles modified to attach and pull shopping carts.  It could simply be pushed, or attached to a person via ropes and towed behind as they walk.

Another option, if you already own one, would be a game cart.  They have a very high weight limit and are ruggedly built to withstand bringing heavy game over rough terrain.  Yet another option is securing gear to a bicycle and walking along side.  Still another would be a wagon, though you’re pretty limited on space.  An option in snow would be a sled.


Traveling Safely

When people on various forums talk about bugging out, I always get the impression they mean to do so through the wilderness.  If you spend a lot of time hiking in the wilderness, this is a solid option for you.  If you don’t, you might want to give it a second thought.  Walking through rough, uneven, and often slippery terrain, dodging branches, might not be the best solution unless it can’t be avoided.

Most people will choose to travel during the day.  For this reason, you may instead choose to travel at night.  This is probably a very good idea if you live in the south, as it will be much cooler at night.

Some nontraditional routes may include following; power lines, railroad tracks, and rivers.  Use caution with railroad tracks, as some tracks go over bridges that are not made for human traffic.  Use similar caution when following rivers, as they can lead through treacherous wilderness areas, unsuitable for travel.


If you liked this article please think about sharing it on the social media listed below, thanks!

Frugal Preparedness


IMG_0341


Anyone involved in preparedness knows that it can quickly get expensive.  This doesn’t need to be the case.  Here are a bunch of tips for prepping on the cheap.


Don’t be a Gear Snob

While having top of the line gear is often ideal, you’re better off having something that will do an efficient job than holding out for that perfect item.  For example if you have nothing for home defense, you’re better off buying a used 20 gauge shot gun for $75 than holding out for a $1500 AR-15.

Another idea that came to mind is purifying water.   While I love our current method of purifying water, we needed a tax return to afford it.  Until then, we would have boiled water or used bleach.  That’s mot ideal but it would have gotten us by.


Don’t be a Brand Snob

When it comes to things like toilet paper, I have my favorite brand, but we have cases of other, less expensive brands, stored.  I’m not trying to be crude, but if there is an event that makes it so we can’t go buy more TP from a store, anything short of tree bark will seem like a blessing.


Coupons

Trudee really started couponing last year and has saved us a ton of money.  Sometimes saving 30% on a weekly grocery bill.  If you’re building a pantry, coupon like your life depends on it.  It might mean going to more than one grocery store, but it can easily be worth the trip.


Sales and BOGO (Buy One Get One)

This might sound like a no brainer, but when there is a sale on an item, stock up.  Grocery stores often have “buy one get one free or half off”. I have also seen “five for $5” or “ten for $10”.  These are great opportunities to stock up.


Discount Groceries

We have a discount grocery store called Aldi’s.  From talking to others and my own experience, if you get produce from them you should consume it quickly.  However, canned and frozen goods should be just fine.


Craig’s List, Free Cycle

Looking online, you can often find free or inexpensive gear.  This would be a great way to stock up on camping gear, and other preparedness related items.


Flea Markets, Garage Sales and Auctions

These can be a great resource for getting gear.  You can often haggle to get the asking price even lower.


Copy Canning

I learned about copy canning from the video Urban Master Volume 1 “The Home”, created by the late Ron Hood and his wife. The process is very easy and is as follows:

  1. You decide you want chicken noodle soup for lunch so you take a can out of your pantry.
  2. Add chicken noodle soup to the shopping list.
  3. When you go to the grocery store, you buy two instead of one. (If you used two cans, you guessed it, you buy four.)

This is a great way to build your pantry to the point where you’re at the maximum amount of any item you want to store. Then you simply move back to buying just one when you use one.


Dollar Stores

While not all dollar stores are created equal, I would wager I could survive for a week or two based off on the items at most dollar stores.  I didn’t say I would enjoy it, but I would survive.  Others might have this as well, but Dollar Tree has a section of their website called ”Emergency Supply Checklist”..


Big Box Stores

Costco and Sam’s club can be great money savers.  If you can’t afford a membership, consider going in on one with another family.  You might always need to go shopping there together, but it would be worth it.

Do you have any tips for frugal preparedness?  If so please add them to the comments section!


If you liked this article please think about sharing it on the social media listed below, thanks!


Soil Amendments to Improve Garden Growth

There were a couple comments about poor soil types in the forum and I listed a couple things that could be done to improve soil types.  I thought I would give a few more ideas here for everyone to see.  I don’t personally like using fertilizers in most situations so with these tips you can improve most soil types naturally.

I am by no means a master gardener, but I have picked up a few things over the years.  I wrote an article last spring called Principles of Gardening.  In that article I covered some of the basics of gardening that I’ll not touch on here.


Raised Beds

If you have truly awful soil, you can build raised beds and bring in soil.  By managing the soil in the raised bed, you will, over time, improve the soil below the bed.  I like raised beds for many reasons.  You can read more about it in a review I did of Mel Bartholomew’s book All New Square Foot Gardening.


Organic Matter

Whether you have too much clay or too much sand in your soil, you can improve it by adding organic matter.  There are a few ways to do this that I’ll list below.


Composting

The following is from the article I wrote on Principles of Gardening.

Composting is more than just throwing out kitchen scraps, but that is part of it. Making your own compost and adding it to your beds is a great way to amend the soil and get rid of kitchen scraps as well as leaves and grass clippings. Here is a site with a huge amount of Information on composting. One of the mistakes I made was buying one large bin and continually adding to it. I have heard Jack Spirko from the Survival Podcast say, “That is like adding more cake mix, when the cake is already half baked in the oven.” He recommends using three small compost bins and cycling them, so you fill one, leave it alone and start filling the second and so on.

There are often community compost sites.  Many times you must pay to deposit leaves, grass or other compostable materials.  However, you can, in many cases, take composted material for free.  You just have to shovel it yourself.  These sites may use chemicals to speed the process of composting, so if you want to remain natural, you should check with the facility.

Manure can be a great source of nutrients to add to your compost.  I was able to find plenty for free on Craig’s list.


Mulching

Mulching is taking organic matter and placing it over the soil.  This will do multiple things; it will bring in other nutrients, it will keep the soil moist and it will prevent evaporation among other things.  You can use many things for mulching: leaves, grass clippings, shredded newspaper and even wood chips.  Carmen commented in the Principles of Gardening about a video done by a Christian called Back To Eden.  It’s about a man who says God showed him how to use wood chips for mulch.  If you leave them on the topsoil this will work great, but do not mix them in with the soil.


Cover Crops

Here is a great article called Cover Crop Basics, written by Organic Gardening, a great publication that we have received for some time.  The article is well worth reading, so I will just touch on the highlights.

Cover crops can help bring organic material to your soil.  They are also a great way to stop erosion.  The process is fairly straight forward.  You plant a crop, give it minimal care and then either chop the top off, letting the plant regrow to chop the top off again later (this process is often called “chop and drop”) or you kill the cover crop completely.  In either case the organic material is left to return its nutrients back to the soil.

There are many types of things you can use as cover crops; ryegrass, barely, buckwheat and legumes, to name a few.  The benefit of using legumes is that they bring nitrogen into the soil, which is often deficient in poor soil types.   You can also use a mix of ryegrass and legumes, to get the benefit of both.


Final Thoughts

These methods will fix a lot of problems with your soil, such as; adding nutrients, stopping erosion and adding organic matter.  While these things can be used to improve poor soil quality, you can keep doing them to keep improving the quality.


If you liked this article please think about sharing it on the social media listed below, thanks!

NPE Syndrome – Not Prepared Enough

 NPE Syndrome – Not Prepared Enough.png

I get an email every once in a while from someone who has just started prepping and feels like they are way behind and won’t have enough time to get prepared.  I think this is a pretty common reaction when someone “wakes up” and see’s that there are some very real dangers that they need to prepare for.

I went through something similar and I am sure many of you did as well.  I discovered that there were things that could have a very real impact on my life.  I was also kicking myself for not waking up sooner, amazed that some of the things I was now seeing slipped by.

Then the amount of things I was unprepared for set in and I was sure there was no way I could get as prepared as I needed to be before these looming disasters set in.  I had far more questions than answers; where should I start? How was I going to pay for all of this?  What is the biggest danger?  How many things are there that I don’t know about? And on and on…

Luckily I found some good sites and spent countless hours researching to learn about preparedness.  At the time I could only find the occasional blog post or forum post about prepping and Christianity.  This is a huge part of why I created this blog.

I discovered that few people ever felt like they were prepared enough.  Many who had been at it for years would say they wish they were better prepared.


Encouraging Words

Above all things; keep praying about it and keep seeking His guidance.

Here are some things I tell people who email me and have a case of NPE.

You’re not alone.  The anxiety you feel is fairly normal and happens to many people when they “wake up”.  Don’t kick yourself for not starting sooner!  You’ve taken the most important step!  You’ve started!

Don’t let yourself get overwhelmed.  You can burn out that way.  You may feel like you’re quickly running out of time.  You’re not too late!  There is still time!

Don’t go in debt to get prepared.  There are inexpensive ways to get prepared.  You don’t need to go from a week’s worth of groceries to a year’s worth overnight.  Slowly increase the shelf stable foods you already eat, get a means to purify water and a means to defend your home.

Be careful who you tell about your new found realization that you need to prepare.  Many of the people in your life are still asleep and it’s not likely that you’ll be able to help them wake up.  Many Christians think preparing is showing a lack of faith.  They, of course, are mistaken.  The other reason to keep a lid on your preparedness is something I call Being gray.  Essentially it means not drawing unneeded attention to oneself, so as not to be a target.

I also try to give some ideas on where to start.  I often discuss the five basic human needs and link to a page written for those new to preparedness called Getting Started.


Final Thoughts

Truth be told, there are still things that start in the NPE Syndrome.  I have learned to see it for what it is.  Turn it over to the Lord and rest in the fact that you ARE prepared.  As with everything, it is God’s hands.

What encouraging words may you have for those with NPE Syndrome?


If you liked this article please think about sharing it on the social media listed below, thanks!


Candle Safety

Do you use candles often or are candles a part of your preparations?  We like to burn them during the colder months; at least we did until recently.  We’ve had a few things happen that caused Trudee and I to do some research on candles.  We had a couple different scented candles burning for a few days when Trudee noticed her asthma was acting up.  Then she noticed a thin layer of soot on the surface of things here and there.  (Note: We don’t have a fireplace.)

She did some research and let me know this might be a good topic to share with all of you.  I did some digging as well.  It turns out that most candles are created with paraffin, which is derived from petroleum.  There are some candles that do not contain paraffin that I’ll discuss a little later.

Here is an article from Rodale called Candle Chemicals Pollute Indoor Air, it talks about a study that was done where:

“The researchers for this study took paraffin wax and soy wax candles and burned them for five to six hours inside a chamber, measuring the kinds of chemicals that could be emitted by burning candles. They found varying levels of cancer-causing toluene and benzene, as well as other hydrocarbon chemicals called alkanes and alkenes, which are components of gasoline and can irritate respiratory tracts and trigger asthma…”

The article also goes on to say that:

“Paraffin candles release chemicals because of improper combustion: The flame doesn’t get hot enough to burn the oil completely, and chemicals are released as a result, Massoudi writes in his study.”

Trudee and I discussed using candle warmers, as you get the scent of a candle, but none of the soot.  However, if the scented oils are also derived from petroleum, it makes sense to me that they would have the same negative impacts that paraffin does.  If I can smell the scent of a candle on a candle warmer, then it also makes sense that I would be breathing in the same harmful chemicals.


Non Paraffin Based Candles

If you read the article I linked above, you’ll see that there are candles made from Soy, Bee’s wax a few other plant based oils.  With Soy, you run the risk of burning a GMO (Genetically Modified Organism), and I not only don’t want to eat GMO I don’t want to breathe it in either.

From what I can tell, bee’s wax candles are probably the best option.  However, I did read that some bee’s wax candles still contain paraffin.  Make sure if you choose bee’s wax, that it is pure.  I haven’t ever burned a bee’s wax candle, but from what I’ve read, aside from not having carcinogens, they also have a natural sweet smell, which means you don’t necessarily need any artificial scents.

Another plus side to using bee’s wax candles is that it can give you an opportunity to support local businesses.  The Honey Locator is a website developed by the National Honey Board.  With it, you can search for various types of honey and bee’s wax items in your local area (not all states available).


Candle Safety

I would be remiss to not include some candle safety information.  I know many people have candles as a part of their emergency preps.  I wonder how many of these people burn them at any other time.  Those who will only use them when “it’s hitting the fan” could make a bad situation much worse.  Here are some simple tips.

Please do not leave candles unattended.  That is a hard lesson learned when a century old condo was completely destroyed.  Praise God no one was killed.  Unattended candles can be knocked over by pets; the wax can also catch fire.

If you do not have a fire extinguisher on hand, this should be a prep you purchase soon.  An ABC extinguisher should do the trick!

Make sure you have working smoke detectors and check them twice a year; I recommend testing when you change the clocks for daylight savings.

Trim the wicks if your candles down to about ¼ of an inch.  This will help produce less smoke and slow the burn of the candle.

I found this site that explains how you can test a candle for soot.  I don’t know if it will work or not, but if you want to keep using paraffin candles it might be worth a try.

Don’t burn candles in confined spaces without access to fresh air and make sure you’re letting that fresh air in now and then.


If you liked this article please think about sharing it on the social media listed below, thanks!

Preserving God’s Word

Bible


JP, a faithful reader, recently sent me an email that I thought was such a good idea I wanted to share it with all of you.  One of the things I have in my preps is a case of Bibles that I got at a good price a few years ago.  My thinking is that if there is a prolonged time of hardship, people will be hungry for God’s Word.  I want to be prepared to listen, talk and to give them a Bible to take home with them.


It seems JP has the same idea, as he recently sent me the following email:


“Chris, I’ve been meaning to share this with you. There is one thing most folks don’t think of when prepping and I encourage it every time I get a chance. Of all the things we seal and store for future use God’s word is usually not one of them.

A year or so back I called around to find some inexpensive bibles. I wanted to buy a hundred or more to put in storage. Well I found out after talking with some folks that ran a bulk bible warehouse that the copies I wanted for $2.00 a piece were not meant for years of use or storage. The paper and ink used for those cheap bibles would fade and the pages would discolor due to changes in humidity or high moisture levels.

The guy I talked to explained this to me and laughingly suggested that the bibles would have to be kept very dry, vacuum sealed and kept airtight or I would have to spend a lot more money on the bibles and get some really good ones. Getting really good ones meant I couldn’t afford to buy very many and I wanted lots.

When times get hard people will cry out to God and they will want to know what His word has to say. As Christians we should be ready to help those in need. But I’m afraid we just can’t take in every person in need. So we should be able to give them some food and water along with a copy of God’s word, present the gospel to them and pray with them, then bid them farewell and God’s blessings upon them.

So Mylar is not just for food products here is what one of my sealed $2.00 bibles looks like. I really like watching people try to figure out what’s in it. If you look really close you can barely see the letters “Holy Bible” in the Mylar.”


I asked JP which site he used and he let me know it was Bible Surplus.com.  I looked around and they have some Bibles for less than $60 for a case of 48.

I haven’t tested this to make sure, but I think one could fit 4-6 Bibles in a one gallon Mylar bag, add 1 300cc oxygen absorber and you have preserved God’s Word for future use.

I want to thank JP for another great idea.


If you liked this article please think about sharing it on the social media listed below, thanks!


Fuel Storage

Fuel storage is something I don’t know a lot about but it was something that was on my list to research.  I recently received an email from a representative of Power Research INC. the makers of PRI-G and PRI-D, fuel treatments.  He asked if I would like a sample to do a review on.  I let him know that I don’t have a way to do a review on his product, but that if he sent me some information I would include it in my research for an upcoming article on fuel storage.  The offer sparked my interest, so I decided to write the article now.  When I say “fuel”, take it to mean both diesel and gasoline.  I will say “diesel” or “gasoline” if I mean a specific one.

Disclaimer; check with your local authorities on how much fuel you may store in a residential area.  Storage of too much fuel can lead to fines.


Fuel Storage

Fuel storage has the same enemies as food storage; light, air and moisture will cause it to go bad faster.  Because of this, it should be stored in a cool, dark, dry place that is not easily accessible by children.


Fuel Containers

Because the fumes are combustible, fuel should be stored in air tight containers that do not vent.  If you walk into the area where you store your fuel and can smell it, it is not air tight.


In The Survival PodcastEpisode-980- Steven Harris on Long Term Fuel Storage, Steven Harris (an engineer and all around guru on fuel and energy in general) said he stores his fuel in HDPE15 Gallon Water Storage Barrels (food grade bucket quality) drums.  He said they will expand in the summer and contract in the winter, but that these barrels can withstand it.  He said he had dropped his from the bed of his truck and they handled it just fine.

A 15 gallon barrel full of fuel will weigh almost exactly 100 pounds.  Steven said he had 2 year old gas in one of these containers with no additives and it worked just fine when used.

Caution: These barrels do not meet DOT standards for fuel transport and you do risk a ticket and other fines if you transport fuel in them.


Another option is the smaller, one to five gallon, containers.  The red ones that you buy from local stores are often low quality and fuel vents through the plastic as it heats and cools.  There have been improvements made to newer ones, but the older ones are not a good idea for long term fuel storage.


5galNATONato Jerry Gas Can 20L/5.28G Military Spec. containers are often very high quality and their price reflects it.  This Nato Jerry Gas Can 20L/5.28G Military Spec. is available on Amazon for $90.  I did some digging and this price is comparable to other vendors.  There are some out there that are much less expensive, but in reading reviews you can often find out why. The metal is often very thin and the spouts either don’t seal right or don’t work well.


Fuel Treatments

My first introduction to fuel treatments came from prepper fiction stories on the Internet.  I hadn’t really looked into them until I received the email from the gentleman at Power Research INC..  It looks like there are two big players in this marketplace; PRI products and STA-BIL.  If you know of others that I have missed, please link them in the comments and I will change the article.

Both products say they will keep the fuel fresh for up to twelve months. PRI-Products, however, say that you can treat them yearly to extend the fuel out many years.  However, they recommend testing the fuel yearly.  In this post on SurvivalBlog.com, Mr. Morton from Power Research INC claims they have stored fuel for 12 years and that it is “still refinery fresh”.  PRI-G is for gasoline, PRI-D is for diesel.  STA-BIL is for gasoline while Diesel formula STA-BIL is for, you guessed it, diesel.

Power Research Inc. has a site dedicated to preparedness where they speak to the importance of making sure your fuel will work when an emergency happens.

In terms of how much fuel treatment is required; STA-BIL states on their FAQ “A: One ounce (30mL) of STA-BIL® Fuel Stabilizer for every 2 ½ gallons (9.5 L) of gasoline, gasoline/oil mixtures, or ethanol blends is the recommended dosage level.”

From the PRI-G downloadable flyer: 16 Ounces treats 256 gallons; 32 Ounces treats 512 gallons and 1 Gallon will treat 2,000 gallons.  PRI-D will treat the same amount.

Here are some examples of fuel treatments;


PRI-G 16 oz. Fuel Stabilizer or PRI-G 32 oz. Fuel Stabilizer

PRI-D Fuel Stabilizer- For Diesel 16oz or PRI-D Fuel Stabilizer- For Diesel 32oz


STA-BIL 22214 Fuel Stabilizer – 32 Fl oz.

Sta-Bil Diesel Formula Fuel Stabilizer and Performance Improver – 32 oz.
 

Refreshing Old Fuel

What are your options when fuel isn’t stored properly or rotated and goes bad?  STA-BIL does not treat old gas, but they do have another product called Start Your Engines, which is geared more at the small engines of lawnmowers, chainsaws and snow blowers.  From the FAQ for PRI; “PRI has been independent laboratory tested on 10-13 year old fuels, and has restored the fuel to usable condition.”

As I mentioned, this subject is fairly new to me, but from the research I have done, I am a bit more impressed with PRI-Products.  They are a bit more expensive but with the ability to use it year after year to keep fuel usable, as well as the ability to refresh old fuel, it seems like a lot more bang for the buck.

Fuel storage isn’t something I have done, but once we get a new home, it is something I want to make sure I do, and I will use PRI to make sure the fuel is usable when it is needed most.

Diesel does not go bad nearly as fast as gasoline.  The one exception I was able to find is diesel fuel that has fungus in it.  Fungus can grow when the fuel has been exposed to the air and moisture. PRI does have a product called PRI-OCIDE.  It can be added when the fuel is stored and will fight the fungi.


Fuel Rotation

I have come across a few different ways to rotate fuel.  The way that I think makes the most sense and is probably the easiest I found, I heard on The Survival Podcast Episode-885.  In it, Tim from Old Grouch’s Military Surplus says he has twelve five gallon NATO style cans, one marked for every month of the year.  Each month, with a little bit of gas in his vehicle already, he empties that months’ can into his vehicle.  He finishes filling his vehicle at the gas station and refills the NATO can as well.


Disposing of Old Fuel

Some counties have a hazardous material facility where you can drop off old fuel and other hazardous materials.  Where I live, I believe it’s free for most things and a small fee for others.  This may not be the case where you live.


Fuel With Ethanol in it

I have learned the hard way that fuel with ethanol in it can be a bad thing for small engines.  I had one mower that I had to take in to have the carburetor and fuel system cleaned out.  I honestly don’t know if fuel with ethanol in it will be harmful to stored fuel.  If you are storing the fuel with a generator in mind, I guess I would say err on the side of caution and store fuel that does not have it.  You can visit this link to get a List of Ethanol free gas stations in the United States and Canada.


If you liked this article please think about sharing it on the social media listed below, thanks!


Sign of Distress; Signaling For Help

Have you ever thought about what you might do if you were lost or stranded and needed help?  Here are some different ways you can let others know you are in distress and need help.  There are different ways and some will work better in certain situations.  Knowing multiple ways to signal for help is a good idea.


Upside down American Flag

This isn’t necessarily a sign of disrespect.  According to Section 8a of the United States Flag Code, which states;

“The flag should never be displayed with the union down, except as a signal of dire distress in instances of extreme danger to life or property.”


Three Shots Fired

Three shots fired in quick succession should draw immediate attention.  This is one well known to hunters, but one everyone should know.  You might be tempted to fire three shots, wait a few seconds and fire three more, but conserve your ammo.  You may need to fire three more later to help searchers get a fix on your position, or you might need it for protection.  Remember to fire into the ground, not into the air.  What goes up must come down.


Three Stones

Finding three stones placed one atop the other is unnatural and should be heeded as a call for help.  This would be one to use for marking your path, so rescuers can follow your track more easily.


Three Sticks in the Ground

Like three stones, finding three sticks near each other, all stuck in the ground and pointing straight up is unnatural and should be heeded as a call for help.  This would also be a good way to mark your trail.


Three Fires

At night when it’s too dark to see other signals, three fires close to each other will stand out and be viewed as a call for help.  To make them stand out more, place them in a triangle or other pattern.  This will stand out more than three in a straight line.


Three Debris Piles

If you don’t have a fire, you can make three piles of debris that are a contrast in color to your surroundings.  For example, if your boat capsizes and you make it to the sandy shore, you could write SOS in 3-5’ letters and 2” deep, filling the letters with leaves, rock or ash from a fire.


Signal Mirror

The reflection of a signal mirror can be seen much further than any of the other signals of distress.  To use it, make a V with two fingers, and hold your hand in front of you, placing the object of your signal between your fingertips.  Now flash the reflection at the object.  Doing so repeatedly in 3 quick signals will standout more than one constant.


Do you have any other ways to signal for help when you’re in distress?


If you liked this article please think about sharing it on the social media listed below, thanks!


The Preparedness Review

Many of you might be familiar with The Prepper Website, which is a fantastic website that lists a huge amount of preparedness articles from many sites in the preparedness community.  Todd Sepulveda, the creator of The Prepper Website has released The Preparedness Review, which is a biannual publication that will be released in the fall and spring of each year. I was honored to be asked by Todd to contribute an article for its Inaugural Edition, which has been released today.

The The Preparedness Review is in downloadable PDF format so you can read it off line.  I read through a copy yesterday and it is loaded with great information from many different authors and covers many different areas.

I want to thank Todd for all of his work with both The Prepper Website and The Preparedness Review.  He has really helped bring a lot of attention to Prepared Christian.  For that and for all of the great information he has brought to light from other sites, I am very grateful.

I highly recommend you head over to The Preparedness Review and get your copy today!