April 25, 2024

Ten Foods to Include in Your Emergency Food Storage Supply

This article was guest written by Lee Flynn.


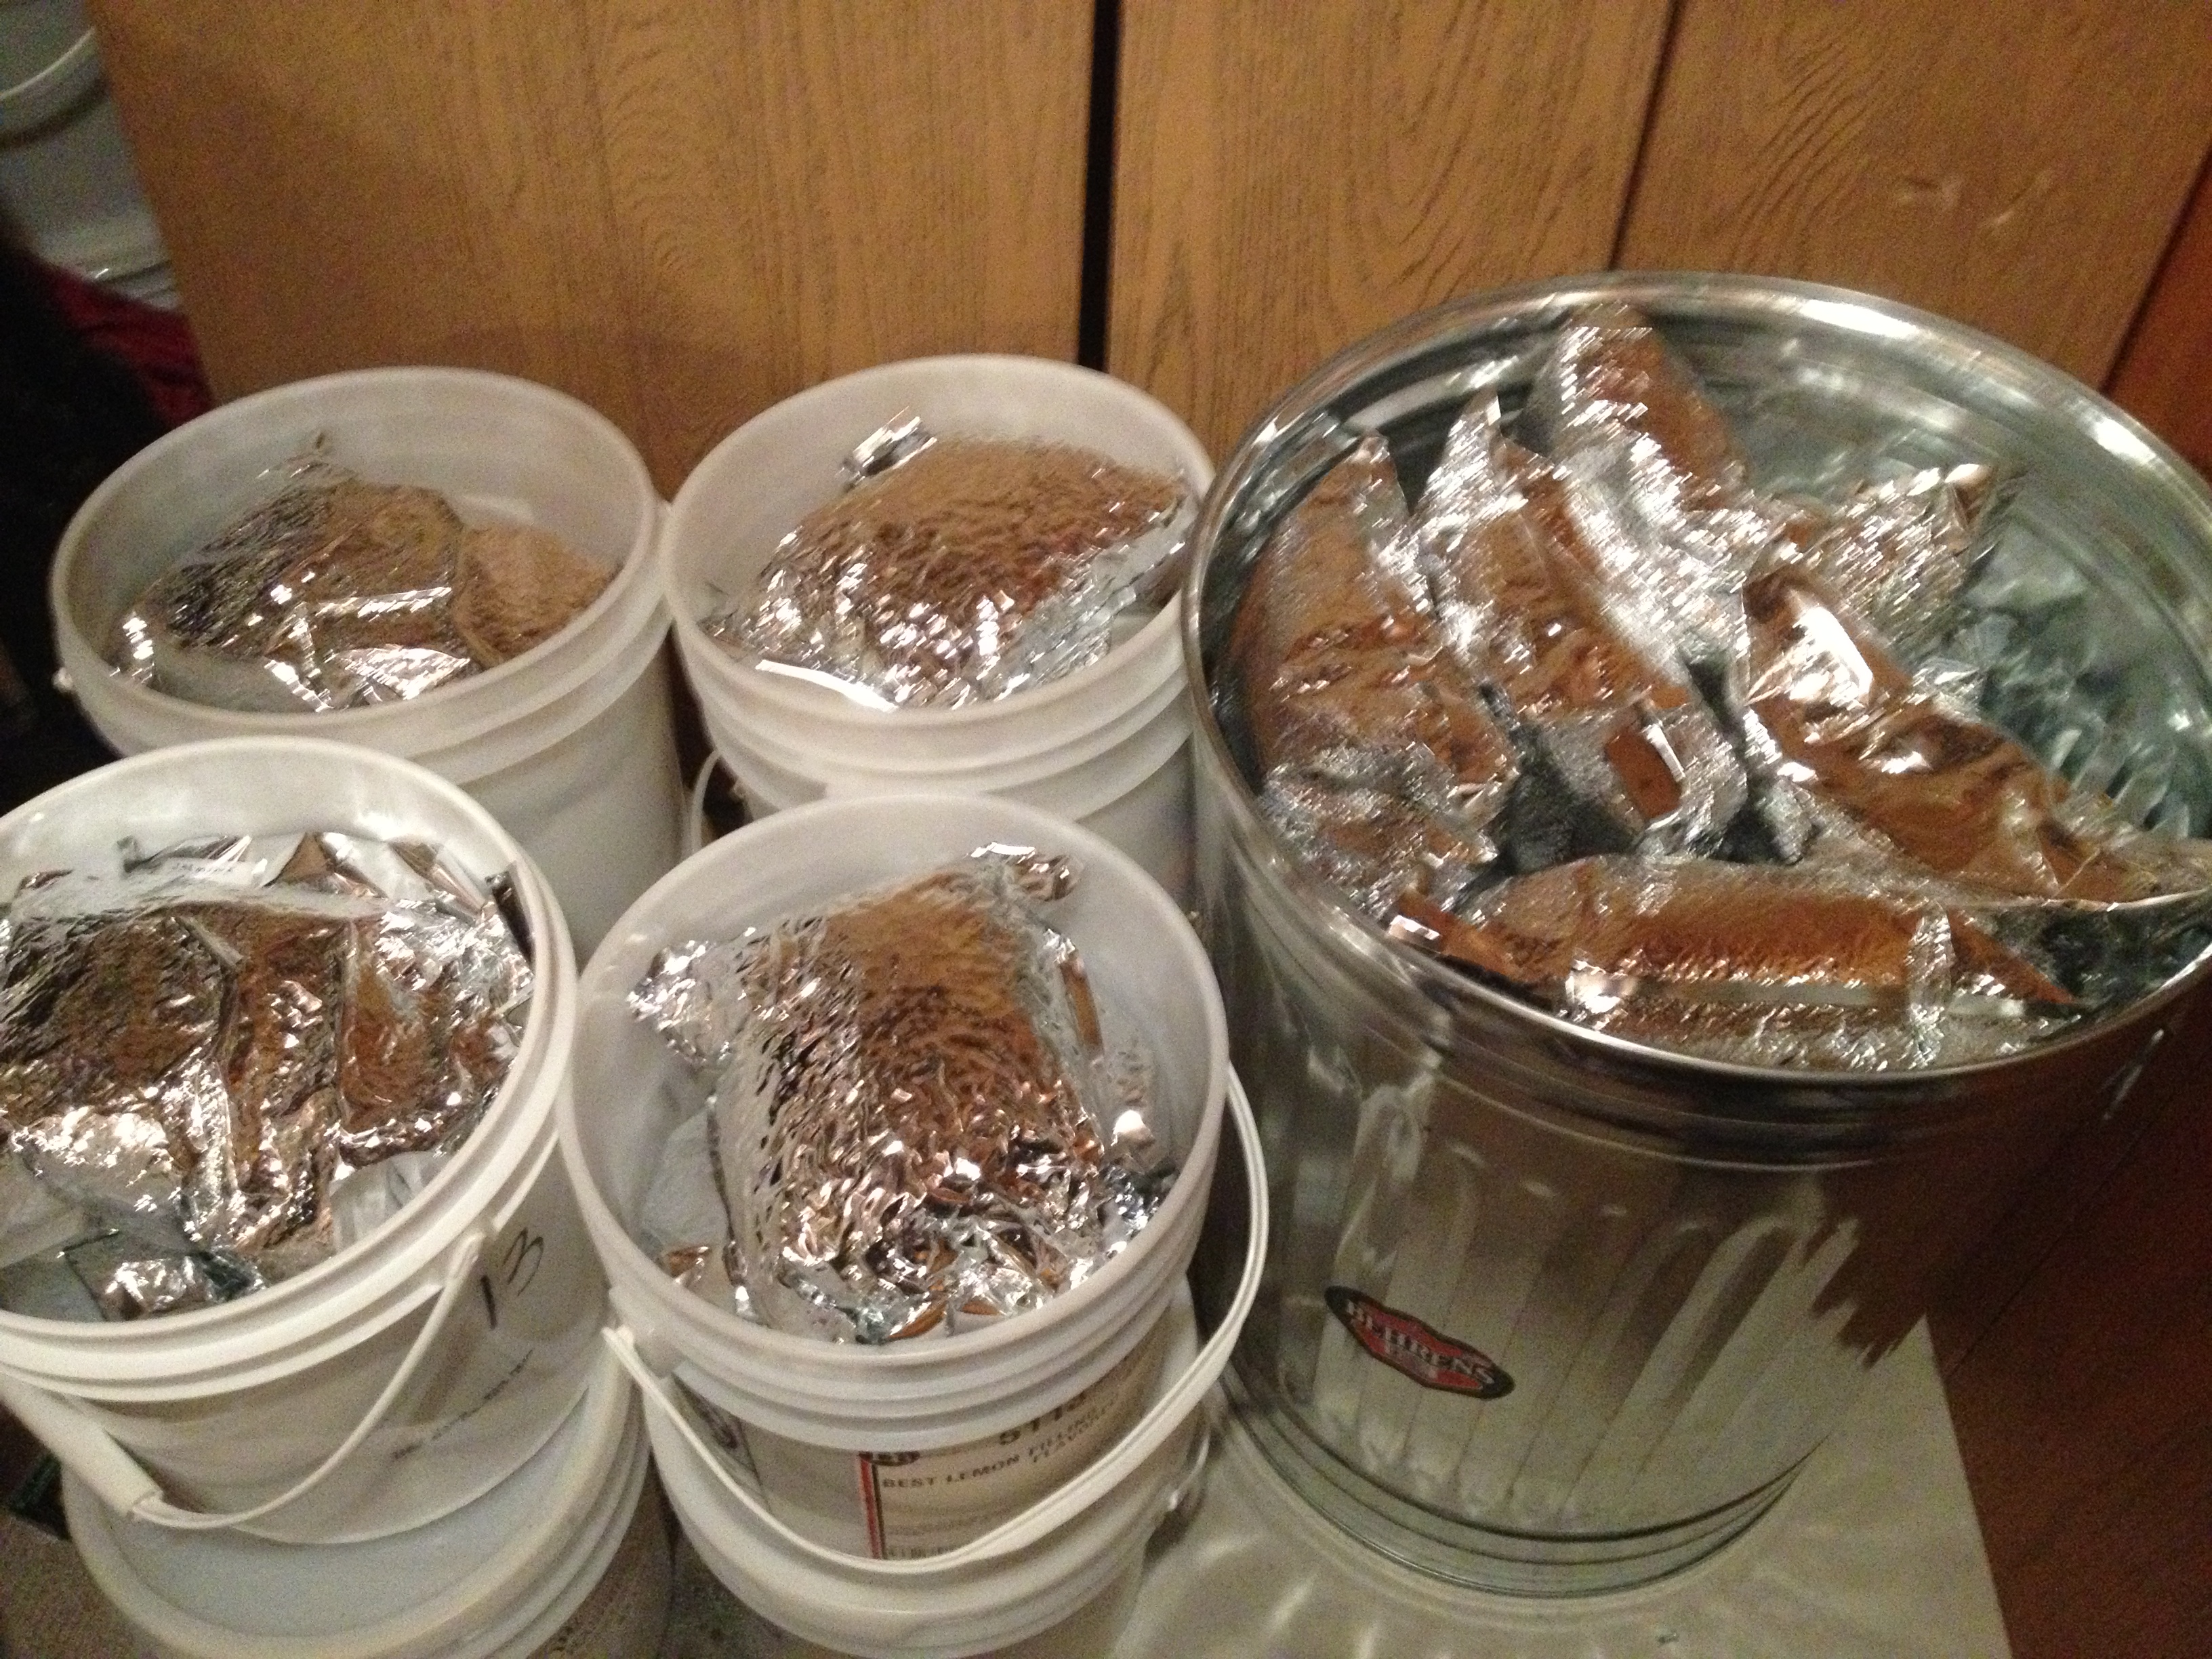
Keeping your body fueled in an emergency isn’t the same thing as eating a typical daily diet. In an emergency type situation, you’ll probably be using a great deal more energy than normal, which is why you’ll need more high-protein, high-energy type foods. Furthermore, because your food storage supply is limited, you need to eat better quality foods overall. In an emergency or disaster, those extra calories will come in handy. Eat foods high in nutrients as well as fiber to keep your system running smoothly.


  1. Whole-Wheat Crackers

Crackers are not only a comfort food, but make a great replacement for bread as well as good substitute for making a quick sandwich. Because whole-grain/wheat crackers have more fat content, their shelf life isn’t particularly long. But, the extra dose of fiber is appreciated if you’re really hungry. Store any opened crackers in an airtight, food-safe container after opening the box.


  1. Bulk Nuts

On your next visit to your local grocery store, look for bulk nuts/seeds, especially for the un-shelled, un-salted varieties. It’s best to pick emergency foods low in sodium since salt will only make you thirstier. Sunflower seeds, almonds, peanuts, and many other seeds and nuts generally sold in grocery stores are very high in vitamins, minerals, protein, and essential fatty acids.


  1. Dried Beans

Pinto beans, lima beans, garbanzo beans, black beans, kidney beans, and other beans have a high calorie content, contain a good amount of protein, and also have many essential vitamins overall. Dried beans are available in packages that are bigger than canned beans but weigh a great deal less for the amount you actually get.


  1. Peanut Butter

Peanut butter is known for packing essential fatty acids and proteins as well as several key vital minerals including iron and copper. For ideal health, choose ‘natural’ peanut butter. Just a few tablespoons a day of natural peanut butter can help someone adequately survive a relatively long period without any ‘normal’ food.


  1. Trail Mix

A classic favorite among hikers, tasty trail mix has various ingredients, including peanuts, raisins, and other nutritious nuts along with dried fruit and sometimes chocolate. The simple sugars the dried fruits, chocolate, and raisins provide are a short-term energy and mood booster that tend to satisfy in a crisis situation.


  1. Power Bars

Filling and nutritious, portable power bars and granola bars usually retain their freshness for six months or more. They’re a superb source of energy-boosting carbohydrates. Foods high in carbohydrates provide more energy than eating foods with none.


  1. Instant Coffee

Instant coffee may not seem like a survival food, but try telling that to someone who’s been drinking it for years throughout the day. Not only is coffee good for your morale, but helps boost your energy level as well. In an emergency situation, it could be considered a “godsend” to some people.


  1. Powdered Super Greens/ Sea Vegetables

Some of the most popular items found in health stores today are the pill or powdered form of sea vegetables. In times of disaster, it’s likely that fresh produce will be nowhere to be found. Sea vegetables are considered a ‘superfood’, chock-full of nutrients, vitamins, and offer incredible health benefits that boost your immune system, provide wound healing and tissue repair, and even have key anti-bacterial and anti-fungal properties.


  1. Beef Jerky

Natural varieties of beef and turkey jerky no longer contain any or at least as much of the harmful ingredients they add while processing it. Basically, jerky is a kind of dried meat. And, dried meat has long been a survival food used by American pioneers and Native Americans alike.


  1. Canned Tuna, Turkey, Salmon, or Chicken

Various canned meats have vital protein and can last as long as two years on the shelf, although the vacuum-packed pouches only last about six months. They’re the ideal food in an emergency situation since they pack a lot of punch in terms of nutrition for such a small, inexpensive, convenient food.

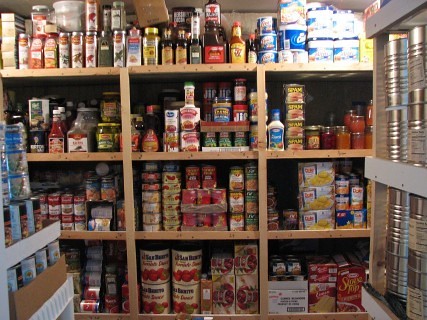
Overall, when choosing which foods to incorporate into your emergency food storage supply, think about the ease of preparation, calorie count, shelf life, and of course the taste of the food before you buy it. Consider these 10 best survival foods to get you started building your emergency food stockpile.

Simple and Straightforward Tips For Keeping Food Fresh

Today’s article was written by Lee Flynn

Simple and Straightforward Tips For Keeping Food Fresh

If you’re sick of noticing your food go bad in what seems like the blink of an eye, you don’t have to sit back helplessly. A few handy tips can go a long way in keeping your food fresh for a longer period of time.


Fresh Onions and Pantyhose


If you’re a big onion household, then you might want to consider stashing these veggies away inside of pantyhose, oddly enough. If you do so, they’ll be able to stay good for upward of 8 months. Make sure all of the onions are apart by tying knots in the middle of them.


Routine Refrigerator Cleaning


Regular, thorough fridge cleaning can be beneficial for keeping your food fresh. If you allow any rotten food items to linger inside of your refrigerator, they’ll rapidly get to all of your other food. Always throw rotten food away immediately. Keep all of your food in top-notch condition by routinely disinfecting your refrigerator.


Berries and Vinegar Solutions


As soon as you purchase berries from the supermarket, cleanse them using a vinegar solution. After you do this, you can store them. Make your solution using 10 parts H20 and a single part vinegar. Whirl them around in the blend, drain them, clean then off and finally place them inside of the refrigerator. Thanks to the dilution, you don’t have to fret about an unpleasant vinegar flavor taking over your delicious berries. If you love strawberries and raspberries, this easy-peasy technique can be extremely useful.


Freezing Bread


It’s common for people to purchase loaves of bread only to notice much of it going to waste in the end. Bread goes stale extremely quickly, after all. If you’re tired of squandering perfectly good food, start freezing your bread. As soon as you bring home a loaf of bread, cut it in half and place the rest inside of the freezer. Once you’re ready to eat the frozen bread, thaw it. Say goodbye to hard, moldy bread for good.


Crispy Lettuce


If you enjoy nothing more than the taste of a salad full of crispy, fresh lettuce, then you can accomplish that quite easily. When you store lettuce, wrap it up inside of tinfoil. Doing this will ensure that it remains crisp and delicious for a longer time.


Mushroom Storage Etiquette


Refrain from stashing mushrooms away inside of plastic. When you do this, you confine moisture which then leads to spoiling. Instead of using plastic for mushrooms, opt for a paper bag. Put your mushrooms in a paper bag in an environment that is both dry and cool. If you put your mushrooms in a paper bag, you can also keep them in the refrigerator.


Suitable Potato Storage


Maintain the freshness of your potatoes by never storing them alongside onions. If you store potatoes and onions together, your potatoes will go bad markedly quicker. If you store potatoes alongside apples, on the other hand, you’ll stop sprouting from occurring.


Prompt Fruit Storage


Fruits such as cherries, pineapples, citrus, watermelons, raspberries, grapes and strawberries never become riper post-picking. Because of that, leaving them outside is a pointless effort. If you leave them out, they’ll simply spoil. If you want to keep these fruits fresh for as long as can be, store them inside of your refrigerator as soon as possible.


No Cheese in Plastic Wrap


Refrain from storing your cheese by wrapping it up in plastic wrap. Instead of going for plastic wrap, opt for either wax paper or cheese paper. Wax paper and cheese paper will both keep your cheese good for a longer time. After you wrap it in wax or cheese paper, insert it inside of a plastic bag.


Meat and Produce Belong Apart

As far as freshness goes, keeping meat and produce in one drawer together can be a bad idea. If you do so, that can bring upon frustrating cross-contamination. If you want to refrain from practically throwing food out the window, store your meats and produce separately all of the time.


These easy and straightforward food storage tips can be extremely beneficial for ensuring that valuable food doesn’t go to waste quickly. Start using them today.

Food and Money Preservation for the College Student

This article was written by Lee Flynn
 
Food and Money Preservation for the College Student

 
We typically associate the term “college student” with words like “poor” and “broke.” Students usually have to work part-time and go to school full-time, simultaneously juggling two different realities and still having to manage finding the amount of time needed to study for tests and having a social life. The life of a student shouldn’t be harder than necessary; finding a way to eat healthy and preserve food can drastically benefit a student’s overall health, performance and stamina during the school week!


Most college students deem properly storing food as a thing their parents do; however, learning how to master this art is crucially important to learning how to live independently. There are many things we can learn to live without, such as saying “no” to that new pair of shoes, limiting the amount of eating out we do each week and limiting the amount of junk food we inhale on a daily basis. When you’re a college student, however, learning to incorporate the things we should be living with is so important! Eating healthy while maintaining a budget is simpler than you might think – and a supply of food storage is essential to this practice!
 
Planning

 Forget all the images that might be running through your mind right now: food preservation doesn’t require storing giant bins of food for an end of the world scenario! Think of it more as ensuring that your limited financial resources receive the maximum amount of return for the trips you take to the grocery store. And if you’re the typical college kid and pizza is you main course on a daily basis, even that can be preserved. Each small amount of money that is wasted can easily add up – imaging how much more socializing you could do on the weekend if your money wasn’t being wasted weekly!
 

Think about the type of foods you love to eat and begin to plan on ways you can easily preserve leftovers. If you’re the type that needs assistance in planning food preservation there are a number of online sites that can help you determine factors such as budget and food preferences to create a custom storage plan for you! It will require very little time and effort!
 

Building
 

Building a supply of food can be a little intimidating at first, especially if you’re on a tight budget. Starting small is the best approach to building up your personal inventory. Begin purchasing food that you’re familiar with and would want to eat if necessary. Keep track of the typical types of foods you eat weekly and start by picking up just one or two of those items every time you go to the store. If you’re a macaroni and cheese junkie and notice a sale at the store take advantage of it and purchase a few extra boxes for your pantry!
 

Storing
 
In a temporary housing situation there is a limited amount of storage available and having roommates can complicate things even more! There’s always a solution, however! Purchase some bed raisers and begin to store your items underneath; use an extra dresser drawer for a couple items; utilize that hard-to-reach high shelf in your closet that you can never reach for extra storage. Remember that when there’s a will there’s always a way!
 
Here’s an easy way to begin the process:

  1. Week One – Begin to cut out eating out for just one day a week; set that money aside.
  2. Week Two – Use the extra money you saved last week to purchase two inexpensive items from the store to set aside in your pantry.
  3. Week Three – Begin to search for sale ads at the grocery store. If you don’t have the extra time to incorporate this habit simply glance at the store’s weekly flyer next time you shop! Purchase a few items for your pantry.
  4. Week Four – For items that can’t be preserved such as pizza, purchase a few storage containers and begin to save your leftovers. You’ll be amazed at how much money you save by simply doing this!

Shelf Life of Comfort Foods

Shelf Life of Comfort Foods

We’ve all got foods that can help lift our spirits or give us comfort when we’re having a bad day. So to me it just makes sense to have some of them stocked for a time when things have taken a turn for the worse. I realize that different people will find comfort in different kinds of food, so I tried to think of as many types of foods that could be considered “comfort foods” (and drinks) that have a decent shelf life.

Because manufacturers use “best by”, “sell by” and expiration dates to generate more business, grocery items do not actually go bad when they reach their expiration dates. Companies don’t cater to prepper’s who buy for long term storage. They have not put any money into figuring out how long their product can be stored. Because of this, the guidelines below are just that and should be looked at as a general rule of thumb and not something hard and fast.

How and where items are stored play a very large part in how long they will remain good. Keep in mind the enemies of food storage; air, moisture, pests, light and heat. Food should be kept at or below 70 degrees. Warmer temps will degrade food quicker. Keep food in a dry place. If you store food in an area with water pipes, I suggest keeping food in paper or cardboard in plastic totes. Keep food out of sunlight. One other enemy of food storage, which is more of a danger to comfort foods; a sweet tooth. To keep the “Not Me Ghost” out of your stock of comfort foods, you could label them as something less enticing.

Many of these products are sold in paper or cardboard materials, which are not air tight and not ideal for long term storage. You would most likely be able to extend the shelf life if you repackage them in Mylar bags with oxygen absorbers.
 
 
Beverages

Dry Drink Mixes         Two years
These would be items such as Kool Aid, Gatorade, Lemon Aid, Tang, hot cocoa and so on.

Alcohol         Many years to indefinite
In the apocalypse, one might really need a stiff drink at the end of the day. Alcohol lasts for a very long time. If left unopened, in a cool dark place, it could have an indefinite shelf life.

Tea         Two Years
Loose tea, instant or tea bags, tea will remain fresh for roughly two years. It would be safe to drink after that, but might not taste as good.

Coffee         It really depends
I’m only going to cover unopened coffee.

Ground Coffee         3-6 months past expiration date in the pantry, 1-2 years in the freezer.
Whole Coffee Beans         6-9 months past expiration date, 2-3 years in the freezer.
Instant Coffee         I have seen from 2-20 years given in the pantry and indefinite in the freezer
Green Coffee Beans These are not yet roasted, and since the bean hasn’t been cracked the shelf life is extended. Camping Survival carries green coffee beans stored in a #10 and claims that because they are devoid of oxygen, that they have a 20 year shelf life.

Pop/soda         It depends
Regular pop/soda will last for a very long time. Diet pop/soda goes bad not long after the expiration date.
 
 
Food

Baked Goods         It Depends
Many comfort foods are baked, so here are some common baking ingredients. Many of these can attract bugs. I recommend you store them in Mylar bags with oxygen absorbers. This will keep them safe from all of the food storage enemies.

Whole Wheat Flour         Varies
Flour won’t keep long unless in the fridge or freezer. Shelf life in the fridge is 6-8 months and 1-2 years in the freezer.

All-Purpose Flour         Varies
All-purpose flour can be stored for 6-8 months in the pantry, 1 year in the fridge and 1-2 years in the freezer.

Wheat Berries         Very Long
Wheat berries are ground into flour. Because the husk has not been cracked, the storage life is greatly lengthened when stored in Mylar with oxygen absorbers.

Powdered Egg         5-10+
Powdered egg is often freeze dried and, like many freeze dried foods, the shelf life is very increased.

Powdered Milk         Depends
Powdered Milk will last a week or so once opened. If left sealed in the pantry 5-10 years is possible.

Cornstarch         Indefinite

Baking Soda         Indefinite

Sugar         Indefinite

Baking Powder         6-18 months
It is suggested to use it within 6-12 months after purchase. However, it may store for 18 months in a cool dry area.

Coco         1-2 years
Opened coco will last for a year or so, unopened 2 years.
 
 
Other types of foods

Nuts         1 Month to 2 years
The oil in nuts is what causes them to go rancid. Most nuts will be good for 2-9 months after the expiration date when stored in the pantry, 1 year if stored in the fridge and 2 years in the freezer.

Candy         It really depends
There are many types candy, so there is no set answer. If it contains nuts, it obviously has a shorter lifespan. If it is a gummy type of candy, it will probably harden, but should be safe for years. Hard candy has the longest shelf life. M&M’s will last 1-1.5 years due to the candy coating.

Chocolate         Months to years
Items that contain just chocolate, like chocolate chips, Hershey’s Kisses and candy bars only containing chocolate have a varying shelf life. The lighter the chocolate, the shorter that is. I found the following on the Hershey’s Product FAQ

Q. How should I store chocolate?

A. Solid chocolate products will maintain their quality if well wrapped and stored in a cool, dry place (55-60°F). While refrigerated chocolate is certainly safe to use, we don’t recommend it. Chocolate kept in the refrigerator may “sweat” when brought to room temperature and may not melt properly. Cocoa is considered a non-perishable item which should maintain quality if stored at room temperature in a tightly sealed container.

Chocolate may turn white. This is called “blooming”. The chocolate is still perfectly edible. Here is what Hershey’s has to say in the FAQ.

Q. My chocolate sometimes turns tan or white. What causes this?

A. Chocolate contains cocoa butter, a vegetable fat that is sensitive to heat and humidity. Temperatures above 75°F will cause chocolate to melt. The cocoa butter can rise to the surface and form a discoloration called “cocoa butter bloom.” Condensation on milk or semi-sweet chocolate may cause the sugar to dissolve and rise to the surface as “sugar bloom.” Chocolate that has “bloomed” is certainly safe to use, but flavor loss and texture changes may be noticed.

Powdered Jell-O         Nearly indefinite (Maybe)
Most of the info I could find is from sites that are not taking into consideration storing long term. But I believe as long as you’re storing the varieties that have sugar instead of artificial sweeteners, these should store for a very long time.

Powdered Pudding         Nearly indefinite (Maybe)
Most of the info I could find is from sites that are not considering storing long term. But I believe, as long as you’re storing the varieties that have sugar instead of artificial sweeteners, these should store for a very long time.

Honey         Indefinite
Honey can harden, but will turn to liquid when heated, and will last forever.

Various Syrups         Indefinitely
Maple Syrup and molasses can last a very, very long time and often do not require refrigeration.

Jams, Jelly         Depends
If they contain natural sugar, they will last a very long time. Just throw them if you see mold develop. If they have imitation sugars they need to be refrigerated. It’s probably not safe to consume them long after the expiration date, or if left unrefrigerated for an extended time.

Peanut Butter         Depends
Many sources I found say that because of the oil in the peanuts, peanut butter is only good for 2-3 months if opened, and 6 months past the expiration date if unopened. However, when the oils go rancid they taste bad, so if it looks ok, and tastes ok, it very well could be safe to eat. The nutritional value of it, of course, is going to degrade over time.

Nutella         Depends
The sources I have found say 3-4 weeks past the expiration. This is purely my speculating, but because Nutella also has nuts in it, it should be in the same boat as peanut butter. I, however, do not know if peanuts and hazelnuts have the same shelf life.

Dried Fruit         Depends
Dehydrated or otherwise dried fruit have a shelf life of roughly 6-12 months in the pantry, 1-2 years in the fridge and indefinitely in the freezer.

Freeze Dried Deserts         Very long time
Many freeze dried foods boast of a 20+ year shelf life. These often fall into the same time frame.

Dry Soup Mixes         Hard to Say
I have seen some sites claim 1-2 years past the expiration dates. Others say they’ll last almost indefinitely. My guess would be at least five years or so.

Pancake Mix         Depends
Pancake mix contains flour, so go by the same timespan as flour.

Soup Mixes         Depends
This is another area where the companies want you to eat the soup, not store it for a rainy day. The times they give are a year or two. However, the ingredients are often either dehydrated or freeze dried and they are stored in air tight containers. My guess would be that they would store for many years.

Jiffy Mixes         years
Jiffy says “For best results, we recommend using all “JIFFY” mixes by the “Best If Used by” date. Beyond this date, dependent upon local weather and storage conditions, the quality of the end product may be affected.” I would think, if kept in optimal conditions, they will store for 1-2 years. Many of them will contain flour, so go by the same timespan as flour.

Popcorn         Depends
Microwave popcorn or popcorn that has been flavored is probably as advertised. Popcorn that is just popcorn seed, like wheat, because the hull hasn’t been broken, will store indefinitely. It can be popped, or ground and used as cornmeal. Once ground into cornmeal, the shelf life is greatly decreased.

If you have an item that you would like to add, a correction or a comment, please post it in the comments section.
Please click here to vote for Prepared Christian as a top Prepper site!

 
Please click here to vote for Prepared Christian as a top Prepper site!

If you liked this article please think about sharing it on the social media listed below, thanks!

Preparedness Club

31 Gallon Garbage Cans for Food Storage

31 Gallon Garbage Cans for Food Storage

Years ago, while building our food storage, we bought a bunch of 3-gallon, food-grade buckets from a bakery. We used 1 gallon Mylar bags for all of our LTS (Long Term Storage) and found that we could fit 3-4 1-gallon bags in each bucket. When we decided we wanted to add to our food storage, we discovered that the bakery we had previously purchased buckets from had gone out of business. I had previously tried stopping at other bakeries to get buckets and had only gotten a few over the course of a week.

I decided to try and find another solution. I came up with 31 gallon garbage cans. Below I have some factors that I considered and my thoughts on each.
 
 
Food Security

When I started prepping and researching food storage, a lot of the information I found made it seem like you had to put the food in Mylar bags and the Mylar bags in food grade buckets. The truth is that you only need food grade buckets if you’re storing your food directly in the bucket, without the Mylar bag. Unless you’re using the food stored directly in the bucket frequently, I recommend putting it in 1 gallon Mylar bags. This way you will only have a small amount of food to use at one time and the food in the other bags isn’t exposed to oxygen and the moisture in the air.

If you’re using Mylar, it is food grade, so you can put the Mylar filled bags in any container that is dry and won’t puncture the bag.

I have read many stories of mice and other rodents chewing through plastic buckets to get to the contents. This just isn’t going to be a problem with a metal can.
 
 
Cost

Home Depot has a 31 gallon steel trash can listed for $24.97. I bought mine at a local Menard’s for a similar price.

I have looked at a few different places who sell food grade buckets online and they are not all of the same quality. I have purchased from Bay Tec in the past, so I am going to use their prices, as I trust the quality and the price is somewhere in the middle. They have a six pack of 5 gallon buckets for $27.54 and a 3 pack of buckets for $14.07. lids for them are $1.99 each for a total of $50.55. You might be able to find cheaper buckets, especially if you can find a local source. I had a great one for a while; the bakery I mentioned above. They kept all used buckets and sold them. Other places I found are willing to give them away but getting to them before they throw them out was a trick!
 
 
Storage Space

All of the buckets that I have are 3-gallon. If you have 5-gallon buckets, you’ll be able to fit more food in the same footprint. As you can see in the image, eight 3-gallon, plastic buckets take up a bit more room than the garbage can. If you have 5-gallon buckets, they’ll obviously stack higher than the garbage can.

I can usually fit 4 full 1-gallon Mylar bags in a 3-gallon bucket. In the picture, I have 32 full Mylar bags in the buckets. I have 22 full Mylar bags in this garbage can. I think I could probably fit 25 in if I tried.

One idea I have is to cut a thick piece of plywood, wide enough to cover the entire opening of the garbage can. This would allow stacking items on top of the can, allowing more storage space. You could place cans side by side and do this with as many cans as you like or have room for.

For those of you with pets, we are able to fit two 38-pound bags of dog food in one can!
 
 
Final Thoughts

We use a mix of both buckets and cans. The cans work nicely and are cheaper than buckets in many cases. The only real downside to buckets is the weight. If we decided to bug out and wanted to bring the contents, we would have to partially empty the can and then carry it out to the truck and trailer.

 
Please click here to vote for Prepared Christian as a top Prepper site!

If you liked this article please think about sharing it on the social media listed below, thanks!

Preparedness Club

Review of SurvivAMINO

SurvivAMINO

Eating a healthy, high protein diet is a good idea now, when times are “normal”. But we prepare for the future, and it can be difficult to make sure you have a good form of protein in your food storage, let alone in BOB. Just as a refresher, here are some forms of protein; eggs, meats, soy, milk, cheese, yogurt and beans. You can store some canned and powdered versions of the above listed food but there is now another option.

I was approached by a company that sells a product aimed at giving a solution to this problem, and their target market is preppers. The name of the product is SurvivAMINO. This is a supplement created from essential amino acids that can act as a complete protein replacement for up to 28 days.

Here is some information provided on SurvivAMINO:

SurvivAMINO“Lightweight, portable, and low volume: Take care of the most difficult part of the nutritional equation with confidence. Complete protein sources such as meat go bad in hours, easily storable forms are often an incomplete source of amino acids. SurvivAMINO™ is an innovative formula consisting of pure amino acids, taking care of your protein needs in a fraction of the space and weight. When every ounce counts, bet on SurvivAMINO™.
 

Improve your health: The SurvivAMINO™ formula has been used for decades by elite athletes to improve performance. By providing the building blocks for your body, the formula has been proven to add muscle, improve blood cell count, and even improve endurance in test subjects. When you’re trying to survive, your health is what counts.”

There is also more information given on what SurvivAMINO is made of.

“A complete source: Of the 22 commonly accepted amino acids, only 8 are deemed essential. Without these, important reactions cannot take place in the body. The consequences of this range from muscle wasting to organ failure and death. This is especially true for the elderly and young, who are less efficient at processing proteins. SurvivAMINO™ consists of 100% essential amino acids to make sure you have all the bases covered.

No binding agents, no caffeine, and no sugar added. Every ingredient in the SurvivAMINO™ is an amino acid essential to life. Anything else would just weigh you down. Keep it anywhere; in your pack, on your boat, or stored in your shelter. Be prepared. Sustain yourself. Sustain your survival.”

For more information visit the SurvivAMINO site. Here is a digital flier as well.
 
My thoughts:

As far as the nutritional aspect of SurvivAMINO goes, I think this is a great idea. Amino acids have been used by athletes for decades to enhance their training. I know some people store vitamins in their preps, but vitamins don’t contain the same amino acids needed to be a protein replacement.

I ran my own short, one-week experiment. I used SurvivAMINO as a replacer for my morning protein for one week. I considered using it for a protein replacer for every meal for an entire week but with diabetes, I need more protein than carbs. I opted to do breakfast so that I would be full and not have to compensate with carbs for each meal. I felt fine and had the same amount of energy I normally do.

The only downside to SurvivAMINO is that it is a bit expensive. MSRP is $45 a bottle, which contains 20 servings. SurvivAMINO’s parent company has agreed to give Preparedness Club members a $5 discount per bottle.

Where I think this product will really be a good fit is in BOB’s. I don’t think bugging out is needed in the vast majority of situations but the ones that require it are sure to be difficult. Making sure you have something to continue to feed your body’s need for protein in such a small, lightweight product makes this a great purchase if it’s in your budget.

I don’t see any information on storage life, but they come in tablet form, so as long as they’re stored in a cool dry place, I bet they’ll last a very long time.
 
If you liked this article please think about sharing it on the social media listed below, thanks!

PreparednessClubOne

The Pantry Primer: Building Your Pantry on a Budget with Home Canning

This article was written by Daisy Luther the Organic Prepper and was originally posted here.

home canning

One of the best ways to build your healthy stockpile is to preserve local organic foods when they are in season.  My favorite way to do this is canning.

When you can your own food, you can make delicious entrees and side dishes that can be served as quickly as you can boil water – and the best part of all is that you know exactly what is in those shiny jars. (See The Canning Manifesto to read more about why I choose to can so many foods!)

Making home-canned foods can be a great way to cost-effectively build your pantry for several reasons:

  • You can buy in bulk
  • You can take advantage of good sales, like “last day” sales
  • You can buy what is in season at better prices than when it is out of season
  • You can put together “quick meals” far less expensively than buying processed foods by doing a big batch of home cooking to be reheated and eaten at a later date
  • You don’t risk losing your stockpile to the vagaries of the power grid like you would by using your freezer

When my daughter eats a biscuit with jam, I know that it only contains organic peaches and sugar. There are no GMOs lurking, no High Fructose Corn Syrup, and no artificial colors and flavors.

Lots of meals for very little money

You can get a lot of bang for your buck by home canning. I recently canned some “meals in a jar” – check out what I spent:

$10 = 7 quart jars of spaghetti sauce with meatballs

$4 =  6 quart jars of Boston Baked Beans

If you were to purchase those items in grocery store cans you’d be spending far more money for far less quality.

This week I have been concentrating on building my pantry with home-canned goods.  I’ve made:

I made all of the above for about $35 not including snap lids and spices, which only add nominally to the cost.

Here are some ways to save money by canning

garden exchange

  1. Don’t decide ahead of time what you are going to can.  It’s okay to have a general idea, but if you have specific recipes that require specific ingredients beyond your pantry basics, you may end up spending a lot of money. For example, yesterday I went to a garden exchange and swapped some money and some home-canned goodies for other people’s surplus produce.  When I got the items home, I took a look at my bounty and decided what to make based on that.  Had I gone to the store or market specifically looking for certain things, I would have spent far more.
  2. Always fill your canner.  If you only have enough ingredients for 5 jars of whatever your making, but your canner holds 7 jars, fill the other two jars with beans.  You’re using the same amount of electricity or gas whether the canner is full or not.
  3. Buy as much as you can when things are inexpensive.  Today I’m heading to a local orchard that has a huge sale on just-picked pears.  They’re selling boxes of pears (about half bushel sized boxes) for $9 – and it gets better – they’re buy one, get one free!  So this means we have some delicious local fresh fruit and enough left over to fill many jars.
  4. Cook in bulk and can your leftovers.  The holidays can supply an enormous amount of ingredients for your home canning endeavors.  Also, as the weather cools off, make double batches of chili, soups, and stews and put the leftovers into jars for later use.
  5. Learn to can with what you have on hand.  Going along with tip #1, be flexible and learn to adapt the ingredients you have on hand in canning.  Here are some instructions on how to can your own recipes and how to make jam from whatever fruit you have in abundance.

canning

Here are some helpful links:

Go HERE to find tons and tons of my canning recipes and how-tos.

Go HERE to learn about water bath canning.

Go HERE to learn about pressure canning (a necessity if you are canning anything besides fruits, salsa, pickles, and jam).

Go HERE to learn how to sanitize your jars.

Go HERE to learn how to adjust for the altitude where you live.

Also, check out these great websites for more canning ideas:

Ready Nutrition

Simply Canning

Prepared Housewives

Food Storage and Survival

The Survival Mom

Pick Your Own

If you have any questions about canning, please don’t hesitate to ask – canning one of my favorite things to do and I could talk about it endlessly!

canned food

If you liked this article please think about sharing it on the social media listed below, thanks!

PreparednessClubOne

3 Dangers To Food Storage And How To Avoid Them

Today we have a guest post written by Lee Flynn

3 Dangers To Food Storage And How To Avoid Them

People tend to think that disasters don’t happen very often, or at least only happen to someone else. Of course, to someone else, we’re all someone else. And have you turned on the news recently? Tsunamis, earthquakes, hurricanes, wars… do you really think that your little corner of the earth is going to stay safe forever? If you want to survive the disasters that are sure to happen sooner or later, you’re going to need to prepare. In many cases, this means having a well supplied food storage. But stocking up on water and rations is only a part of the equation, because once you’ve got everything you need, you then need to protect it. Here are three dangers to your food storage, and how to overcome them.

1. Time

Just because something is called non-perishable, doesn’t mean that it will last forever. Canned goods only really have a shelf-life of about five years, at most, and Meals-Ready-to-Eat stay good for only about three years. Instead of relying on food that might spoil and leave you up a creek without a paddle, stick with freeze-dried and dehydrated foods, which last a good deal longer. Storing your food in the right place will also have a big effect on how long it lasts. That means that you should find someplace cool, dry, and dark. Also, make sure that the food is well packed in airtight containers, because exposure to oxygen can speed up the spoiling process.

2. Animals

Insects and other invertebrates are natural born food-storage thieves. They’re small, so they can usually get into any room or building that they want to. And guess what? they’d like nothing better than to burrow into your sack of flour and raise a couple thousand kids. But although you may not be able to keep these pests from getting to your storage room, you should be able to at least keep them out of the food. Store your food in secure plastic, metal, or glass containers, and be sure to clean up any spills as quickly as you can. Rodents such as mice or rats, and even larger mammals like raccoons pose a different threat. They might have a harder time breaking into the building, but with the help of gnawing teeth and dexterous fingers, they’ll have a much easier time getting into the food. Store all your food well off of the ground, and avoid using baited traps, as other pests might be attracted by the smell. Above all, be vigilant. Check your food storage repeatedly for signs of incursion. If you find damaged containers or infested food, discard it immediately, and replace it. Regularly clean out your storage area, and make sure to keep it free from crumbs and moisture that might catch the notice of uninvited animal guests.

3. People

No one likes to consider the possibility of having to defend their emergency storage from other human beings, but if a disaster occurs and food and water become scarce, then even the most kind and charitable individual will start fighting for survival. Looting has been known to happen regularly in the wake of disasters, and to a desperate and hungry person, there’s not much difference between robbing a grocery store and robbing a home. The best way to keep looters from taking your storage is to keep it secret. Only eat food at home, and never take it out into public where people might notice and be enticed by it. If possible, keep the area in which your food is stored locked, and keep the key well hidden. Don’t allow any strangers into your home, no matter how sorry you might feel for them, nor how friendly or harmless they may seem. And last but not least, be prepared to defend your food storage with lethal force, if need be. The thought of taking a human life over something like a few cans of stew or a jug of water is repulsive, but without that food, you or your family might starve.

Lee Flynn is a freelance writer, survival enthusiast, and food storage expert.

The Ins and Outs of Food Storage

canned emergency food storage
photo credit The Survival Woman


I mentioned in the comments section of the What Would You Do: North Korea Attacks that I would put together some options for those of you without basements.  I started working on one and soon realized that to do the topic justice I needed more time.  Instead, I am going to post the article I had planned to post today and will post an article on the topic of radiation and fallout next week.


The Ins and Outs of Food Storage

It’s been a while since I have covered food storage.  Because of that and a couple good forum threads, I thought I would bring the subject up again.  One of the five basic human needs is food.  It can be one of the more difficult to figure out when you’re new to preparedness.  I think the reason for that is because the sheer size of the problem can be overwhelming.  Take a family of four, eating three meals a day, and two snacks a day, that is 84 meals and 56 snacks in a week, or 336 meals and 224 snacks in a month.  Seeing as most people shop for what their needs will be in the next week or two, planning that far or further ahead can be a lot to wrap your brain around.


Guidelines

Food storage isn’t one size fits all.  You’ll need to tweak things to fit your family’s needs.  That being said, here are some guidelines that can help you build your food storage and keep it rotated.


Shelf Stable

My definition of a shelf stable food is one that can last for six months or longer without freezing or refrigeration and won’t spoil.


Eat What You Store, Store What You Eat

This is the food storage golden rule.  It will make sure that you don’t waste money on foods your family doesn’t eat.

When building your pantry, I recommend getting a notebook and writing down all shelf stable food that your family consumes for a week or two.  These are the “eat what you store, store what you eat” foods to concentrate on.

There are exceptions to every rule and this one is no different.  We happen to eat foods that don’t store well, so if we only stored foods that were shelf stable that we consumed regularly, our food storage wouldn’t last for very long.  What we have done is stored some shelf stable foods that we eat occasionally along with some that, because of their long shelf life, we have decided to leave as storage foods.


First In, First Out (FIFO)

When you grab a can of vegetables take it from the front of the line.  When you replace it, put it in the back of the line.  This is the best way to rotate your foods.


What Kinds of Foods Should You Store?

If you’re like me, what can you do to supplement your food stores with foods other than the ones you eat frequently?  There are many options available for foods that have a long shelf life, though some you will need to repackage.


Staples

A staple is a food that is used commonly.  Think of sugar, flour, salt, rice, beans and so on.  These staples, when repacked into Mylar bags with oxygen absorbers, can have a shelf life of 25+ years.


Dehydrated

There are commercially dehydrated foods sold that tout a 25+ year shelf life.  This can be achieved because the oxygen in packaging is replaced with nitrogen.  Most of the data I have seen on home dehydrated foods say 1-2 years.  We’ve mostly dehydrated fruits, but you can make jerky, soup ingredients and so much more.  Sadly the dehydrated foods never seem to last more than a couple weeks around me, so I’ll never get to see if they could be edible after a few years. J


Freeze Dried

There are many brands of freeze dried foods on the market.  I have tried a few and enjoyed most.  Trudee and the kids did not like some.  Some manufacturers have gotten smart and have the entrees available in a pouch and a #10 can.  I highly recommend you try the pouch, as it’s only a few bucks and will save you money if it turns out no one likes it.

Freeze dried foods also have a shelf life of 25+years, as long as the packaging isn’t opened.  Once you open the #10 can, you need to consume it within two weeks. I don’t know if it is possible to freeze dry your own food.

Because of the shelf life, and some other factors, we decided to add some freeze dried food to our food stores.  We purchased some entrée’s as well as some baking ingredients like powdered egg,  powdered milk, powdered cheese and powdered sour cream.


MRE’s and Emergency Ration Bars

MRE’s or Meals Ready to Eat are already cooked meals.  They include a heating element that you add water to in order to activate.  They often come with a desert and some condiments.  Emergency Ration Bars often say something like “2400 calories”.  That is for the total bar.  However, there are usually nine separate bars, each one containing 250+ calories.

These foods have their place in food storage.  They make good additions to BOB’s and car kits.  Shelf life can vary from 5-8 years if stored in optimal conditions.


Home and Manufacturer Canned Foods

Whether you purchase commercially canned food or can it yourself, canned food is a great way to supplement your food storage.  The most common question is: “how long does canned food last?”  Food Reference.com and the FAQ at the Ball Jar Company state the same basic information.  Properly canned food that is stored in temperatures above freezing and below 75 degrees will last at least two years.  The food will often last a lot longer than that, but over time there may be changes in the color, texture etc.  If the home-canned food looks edible from the outside, open it and see how it smells.  If it is store purchased and not bulging, open it and see how it smells.  If it smells fine it’s probably safe to eat.


What are the Dangers to Food Storage?

The life of many foods can be extended greatly by avoiding the following dangers.

Heat

Temperatures between 40 degrees and 72 degree Fahrenheit are ideal for food storage. For every 18 degrees above 72, the food loses up to half its nutritional value. If the food is exposed to temperatures over 72 degrees for an extended amount of time it can lose its color, texture and taste.

Light

Keep things in a dark space if at all possible, light can affect the appearance and taste of food. Mylar bags and food grade buckets will also help here.

Oxygen

When fats oxidize they turn rancid. Keeping your food in an oxygen free environment will prevent this, as well as kill pests that may be in the food. You can remove oxygen with oxygen absorbers in an airtight bag. I’ll cover deciding how many to use below.

Moisture

Moisture can take the form of humidity, condensation or even a water pipe breaking. To mitigate this, I keep much of my preps in Mylar bags and put the Mylar bags in food grade buckets. You can also add a desiccant to the inside of the Mylar for added moisture removal. I try not to have any food with cardboard packaging out in the open, as it is susceptible to accidents involving liquids, such as broken pickle jars, broken pipes or the “Not Me Ghost”, you know, children.

Pests

Pests range from larvae in bulk food to mice in your food storage area. There are a few ways to deal with each. For larvae, you can place a bag of rice, beans or whatever dry food you intend to store in your freezer for a couple days. This will kill any bugs, larvae or eggs. I used to do that, but it’s time consuming, my freezer isn’t that big and it’s usually full. I found, on a forum, that the simple act of removing the oxygen would kill any pests in the food. This made sense and they were steps we were already taking. We have not had any problem with pests in any of the food we have stored this way. If you want to make sure, feel free to do both. I have also read that Bay Leaves will keep pests away and some people add them to the inside of the Mylar bag as well as the inside of the food grade bucket.

To summarize, keep your food storage in a dry, dark, cool area in oxygen free and pest resistant containers.


How Much Food Should I Store?

This is something everyone will have to decide on their own.  That being said, I think everyone should have a minimum of three months food stored.  I personally would eventually like to get to one year stored for my family.  This will give us a large cushion if I should lose my job, or a number of other things take place.  It would also give us room to help those in need in a short term situation.

When you’re beginning your food storage it may be difficult to wrap your mind around storing an extra 90 days of food, or an extra year.  Don’t overwhelm yourself!  Break it down into easier chunks, like a week, then two and just keep adding to it.


How Do I Know How Much Food I Have Stored?

There are a couple ways to approach knowing how many days’ worth of food you have stored.  The first is to determine the required caloric intake for your family, then count up the calories of all the food you have stored, divide calories needed into calories stored and you now know how many days of food you have put up.

The second way is to use a food storage calculator.  Emergency Essentials has a very good one that is free.  With it, you can add how many family members you have and some basic information about them.  There are over 500 foods already populated to choose from and the ability to enter your own foods that might not be populated.  Once you’ve entered in all of your food storage, simply hit “calculate” and it gives a tally of how many days food you have stored, along with the nutritional information.  If you shop from Emergency Essentials, you also have the ability to add items that you want to purchase on your next order.


How Can I Afford Food Storage?

I recently wrote an article called “Frugal Preparedness”.  It has many tips and the comments have even more suggestions from readers.   There are many easy things you can do to build your pantry.

If you just need to bring in more money, one option, if you qualify, is donating plasma.  I checked into it a couple years ago and you can do it twice a week, receiving $25 each time.  That’s an extra $200 a month!  Blood Banker is just one online resource.  It may or may not list locations that buy plasma near you.


If you liked this article please think about sharing it on the social media listed below, thanks!


Food Storage for Outdoor Cooking

Today we have a guest article written by Adeline Cid who is an enthusiastic survival specialist and has extensive training on disaster preparation. She is a strong advocate of quality readiness and have tried and tested Daily Bread and believes it provides the highest quality food storage products.


Food Storage for Outdoor Cooking

Food storage is a very efficient way to feed your family during a weekend camping, hiking or mountain biking trip. Using your storage during your outing is a good way to practice rotating your foods for longer shelf life. This is also an opportunity for you to learn various ways to cook your foods outdoors.

4 Conveniences of Food Storage for Outdoor Cooking

There are a few hassles that come with cooking outdoors. Some of them include:

  • No refrigeration
  • Excessive weight of packed foods
  • Lack of kitchen facilities
  • Lack of cooking utensils

Many of these inconveniences can be overcome as long as you’re prepared. Here are four reasons why food storage is very convenient during camping and other outdoor outings:

  1. No Refrigeration Needed – Food storage doesn’t require refrigeration or freezing. This eliminates the need to pack multiple coolers with massive amounts of ice to store your foods. Dehydrated foods stay safe even in extreme temperatures. All the require is re-hydration using hot water, and they’re ready for consumption.
  2. Just Add Water – Imagine cooking a tasty, homemade meal without having to measure spices and chopping vegetables. Dehydrated food products can be pre-assembled before you leave on your trip. Now, all you need to bring with you is one cooking pot, one measuring cup and a supply of water. For best results, boil the water first before using it to re-hydrate your food storage.
  3. Lightweight – Many camping trips take place in remote areas that vehicles can’t access. That means that you’ll be carrying your entire food supply to your camping grounds. In this case, every single ounce counts. You already have to tote all your camping gear and emergency supplies. Just imagine how much easier it will be if your food is lightweight. When compared to canned foods, dehydrated food weigh much less. Be sure to bring along some resealable plastic bags for your leftovers.
  4. Less Space Needed for Larger Meals – There are occasions when camping trips include large groups of people. This means storing and preparing large amounts of foods at one time. Dehydrated food supplies make it much more convenient to store foods needed to cook meals for large groups. Many of these foods come in one-gallon cans, making it convenient to take with you as you hike to your camping grounds.

Cooking Outdoors Using Your Food Storage

During a camping, bike riding or hiking trip, part of the fun is enjoying the great outdoors. Cooking outdoors can be used a family-fun time, but only if you’re prepared. Remember, you won’t have access to electricity or gas for cooking your foods the traditional way. However, there are a variety of other ways that you can prepare your foods outdoors:

  • Camp stoves: kerosene, butane, propane
  • Dutch ovens
  • Bar-b-cue grills
  • Cooking over an open campfire

The key to packing your food storage for your outing is to pack foods you actually enjoy eating. Daily Bread carries gourmet meal plans, emergency supplies and cooking kits for your camping needs. Buy stored food online from Daily Bread.