April 20, 2025

Being Gray

Being Gray

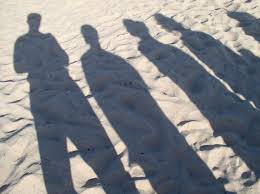
I have always tried to just blend in, comfortable to never be the center of attention, just a face in the crowd. When I was younger I didn’t know that what I was doing was “being gray” but in part it was. You see, I was just trying not to be noticed and that act, in and of itself, can bring attention. “being gray,” means more than not being noticed, it means doing what is expected of the majority of people in any given circumstance, when you are in public.
 
How you carry yourself matters, before and especially after an event.

As I mentioned, part of “being gray” means blending in and not drawing attention to yourself. For instance, there are some people in the preparedness/survival demographic that love the tactical gear. If there is ever any social unrest, wearing this gear screams “I have cool stuff, hit me on the head and take it please.” There are many ways to conceal that you are armed.

I’ll cover situational awareness more thoroughly in another article, but for now I’ll just say this; being discreetly aware of everything around you is a good skill to have now; it will be a must after any event.

The following is an example of what I mean by discreetly aware. There is a fantastic teriyaki place in the food court in the mall. When my wife and I go there I make a point of sweeping the room, giving everyone a quick once over. If I see a potential “problem child” they may get another look. I don’t stare, I only glance or keep an eye on them with my peripheral vision. If anyone catches me looking at them I either smile or give them a quick nod and then go back to what I was doing. I’ll scan the food court while we eat and talk. My wife does the same thing.

This is all before an event. Tensions run higher after an event of any kind. This makes it more important to be aware of surroundings and even more important to be discreet. If you’re the proverbial gazelle, non-discreetly looking around, you have just told the lion that you are food, that you have a reason for being jumpy.
 
Methods of “being gray” can change depending on pre-event, during and post-event.

Pre-Event
I do not recommend you share that you are prepping with just anyone. There are a couple reasons for this. First, there are some people that for many different reasons just don’t get it.

Before I built the website, while I was still trying to figure out what God wanted me to do, my wife and I went forward for prayer at church. I mentioned that I was feeling led to help people in terms of preparedness. The look the man gave while he shook his head almost made me regret going forward. His wife, however, didn’t even stumble but only began to pray for us. There have also been Christian forums where preparedness is brought up and I see comments about “not trusting in the Lord” etc.

Not only might there be judgment, but the more people that know you prep and decide not to prep for themselves, the more people you will have to decide to either feed from your very limited preps or turn away hungry. I have read about some Preppers that store a little extra to give to people and then tell them not to come back. While this might make the giver feel a sense of helping someone out, the recipient will soon be hungry again and now knows that you had enough food to share.

It is also a good idea to keep your preps in different places in your house. This way if someone sees some of your preps, they won’t know the extent of them.
 
During or After an Event

As I mentioned, after an event, methods of “being gray” may change. Here is an example; let’s say that the breadbasket of the United States is struck with drought and wildfires this year, like Russia was last year . As a result we are experiencing food shortages. To stop price gouging the government sets limits, both on price and quantity of food that each family can purchase per day. You have been prepping for a while and have a few months of food stored for your family. You are faced with two choices. They are listed below.
 
Choice one:

As mentioned above, you have a few months of food stored for your entire family. Since you do not want to feel like you are taking from someone who wasn’t as prudent as you, you decide to skip your daily allotments. After a few weeks, some of your neighbors begin to talk amongst themselves. They notice that no one has seen your family at the grocery store but no one in your family appears to be losing any weight like everyone else.
 
Choice two:

As in the other example, you do not want to feel like you are taking from others that were less prudent than yourself. But you also do not want to potentially put your family at risk, so you and your family do as everyone else is. You go to the grocery store and stand in the same lines for the same daily rations. You also might skip a meal here and there to lose a bit of weight just like everyone else. If you feel some guilt for taking your daily allowed rations from the grocery store, under the cover of darkness, bless a family with an extra ration every night and add a note asking them not to say anything to anyone so that it can continue.

As we have seen in Tunisia, Egypt and some other Middle Eastern countries, people become unpredictable and can become violent when they are desperate. Being hungry is a quick way to become desperate. In choice one, your neighbors might not come to your house asking questions but the person standing behind them, who lives a few blocks away, just might and they might do more than ask a few questions.
 
Blown OPSEC (Operational Security) or No More Gray

Once your OPSEC is blown, you’re in a tough spot. Many Christians (myself included) feel the need to help as much as they can. While this is admirable, our resources and preps are finite.

You might be thinking that I, personally, have thrown OPSEC out the window and in large part you are correct. When I felt called to create this website I thought about not having my name attached to it but then decided that no one would take the site seriously if I went by some nickname like Mr. Prepper.

Please don’t misunderstand, I don’t think that I am Mr. Center-Stage- Big-Shot-Prepper-Guy, but even being as public as I am makes me pretty uncomfortable. I can take solace in knowing that the vast majority of people that read this don’t know who I am or where I live. Those that read this and do know, well, they should be storing their own preps and might be treated in the same way as the bridesmaids that didn’t bring enough oil if they show up expecting a hand out.

As I am writing this and thinking about how much it would hurt to turn someone away, I am reminded about the motto of this site and the verse I took it from. Proverbs 27:12 People had access to the same information that I did. They see the same things going on in the news. They see prices going up at the grocery store. The difference is that I decided to be prudent and they ultimately will have to face their hardship. This might seem heartless, but Christ told the disciples in Mathew 10:14 “If a village doesn’t welcome you or listen to you, shake off the dust of that place from your feet as you leave.”

I think that we should all help, as we feel led and continue to pray for guidance and wisdom.

 
Please click here to vote for Prepared Christian as a top Prepper site!

If you liked this article please think about sharing it on the social media listed below, thanks!

Preparedness Club

Lessons From Tunisia and Egypt

I wrote most of this article before the rallies and protest that took place this week in Wisconsin. While the protests have been fairly peaceful so far, let’s pray they stay that way. I’ll cover some things that will help mitigate their impact if in fact things do take a turn for the worse.

There are quite a few things we can learn from the coup d’etat in Tunisia and Egypt. Before I cover the lessons, let me cover some of the event’s that took place. I am not an expert on Tunisia or Egypt, but have done a fair bit of reading on them as many have recently. These are two modern cultures, Egypt being the most populated African country and Tunisia having Africa’s largest economy. The research I did showed that both have populations of 20-40% that use facebook and other social media. In fact facebook, Twitter and You Tube were used extensively to coordinate the three R’s of a coup, Rallies, Riots and Revolution. Here are a couple of articles that show how social media was used. Tunisia: The Facebook Revolution and Egyptian government fears a Facebook revolution.

Citizens of both countries were unhappy with their government, but the spark that started the rallies and riots in Tunisia came in mid-December 2010 when a man who had his vegetable and fruit cart confiscated because he didn’t have a permit for it, lit himself on fire in protest. This led to protests, rallies and soon riots, ending in revolution. The story in Egypt is much the same, but the government exerted a bit more force and clamped down a bit more on media.

According to the Telegraph, “Egypt and Tunisia usher in the new era of global food revolutions”. “The surge in global food prices since the summer – since Ben Bernanke signaled a fresh dollar blitz, as it happens – is not the underlying cause of Arab revolt, any more than bad harvests in 1788 were the cause of the French Revolution. Yet they are the trigger, and have set off a vicious circle”

To understand this, you need to realize that in America we spend roughly 10-13% on food, in many other countries they spend 30%-50%, so when prices are increased they often do not have the money to afford paying for food.

The police stepped aside, some of whom joined protesters, leaving the security of neighborhoods to the people who lived there. These people defended their property, places of business and loved ones with sticks, knives and clubs.

In an attempt to control the masses and limit their communication, Egypt Shows How Easily Internet Can Be Silenced, I’m a fairly tech savvy guy. I would not have guessed it was as easy as they showed it to be. The Egyptian government also shut down Al Jazeera bureau..

As the rallies and riots continued, “Food staples started to run out in Egypt”, “Egyptians stock up on food, water as protests rage”. The banks were closed and with the Internet down, many businesses were forced to be “cash only”. “Egyptians Line Up for Cash as Banks Open, Currency Plummets to 2005 Low”
 
Lessons To Learn

The first question we need to ask is “could it happen here in America?” I don’t think we will ever see another violent revolution, at least I pray not. I think that there are a few triggers that could set any society up for civil unrest and riots.

What are these triggers? An increasingly high unemployment rate, a populace that is dissatisfied with our government, high oil prices and inflation levels that force a larger percent of income to provide food, or food shortages, as the end result is the same, people either eat less or not at all.
 
Unemployment

Our current level of unemployment is 9.8%. This does not factor in those under employed or those who have stopped looking for employment. The numbers get worse when you look at the percentage of unemployed youth, who will soon be out of school for the summer and looking for non-existent jobs.
 
Political satisfaction

I’m going to try to keep my writings non-political (remember I said “try”). We just had a pretty big upset in this last election. But I’m not kidding myself; I don’t think that just because the republicans took the majority that we’re going to see a huge change. It seems to me that those we’ve elected to lead us don’t often have our best interest in mind.

Obama ‘Internet kill switch’ plan approved by US Senate panel. “The bill also would allow the US president to take emergency actions to protect critical parts of the Internet, including ordering owners of critical infrastructure to implement emergency response plans, during a cyber-emergency. The president would need congressional approval to extend a national cyber-emergency beyond 120 days under an amendment to the legislation approved by the committee.” My question is, who gets to decide what a cyber-emergency is? Another concern is that the President would have the power to shut down segments or the entire Internet for 120 days. This would destroy many companies, the company I work for being one of them.
 
Oil prices

Oil prices are on the rise again, but here are a couple of things to keep in mind. Much like food, Americans are blessed with much lower gas prices than much of the world. In most major European countries they pay around $6.00 a gallon. Our economy is driven by cheap oil and we’re almost to $100 a barrel now. The last time we got this high was in 2008. I paid $4.10 a gallon at its highest back then. You also have to take into account that in one form or another, oil is used in every single thing you use, even if it was the gas used to transport it.
 
Food

As I mentioned above, we in America have been blessed with low food prices so far, but will they stay that way? Here is a secret study from Wal-Mart from a few months ago that showed increasing inflation then. Just yesterday my wife was telling me that the pizza rolls that my boys like have gone up over a dollar in price in the past 3 months. Here is another story called “The Invisible Food Crisis”. “Food prices are going up everywhere. Will they start rising in America, too?” One more that says “Higher Corn Prices Causing Rising Grocery Prices”. Another story that states Explosive’ Food Prices the Biggest Risk. How much wiggle room do you have in your budget? How much wiggle room do you think the 43 Million Who Use Food Stamps have?

I think the chances of the United States ever seeing a coup or another violent revolution are slim. As far as rallies and protests, we had multiple this week in Wisconsin and other states and they were all peaceful. However just last fall there were 30,000 people that showed up “seeking applications for government-subsidized housing” and it turned into a riot, with 62 injured. We also have multiple riots for other reasons, such as sporting events.
 
 
Mob Mentality

Have you heard the term “Mob Mentality”? It means a group that acts together without a previous plan. Let’s take the same protests in Wisconsin or other states and add in rising grocery or gas prices. Now the level of angst and frustration is even higher. People begin to feed off of each other’s emotions. If one person acts out then some in the group might also.

Here are four suggestions for mitigation if something similar happens here;

1. Avoid groups of people that are protesting. The individual people that are protesting might be good people, but remember the mob mentality. You can be a target just by not being a part of the group.

2. Have food stored. I have written extensively on food storage, found in the Preparedness section. There are a few reasons related to the coup’s that make food storage a great idea; increasing prices, food shortages and not needing to go out and get food if there is civil unrest. Even if none of these things happen, imagine the peace of mind that comes from knowing you can feed your family for an extended length of time.

3. Have some cash on hand. If there is a loss of power, ATM’s don’t work and most store cash registers won’t work, nor will credit card machines. Some places might take checks but many don’t when things are “normal”, so I wouldn’t count on it.

4. Know your community. I don’t expect that you will have to join together to chase off any rioters but knowing who you live near is always a good idea.

 
Please click here to vote for Prepared Christian as a top Prepper site!

If you liked this article please think about sharing it on the social media listed below, thanks!

Preparedness Club

Food Boredom and Survival Cooking

Food Boredom and Survival Cooking

In this last section I want to give some information that didn’t really fit anywhere else. I will also list some items related to food storage that you should store.


Food Boredom/Fatigue
I have read that there are people that get so tired of eating the same thing that they refuse to eat at all. This is part of the reason to have variety in your stored foods. Herbs and spices can also be used to enhance and modify recipes. As I mentioned in “Food Storage Part Three”, the storage length of herbs and spices varies, but the same food storage rules apply to them.


Water Enhancement
Storing a variety of things to enhance or flavor water is also a good idea. Dry powder mixes such as Kool-Aid or lemonade are good. Keep in mind that sugar might be needed in some of these. Gatorade mix can be used as well and is a great way to get electrolytes into the body. Tea bags or mixes are good for hot or cold teas. Hot cocoa mix and instant coffee are good as well.


Coffee
I have done minimal research into coffee storage but here is what I have found; coffee grounds by themselves can be stored for six months to a year, while whole coffee beans will store longer. Whole beans can be stored in Mylar to lengthen storage time. This will mean you will need to have a coffee grinder; having one that can grind the beans without electricity would be a good idea, in case there is loss of power. I have seen green coffee beans available but you would need to know how to roast them as well as have the implements to do so stored.


Pop, Soda, Coke, Cola, whatever you call it where you live.
Diet pop will not store for any length of time, stick to the date on the can. Regular pop will in most cases store just fine, though you should rotate this like anything else.


Power Loss/Black Out
The following are a few tips for the times you may lose power. This tip is a good idea at any time; the fuller a freezer is, the less energy it takes to keep the temperature constant. If you have unused space, you can add a 2 liter bottle of water to take up that space. This will keep the freezer cooler longer in times of power loss. You should also make a list of the entire contents of the fridge and freezer and stick it to the outside. This way people can just look at the list instead of browsing for something to eat.


Alternative Means to Cook
Have an alternative way to cook and a way to fuel it. The following are a few examples.


Open Fire
There are a few things to keep in mind about cooking over an open fire. Firewood takes 6-12 months to season. If this is going to be your fallback cooking method, you’ll want to have the wood ready well before hand and plenty of it.


Standard Barbecue
Many people have a barbecue to cook on when the weather is nice. If you go this route, have a few bags of charcoal or extra propane tanks stored safely.  Propane never goes bad and will store indefinitely.

Backpack and Camp Stoves
(click to see some examples)
These are stoves that have one or two (possibly more) burners. The ones that have one burner are often used for backpacking, as they can be very light. These stoves utilize a variety of fuel, propane and butane among the most popular.

The reason I am bringing up the next two are because they are very efficient at burning and use very little wood, they are also things you could build yourself.


Hobo Stove
A Hobo Stove utilizes two metal containers, a larger one and a smaller one. The larger one has a large hole in the bottom for putting small pieces of wood in. There are also many holes throughout for letting oxygen in. Near the top there is a metal brace that the smaller metal can rests on. You place your food or water in the smaller can, which is heated by the flame in the larger can. The video below was found on you tube. There are many others. Just search for “hobo stove”.


Rocket Stove
A Rocket Stove can be used for heating a building or scaled down and used for cooking. Here is a link that explains the Principles of the Rocket Stove. The top video is a coffee can Rocket Stove and the bottom video is a large scale stove that could be used for heating a building. Here is an excellent article on Rocket Stoves with a better explanation then I can give as well as many more videos.


Solar Cooking
Here is a means of cooking I’m not very familiar with, that I was clued into from Jimmy a reader of the blog. It uses sunlight as a heat source, this could be a very good way to cook in an off grid situation. Wikipedia has a good write up on a Solar Cooker.


Cooking with Cast Iron and a Dutch Oven
Here are a few articles that give a wealth of information on cooking with Cast Iron and a Dutch Oven.

Cast Iron
The Irreplaceable Cast Iron Pans , Using a cast iron skillet ain’t so hard!

Dutch Oven
Seven secrets of Dutch oven cooking , Dutch Oven Cooking


Random items to stock up on that are related to Food Storage, this is not a comprehensive list, let me know what I may have missed and I will add it.

Vitamins.
Manual can opener.
Manual coffee grinder
Percolating coffee pot
Grain mill
Wine corkscrew (Don’t look at me like that, this is for Communion 🙂 )
Teapot
Paper plates, bowls, towel, napkins.
Plastic silverware
Plastic or paper cups
Aluminum foil
Saran wrap
Plastic bags of various sizes (this includes sandwich bags, garbage bags, Ziploc storage, etc.)
Fire extinguisher. (know how to use it)
Cast Iron Cook wear
Dutch Oven
Dish soap
Matches
lighters


Here are the links to the other food storage articles.

Food Storage Part One: Why Store Food And The Rules For It.
Food Storage Part Two: The Kind Of Foods That You Can Store
Food Storage Part Three: Shelf Life of Staples.
Food Storage Part Four: The Process and Enemies of Food Storage.
Food Storage Part Five: How much food should you store and where should you put it all?
Food Storage Part Six: Tips On Stocking Up and Affording it all.
Food Storage Part Seven: Food Boredom to Survival Cooking .

 
Please click here to vote for Prepared Christian as a top Prepper site!

If you liked this article please think about sharing it on the social media listed below, thanks!

Preparedness Club

Tips On Stocking Up and Affording it All

Tips On Stocking Up and Affording it all

I am not going to lie and say that food storage is cheap or easy, but it can be and should be done. You might have to make some short term sacrifices, but the long term peace of mind that comes from knowing that you can feed your family, come what may, is worth it. I’m going to try to provide some ideas to build up your pantry and a few ideas to raise some income.

Remember the short-term goals that I mentioned in “Food Storage Part Five”? Make sticking to them a priority. Don’t go into debt to stock up, but don’t put fluff ahead of it either. I plan on covering debt in another article. For now I’ll just say that getting debt free (aside from a mortgage) has not only been a tremendous blessing, it has been a huge prep in and of itself.
 

Food Storage Acquisition Tips

 
Big Box Stores and Discount Grocers

You may have a discount grocer like Aldi; this would be one way to save money. Buying bulk from a Costco, Sam’s or other big box store is another. I also know that there are some online companies that will give discounts for large ‘group buys’. If you know of other like-minded people this could be a great option.

Avoid going out and dropping hundreds at a big box store, this can really tax your finances and this is often done out of fear. If you’re not reacting out of fear and have the disposable income, this might work for you. On a side note, when you do buy from them, the items on the bottom or in back usually have a longer shelf life, as they rotate with ‘First In, First Out’ too.
 
Co-Op or Farm Direct

Another way to save money is to purchase from a co-op or directly from a farm. I listed some ways to find local co-ops and farms as well as some on-line stores at the bottom of “Food Storage Part Three” (LINK).
 
Double Buying/Copy Canning

I first heard about this process from Ron Hood ‘s video “Urban Master, Volume 1”. His wife explains that if you normally eat Spam and use a can for lunch, the next time you go to the grocery store, you purchase two. You do this for every shelf stable food that you purchase until you have the desired amount. On a side note, if wilderness survival is a topic of interest, Ron Hoods’ videos and Internet forum contain some of the best knowledge on the subject that I have been able to find.
 
Target Buying

I don’t mean the store, but a specific item. Pick one shelf stable food and purchase a specific amount each week. This number is going to vary, based on income and whatever the item is. As an example, this week I buy 12 cans of green beans, next week it’s 12 cans of corn.

Even if you are on a very tight budget, you can still add to your pantry a little at a time. I did a web search for “Food storage for $5 a week” and “Food storage on $10 a week” (without the quotes) and found the following sites. Food storage for $5 a week and Food storage on $10 a week .

Even if you can only spend $5 a week, you can take advantage of sales. The most important thing is that you are working toward your goal.


How Can You afford this all?

 
Know where your money goes.

There are two ways to do this, you can either write down what every single penny is spent on, or you can do what we did and get the bank statement and itemize it. You need to do it for at least one month, as this will make sure you get the monthly bills. We actually printed off the statements for the last year and broke things up into twenty or so categories and tallied it all up. Shocked is the best word that comes to mind. My wife does a fantastic job of keeping our budget but seeing the total that went to junk, well that brings me to the next section.
 
Needs vs. Wants

Many people are willing to spend much more on their wants then they are on their needs. Jack, at The Survival Podcast explained it something like this; gas in your car is a need, but people will complain that the price of gas went up $.05 and then drive across town to save $.02 a gallon, saving a grand total of $.40 on a twenty-gallon tank. That same person might have a craving and spend $5 on a latte. I don’t care how good it is, its still a want.

If you do as I suggested above and can see the amount of money you spend on wants, I bet you’ll be a little surprised. I’m not saying that you should deprive yourself but being honest with yourself and looking at this list, I bet you can find ways to cutback and still feel like your not being deprived.

Cut back on spending

Eat at home and bring your lunch to work. For a family of four, a fast food dinner can run up to $30, pizza or take out can be almost $50. I bring my lunch to work while most of the guys in my department eat out every day. I bet that what they spend in two days will pay for my brown bag lunch for two weeks.

Sell the excess

Glenn Beck recently cited a story that said the average family has $20,000 worth of unused stuff in their home. I’m not so sure about the $20,000 part, but I know most families have excess stuff they could sell on Craig’s list or in a garage sale or eBay. I have seen a few businesses that will sell your stuff on eBay and just take a small portion for their efforts.

Part Time Job

This might not be a great tip given our current economy; however it might be in your situation. If you get a part time job, even if you only work one shift a week and dedicate the money you earn to preps, you’ll be amazed how quickly you’ll increase your pantry.

Sell Plasma

Another option is selling plasma, I have thought about this. The last time I looked into it a person could sell plasma twice a week and receive $25 each time. That’s $200 extra a month! Blood Banker is a site that you can use to find areas local to you to sell or donate blood and plasma.


Here are the links to the other food storage articles.

Food Storage Part One: Why Store Food And The Rules For It.
Food Storage Part Two: The Kind Of Foods That You Can Store
Food Storage Part Three: Shelf Life of Staples.
Food Storage Part Four: The Process and Enemies of Food Storage.
Food Storage Part Five: How much food should you store and where should you put it all?
Food Storage Part Six: Tips On Stocking Up and Affording it all.
Food Storage Part Seven: Food Boredom to Survival Cooking .

 
Please click here to vote for Prepared Christian as a top Prepper site!

If you liked this article please think about sharing it on the social media listed below, thanks!

Preparedness Club

Store how much food and where to put it all?

Store how much food and where to put it all.

How much food you store is something that each family will need to decide. It will depend on income, storage area and other factors. I personally think people should store six months worth of food and a year if at all possible. I recommend that you have a long-term goal, whether it’s six months, a year, or even more in mind and work toward it by setting smaller goals along the way.

In the beginning, go with smaller goals; three days, then a week, then two weeks, then a month. This will do a few things. First it won’t break your bank. Second, it will keep you from fear buying. Pray along the way, asking God to guide you in how to prepare. Third, it will keep you from prepping burnout and buyers remorse.

I recommend having at least 2-3 months of the “store what you eat foods”. Once you have that, then add another 2-3 months of freeze dried or LTS (Long Term Storage) dehydrated food. From there I recommend storing staples. When it comes to staples make sure you have the storage for them as well as the equipment before you order them. This includes Mylar bags, heat sealers and oxygen absorbers.

The LDS church recommends that their members slowly work toward one year of ood stored. I do no want to get into a discussion about the LDS church; this site is about preparing the body of Christ, not deciding who is in it. Here is a Food Storage Calculator built off of the recommendations from the LDS church, it asks for the number of family members in certain age groups and will show you the amount of staples they recommend.

The idea of storing a year of food may be a little overwhelming. That is why I said to set a long-term goal and short-term goals. Once you get started and your pantry begins to grow, your long-term goal will seem much more attainable.
 

Where can you store all of this?

When it comes to food storage and keeping in mind the enemies of food storage as I mentioned in Food Storage Part 4 a cool, dry, dark place is best. With that in mind, I’ll try to give you some storage ideas that may be helpful to you. I recommend you make room for your preps before you get them home, otherwise that 50 lbs of rice might sit in the bag until you get a place ready.

When it comes to storing staples, many of them are relatively cheap and you will be more restrained by your storage space then by the cost. Whether you use a shelving system, or just stack food grade buckets on top of each other in a closet, a place to store your preps is a must.
 
Location, location, location:
Keeping a cache of food at a different location is a good idea if possible. If you have a friend or relative that is like-minded, you could each store some of the others food. I also recommend keeping some food stored in different places in your home as well. The thinking here is security and redundancy. If something happens to one section of your storage, the other could remain intact.
 
Shelf Reliance
Shelf Reliance is a company that sells a few types of preparedness related products, one of which is shelving. I purchased “The Pantry” and because of the functionality and storage space of cans that it provides, this is one of my favorite prepping purchases. They have two types, the larger Free Standing Systems and the smaller Cansolidator Series these hold a smaller amount of cans, but would be great for people that do not have a lot of room, or are on a tight budget.
 
Shelving:
There are many kinds of shelving available at the big name hardware stores. Here are a few things to keep in mind. Some of the shelves have a recommended weight limit, I have seen this mostly in the plastic shelving. Try to figure out how much space you need in-between the shelves. Also keep in mind future storage, buying or building a bigger shelf than you need right now is a good idea; “I would rather have it and not need it, than need it and not have it”.

We decided to get shelving in place before we purchased much of our preps, this was a good idea, but in hindsight I wish I had built it differently. I initially thought I would be using 5-gallon food grade buckets, and designed it to hold two five gallon buckets, one on top of the other, on the bottom shelf. When we went looking for buckets I could only find 3 and 4-gallon buckets, so there are eight inches of wasted space between the top of the highest bucket and the bottom of the shelf above it. Leaving some room so that it isn’t a really tight fit is good, but this is enough room for a 12-pack of soda or something of similar height, that is now wasted.

The other nice thing about building your own is that you can custom make it to your needs. We had a wall that was about ten feet long, so I made a 10’ long by 3’ wide shelf with 2”x4”s and 1/2 plywood. It might not be pretty, but it is very functional and holds our preps safely and securely.

For you “do-it-yourselfers” here are two plans for making your own rotating canned food systems. One plan from From wikiHow and 14 plans from CanRacks.com, $14.95 each or $110 for all 14.
 
Grocery store demo shelving.
I have seen this tip a few places and cannot remember where or I would give them credit. The displays at grocery stores are often thrown away after the display is taken down. These displays are often pretty high quality as to show the product off. Asking the store if you can have it once the display is taken down might get you some free shelving, even if you have to call the distributor.
 
Metal garbage cans:
We keep two 25 lb bags of dog food in one 30-gallon metal garbage can. I have toyed with the idea of keeping some of the preps in Mylar in one of these. It’s metal, so there is no leeching and its also rodent proof. The only real downside I can see is that it’s not incredibly portable, but for me, that’s not a big drawback.
 
Under the bed:
If you have room under your bed, you can use the shallow plastic containers, as an example Under-Bed Box with Wheels, Clear Base and add either canned goods or Mylar bags. You can tape a list of the contents to the top of the lid. This will make keeping track of the contents easier than sliding it out and pulling out each can to look for a product name.
 
Closets:
Walk in your closet, turn around and look above the door. This space is open in many closets; you can add a wire shelf there and store some lighter foodstuffs (you don’t want cans as they could roll off and land on your head).
 
Attics:
For many people the attics in their home and garage are only used for the insulation, depending on the type of insulation, you might be able to put down sections of plywood and use it for storing paper goods or other items that are not going to be affected by extreme temperatures.
 

Here are the links to the other food storage articles.

Food Storage Part One: Why Store Food And The Rules For It.
Food Storage Part Two: The Kind Of Foods That You Can Store
Food Storage Part Three: Shelf Life of Staples.
Food Storage Part Four: The Process and Enemies of Food Storage.
Food Storage Part Five: How much food should you store and where should you put it all?
Food Storage Part Six: Tips On Stocking Up and Affording it all.
Food Storage Part Seven: Food Boredom to Survival Cooking .

 
Please click here to vote for Prepared Christian as a top Prepper site!

If you liked this article please think about sharing it on the social media listed below, thanks!

Preparedness Club

The Process and Enemies of Food Storage

The Process and Enemies of Food Storage

In this section I’ll explain the enemies of food storage and how to mitigate them. I’ll also cover how to properly store food for LTS (Long Term Storage).

The five dangers of food storage are; heat, light, oxygen, moisture and pests. Minimizing the effects of these things will greatly increase the storage life of food.


Heat

Temperatures between 40 degrees and 72 degree Fahrenheit are ideal for food storage. For every 18 degrees above 72, the food loses up to half its nutritional value. If the food is exposed to temperatures over 72 degrees for an extended amount of time it can lose its color, texture and taste.


Light

Keep things in a dark space if at all possible, light can affect the appearance and taste of food. Mylar bags and food grade buckets will also help here.


Oxygen

When fats oxidize they turn rancid. Keeping your food in an oxygen free environment will prevent this, as well as kill pests that may be in the food. You can remove oxygen with oxygen absorbers in an airtight bag. I’ll cover how to know how many to use below.


Moisture

Moisture can take the form of humidity, condensation or even a water pipe breakage. To mitigate this I keep much of my preps in Mylar bags and then I put the Mylar bag in a food grade bucket. You can also add a desiccant to the inside of the Mylar for added moisture removal. I try not to have any food with cardboard packaging out in the open, as it is susceptible to accidents involving liquids, such as broken pickle jars, broken pipes or the “Not Me Ghost”, you know, children.


Pests

Pests range from larvae in bulk food to mice in your food storage area. There are a few ways to deal with each. For larvae you can stick that bag of rice, beans or whatever in your freezer for a couple of days. This will kill any bugs, larvae or eggs. I used to do that, but it’s time consuming, my freezer isn’t that big and it’s usually full. I found, on a forum, that the simple act of removing the oxygen would kill any pests in the food. This made sense and they were steps we were already doing. We have not had any problem with pests in any of the food we have stored this way. If you want to make sure, feel free to do both. I have also read that Bay Leaves will keep pests away and some people add them to the inside of the Mylar bag as well as the inside of the food grade bucket.


Mice

We keep a very clean house but the little buggers always seem to come in, especially in the fall when it starts to get cold. There are a few ways to deal with them but I prefer traps. With poison there’s a possibility they’ll make it to a spot that you can’t find before they die, which could cause a smell. Glue traps are about as inhumane as anything I can imagine. I prefer spring traps. I used to use the old fashioned ones, but they’re so touchy and can be a pain to set. I started using JAWZ Mouse Trap and I really like them. They are incredibly easy to set, still go off when “visited” and mouse extraction is quick and easy.


The “How To” of Storing Your Own Bulk Food.

This process seemed a little daunting when I began to research it. In truth it was a bit frustrating the first few times we put up some bulk food. The reason it was frustrating had to do with the process we were using. I had seen a video about using a household vacuum and a household iron to seal the bag. It worked but was an exercise in frustration. After the food and oxygen absorbers were added, the bag was heat sealed, save a section about an inch long. One end of a tube was inserted into the remaining hole, while the other end was connected to the vacuum. My wife was at the ready with the iron. I would turn the vacuum on, removing the air. I would remove the tube and my wife would seal the remaining hole. It was effective, but as said, it got frustrating. It was definitely a team building exercise!

The process we use now is much better, we purchased a heat impulse sealer,this makes things easier, but it would still work with an iron. We got rid of the vacuum completely. We achieve the airtight seal by adding more than enough oxygen absorbers for the size of the container. I’ll explain the process below.

You might be thinking why not use a vacuum sealer? The bags that come with vacuum sealers are clear. That makes the food susceptible to light. They are also not as heavy duty as Mylar and I also don’t think that they are an oxygen barrier, whereas Mylar is. So why not use Mylar bags with a vacuum sealer? We tried, the vacuum sealer wouldn’t work on Mylar. I could get the vacuum to engage but it couldn’t form a seal to remove the oxygen. I did some research on-line and found that you can make a “sleeve” out of the clear plastic bag and slide it over the Mylar. Remember me saying that the first few times were frustrating? The vacuum sealers might be fantastic for use with the bags made for them, which are frequently used in freezing, but for long-term storage I highly recommend Mylar and the process I’ll explain below.


Let me cover the needed components first;

Mylar Bags

Mylar is a clear material made from polyester resin. The balloons you see at grocery stores or party stores are made of Mylar. The Mylar bags used for food storage have a layer of foil on them. They come in varying levels of thickness. I have seen 3.5 mil – 7 mil. I have seen the recommendation to use thicker Mylar bags for things like pasta because the pasta can puncture the bag when the oxygen is absorbed and the bag tightens around it.


Oxygen Absorbers

Oxygen absorbers are made of iron oxide. When oxygen is present the iron oxide rusts as it absorbs the oxygen. When all of the oxygen has been absorbed the rusting stops. Every time I have purchased oxygen absorbers, they have come in a 50 pack, in sealed plastic packaging. I always have a canning jar on hand to put them in. I put the jar lid on as soon as I take them out of the packaging. I remove the lid as needed. This will keep the absorbers from absorbing too much oxygen. When I am done putting food up I can just leave the absorbers in the jar.

Sorbent Systems recommends that if you are filling a:

5 or 6-gallon bag, that you use 1500cc-2000cc oxygen absorber.
3-gallon bag should use 1000cc
1-gallon bag or #10 can should have 300cc.

You can mix sizes to get to the recommended amount of absorption. Use 1 1000cc or 4 300cc. It’s a bit of overkill but it’s better to go a little overboard than to not have enough.

Keep in mind that since we’re not using a vacuum, the package will not be “solid” right away. Once the oxygen absorbers have had some time to work the effect is as good as using a vacuum and a lot less frustrating.


Heat Source

As I mentioned, we now use an impulse sealer, but you can do this with an iron as we have in the past.


Food Grade Buckets

Here is an article that explains what food grade plastic is. Most food grade buckets have a “2” in the recycle symbol. You can purchase brand new food grade buckets on-line. The prices often range from $7-$10 (depending on size) with the lid included. However, you can often get them locally cheaper or even completely free.

I purchased the bulk of mine from a bakery for $2.00 (including the lid). I also got some free from the bakeries in the local grocery store, Sam’s and Costco. I had to endure a few odd looks but for the $10 I saved, I’ll deal with it. We washed these buckets thoroughly with hot water and dish soap.

Keep in mind that there is a chance that whatever was in the bucket may leave it’s scent on whatever you put in the bucket. If you get a bucket that smells like pickles, there isn’t much you’re going to be able to do to get the smell out. You may be able to purchase something to wash it with, but once you factor in the cost of that product and the time, you would probably save money by buying a new bucket.
 

Do you have to use food grade buckets, or will any 5 gallon bucket suffice?

If you’re storing the food in Mylar than the food will only come in contact with the Mylar bag, which is food grade.  If you’re going to have the food loose in the bucket then yes, you should use a food grade bucket.


Gamma Seal Lids

As you’ll soon discover, taking the lids off of these buckets can take a toll on your fingernails and knuckles. Gamma seal lids go on like a normal lid but they also have an inner lid that screws off, leaving the outer sections attached to the bucket.

I didn’t go the gamma seal route. Instead, I have a Bucket Wrench. I didn’t use one at first but after I had a few fingernails bent back I ordered one.

Another possible storage option:

Something that I learned about from Jack on The Survival Podcast is Paint Style Cans w/ Gold Phenolic Lining; these are FDA approved and are evidently great for storage. You can put the food right in the can, add an oxygen absorber and put the lid on.


The process of storing food in Mylar:

Step One: Get all of the needed items in one place:
-Item to be stored.
-Mylar bags.
-Oxygen absorbers.
-Heat Sealer.
-Permanent Marker or labels and pen.
-Scoop (in this case it was a large plastic cup.)
-Food Grade bucket.

Step Two: Add an oxygen absorber and start adding food to the Mylar bag. I usually add an oxygen absorber at the bottom of the bag, the middle and near the top. Remember that the amount of oxygen absorbers you’ll need to add are dependent on the size of the bag you are using.

Notice the headroom left at the top, you’ll need to leave room so when you lay it flat, the contents don’t spill.

Step Three: Seal the bag. The left picture is of an impulse seal. The right is of a household iron seal. The picture below them is a side-by-side comparison of the two. Leaving the iron on the bag for more then a second or two can cause the bag to melt on the seal line, leaving a hole.

Step Four: Label the Mylar bag with content and date stored. Writing on the bag is fine; the labels are just easier to read.

Step Five: Put the filled Mylar bag in the bucket. I usually leave the lid off so that I can check to make sure the oxygen has been removed from every bag. We will occasionally get one that has to be repacked with a new bag and oxygen absorbers.

Here are before and after pictures, the left (or top, depending on your monitor resolution) one is right after sealing, before the oxygen absorbers have done their work. The right one is 12 or so hours later, notice how the bag is dimpled, that is the easiest indication that the oxygen is removed.

Once you’re sure the oxygen has been removed from all bags, you can put the lid on. I can get three, one gallon bags in the 3-4 gallon buckets.

One of the mistakes we made in the beginning was using Mylar bags that were large enough to fill the entire bucket. The problem with this is that once you open the large bag, all of the contents then have to be used, or you have to reseal them. We now use smaller one-gallon bags and put three in the bucket.

Here are some resources for purchasing food storage supplies. Interteck Packaging and Sorbent Systems carry mainly Mylar, oxygen absorbers and the like, while Emergency Essentials carries a wide variety of preparedness supplies.

2-14-11 Update
I am in need of more oxygen absorbers so; I went to the three sites I have listed and, well lets just say I found a much cheaper source. Honeyville Grain at the bottom of the page. Nearly half of one of the sites listed. I’m going to leave the others, as they are a good source for other things.


Here are the links to the other food storage articles.

Food Storage Part One: Why Store Food And The Rules For It.
Food Storage Part Two: The Kind Of Foods That You Can Store
Food Storage Part Three: Shelf Life of Staples.
Food Storage Part Four: The Process and Enemies of Food Storage.
Food Storage Part Five: How much food should you store and where should you put it all?
Food Storage Part Six: Tips On Stocking Up and Affording it all.
Food Storage Part Seven: Food Boredom to Survival Cooking .

 
Please click here to vote for Prepared Christian as a top Prepper site!

If you liked this article please think about sharing it on the social media listed below, thanks!

Preparedness Club

Shelf Life of Staples

Shelf Life of Staples

What are food staples?

Wikipedia has a pretty good explanation of what staple foods are. In short it says a staple is a food that is “eaten regularly and in such quantities as to constitute the dominant part of the diet and supply a major proportion of energy and nutrient needs.”

What are some staples that can be stored long term? – Note, in many of these explanations I say, “When stored correctly”, I’ll cover this in greater detail in the next article. For now just know that in general this means dry, cool, dark, oxygen free and secure from pests.

This is not an exhaustive list of staples. If you notice one that is missing and feel it should be added, please let me know. A quick disclaimer; the information here has been gathered over many resources and should be viewed as “best practices”. I have not stored any of these items for 30 years to see if they’re still edible.
 

Grains

Grains store very well because the hard outer shell is protecting the inner seed. When stored correctly, they have a shelf life of 30+ years. One of the most popular types of grains to store is wheat. Different types of wheat are better for different things. Wikipedia has a good description and explanation of different kinds of wheat. In the section “Major Cultivated Species of Wheat”

-Note; if you store grains, you will need a mill to grind them.

Some examples of hard grains are: Buckwheat, Kamut, Millet, Durum wheat, hard red wheat, hard white wheat and Spelt.

Some examples of soft grains are: Barley, Oats, Quinoa and Rye.
 

Flour

After the shell is broken and can no longer protect the seed, the nutrients begin to degrade. Wheat is then ground into flour. Don’t try to store flour for more than a year. I have read that flour stored correctly can be stored for five years.

Types of flour: All Purpose Flour, Bakers Flour, Unbleached Flour, White
Flour, Whole Wheat Flour, Cornmeal.
 

Rice

Brown rice has the shell containing fatty acids attached. These acids go rancid after six months or so.

White rice has had the outer shell removed. Because of this, it has less nutrients but will store much longer; as long as 30 years if stored correctly.

Rice that has a very long storage life: White, Wild, Jasmine, Arborio and Basmati.
 

Beans

The magical fruit if stored correctly can have a shelf life of 30+ years. Aged toots.

Some types of beans: Kidney, Garbanzo, Great Northern, Lentils, Lima, Pinto and Soy.
 

Beans and Rice

I have heard that beans and rice are a complete protein, I’ve also heard they are not. So I did my own research and the following is what I found. A complete protein contains all essential amino acids. Animal based protein such as meat, milk, eggs are good sources of complete proteins, whereas most plant based proteins are not. A combination of grains, legumes or vegetables can be made to create a complete protein; one of which is beans and rice.

The reason that beans and rice are a popular choice for preppers is that you can put up a large amount fairly inexpensively. I caution you against making this the bulk of your stored food. As I mention in part two, diversity is important. One of the reasons it is important is food boredom. Beans and rice every day would wear thin quickly but they could be mixed in now and then to stretch your other food supply. A side note; unless beans are a part of your normal diet, they can do a number on your digestive system. I have read that over time your body will adjust and the gas will lesson. You can also mitigate this and other digestive problems with other preps. I’ll cover those at another time.

Here are some of the articles that explain how beans and rice make a complete protein.

Laissez “Fare” Nutrition: Protein

Incomplete vs. Complete Proteins

What’s a Complete Protein? Inquiring Vegetarians Want to Know.
 

Pasta

Pasta will store longer then flour but probably not as long as un-cracked wheat. I got a really good tip from a friend that I haven’t tried yet; you can cook pasta and then dehydrate it. The benefit of this is that it is already cooked and can be reconstituted and eaten.
 

Dehydrated Dairy Products

If a dehydrated product has fat in it, the shelf life is probably about 5 years. If it is fat free then the shelf life is 20 years. Some of these things don’t taste very good on their own, but if used for baking taste just fine.

Types of Dehydrated Dairy Products: Dehydrated Milk, cheese powder, cocoa powder, powdered eggs, butter or margarine powder.
 

Honey

There are three types of honey. Pure honey won’t go bad. It can crystallize but it turns back into liquid if warmed. (Avoid boiling, as that will kill nutrients.) The other two types are adulterated and artificial. Adulterated honey is real honey with another ingredient added. Artificial honey is, well, artificial. The honey found as condiments at restaurants is most often adulterated or artificial. Here is an article that explains How to Distinguish Natural Honey and Artificial Honey.
 

Salt and Sugar

If salt and sugar are kept dry they should store for a very, very long time. Sugar has a tendency to harden. It can be broken back into granules. These are two items I recommend storing a fair amount of. They are used in a lot of things and chances are you can’t reproduce them. Most of the uses for sugar are related to food but here are Sixty Uses For Table Salt

Keep in mind there are many kinds of salt. Here is an article called Beyond Table Salt — A Guide To Different Types Of Salt.
 

Yeast

Yeast, if kept in its foil container, should have a storage life of at least one year.
 

Cornmeal

As I mention in the section on flour, cornmeal has a pretty limited shelf life. However, you can make cornmeal out of popcorn seeds and popcorn seeds have a much longer shelf life. You’ll need a grinder for this as well.
 

Baking Soda

Also known as sodium bicarbonate, baking soda is another one of the staples that has many uses. It acts to neutralize acids and break down proteins. This makes it useful as a tenderizer and a leaven. It has a neutralizing effect on acidic scent that makes it an effective deodorizer. Added to the water when doing laundry, it stabilizes the pH level, enhancing the detergent’s effectiveness. If kept in the cardboard box the storage life is probably around a year. If kept oxygen free and moisture free it should store indefinitely.
 

Herbs And Spices

The shelf life of spices and herbs varies greatly so I’ll just give some general rules. Whole spices have a longer shelf life and often have a better taste and smell when freshly ground. Herbs lose their flavor faster then spices. If they have little to no smell when crumpled in the palm of your hand they should be replaced. The same rules apply for storage of spices, which means that keeping them above the oven, as is very common, probably isn’t the best place to store them. We have some individual spices, but also stock some of the mixes. Herbs and spices are one way to combat food boredom.

Here is an article from the Mother Earth Network called Forever foods: 10 cooking staples that can outlast you.
 

Cooking With Staples

For those of us that don’t have a lot of experience cooking with staples, here are a few resources.

The Food Network offers 100 Wheat Recipes.

Chef Keith Snow created a website called Harvest Eating. On it, he shows people how to cook with locally grown foods, with techniques people of any skill level can use. I have heard him interviewed on a couple of different Podcasts and was impressed with his approach. I think his site is a fantastic idea.

Here are two books that I own;

The Amazing Wheat Book

Making the most of basics
I can’t recommend this book enough. It not only has information on cooking with staples, but a wealth of information on basic skills that not many in our culture retain.

Lastly I want to give you a few sources for finding staples, both on-line and locally.

Here are some links to help you find sources locally to you that you can
purchase staples in bulk.

Local Harvest
Coop Directory
Sustainable Table
FoodRoutes.org
Eat Well Guide

Here are some links to help you find sources on-line that you can purchase staples in bulk. I would recommend checking a few of them before placing an order. Prices and shipping prices will vary.

Wholesale Bulk Foods.com
Pleasant Hill Grain

WHEAT MONTANA FARMS & BAKERY
Honeyville Grain
Organic Wheat Products
Barry Farm Foods
Bob’s Red Mill
King Arthur Flour Company
War Eagle Mill
USA Emergency Supply
Dutch Valley Food


Here are the links to the other food storage articles.

Food Storage Part One: Why Store Food And The Rules For It.
Food Storage Part Two: The Kind Of Foods That You Can Store
Food Storage Part Three: Shelf Life of Staples.
Food Storage Part Four: The Process and Enemies of Food Storage.
Food Storage Part Five: How much food should you store and where should you put it all?
Food Storage Part Six: Tips On Stocking Up and Affording it all.
Food Storage Part Seven: Food Boredom to Survival Cooking .

 
Please click here to vote for Prepared Christian as a top Prepper site!

If you liked this article please think about sharing it on the social media listed below, thanks!

Preparedness Club

Why Store Food And The Rules For It

Why Store Food And The Rules For It

Water might be the most important part of a preparedness plan but food storage is the most complex. With water, once you know where to find it, how to purify and store it you pretty much have it nailed. Because food storage is so involved I am going to break it up into manageable segments.

First I’ll cover why you should store food and food storage rules and principals.
 
 
Why store food?

As I wrote in “Should You Prepare? Part One and Part Two. Most of us carry multiple types of insurance incase we get an in accident, or become ill. Do you plan on getting in a car accident? Or how about getting sick enough to need to see a doctor? Nope, me either, yet we pay for this insurance every month just in case.

Now how many times is your family going to eat this week? A family of four eating three times a day will eat 84 meals, that’s not counting snacks. Yet the average family has less than a weeks worth of food stored. To me its just prudent to have an insurance policy that will guarantee my family will be able to continue doing something we do multiple times a day?

We have become a society dependant on a grocery store that uses “just in time” delivery system. The process of getting food from harvest (from places all around the world) to your table is very complex. The more complex something is, the more susceptible it is to failure. Failures caused by things such as not enough rain, wildfires, blight, price of oil and many more.

Another reason to store food now is that the price of it is going up now as shown in this Secret Wal-Mart Survey Shows Inflation Already Here, and many are expecting hyperinflation. Even if we only experience normal inflation, the prices today are probably still going to be lower than they will in a few months. Since much of the food you store will be eaten anyway, this is a way to save money. It has not happened in America to any large extent, but there have been many countries suffering from food shortages. Just search for “Global food shortage” in your favorite search engine, the amount of sites is staggering. Some of the information may be a year or two old, but things are getting worse, not better. Here are just two stories from mainstream sites; one from the Financial Post that says Forget oil, the new global crisis is food And another from the Washington Post that states Global Food Crisis: The new world of soaring food prices.
 
 
Food Storage Rules:

What makes a food “shelf stable”?
A shelf stable food is one that will not spoil for at least six months without refrigeration, when packaged and stored correctly. Some examples are canned vegetables, canned meats, white rice, dried beans, pasta and sugar.

FIFO: First in, first out.
This just means when you buy new food put it behind the old food to ensure the older food gets consumed first.

Store what you eat and eat what you store.

This is one of the core tenants of preparedness, or the golden rule of prepping. How do you put this into practice? Grab your prepping notebook and every time anyone uses a shelf stable food write it down, do this for two weeks. These are the foods that you should store and rotate.

This can work with frozen food as well, but if the power goes out, you have a limited amount of time before the food spoils. That is unless you have a generator to keep the fridge and freezer running.

There is caveat with “store what you eat, eat what you store”, I may catch some flak for saying this, but it doesn’t work for everyone. By that I mean, that it is not feasible to store the kinds of food they consume on a daily basis.

Many years ago, people cooked much of their food from scratch. Today, many meals are eaten out, or something that is precooked is thrown in the oven to reheat. I know many different kinds of people fall into this category, everyone from single parents, to folks with busy schedules. I’m not saying its right or wrong, heck my family falls into this category for a few different reasons.

How should people in this category prep? I can only tell you what we have done, which one of the things we have done is store some staples such as beans, rice, wheat berries, salt, sugar and other staples, stored in Mylar bags, with oxygen absorbers. Stored this way and kept in a cool dark room the shelf life is very long. I’ll cover this process soon.

Critics of storing foods that are not a part of our normal diet will say that eating foods that we don’t normally eat, like red beans and rice, will be a shock to our systems. While this may be true, it’s less of a shock then starving. I can also mitigate the shock with some over the counter medicines.

Is this the ideal way to stock up? Nope. Will we have wasted some money and have to give away or throw some of the food we have stored? Possibly, but I look at it like this. I spent roughly $100 on car insurance for my family last month. None of us got in an accident; do I think the money was wasted? Heck no, my peace of mind is worth that and more.

My wife and I have also purchased some books like “The Amazing Wheat Book“and “ Making the most of basics”. Make a point of learning to cook with basics, even if it’s just an occasional meal. Cooking with basics is like any other skill in prepping, it’s better to own the skill, before you need to rely on the skill.


Here are the links to the other food storage articles.

Food Storage Part One: Why Store Food And The Rules For It.
Food Storage Part Two: The Kind Of Foods That You Can Store
Food Storage Part Three: Shelf Life of Staples.
Food Storage Part Four: The Process and Enemies of Food Storage.
Food Storage Part Five: How much food should you store and where should you put it all?
Food Storage Part Six: Tips On Stocking Up and Affording it all.
Food Storage Part Seven: Food Boredom to Survival Cooking .

 
Please click here to vote for Prepared Christian as a top Prepper site!

If you liked this article please think about sharing it on the social media listed below, thanks!

Preparedness Club

The Storage, Filtration And Purification Of Water.

The Storage, Filtration And Purification Of Water

Aside from oxygen, water is the one thing we cannot live without for very long. In fact the rule of three’s states the average human can only go three days without water, but don’t kid yourself, those last two wouldn’t be pleasant. I think that water filtration/purification and storage should be near the top of most preparedness plans.

How much water a person uses per day varies based on the climate, level of activity and other factors. According to The Mayo Clinic The average person should drink 8 – 8 ounce glasses of water a day (64 ounces of water is ½ gallon). If temperatures are warm, or activity is high water intake will be higher.

In an emergency situation clean water may not be available. Look at the problems with Cholera in Haiti going on right now, or what happened in India after the Tsunami. There are two ways to mitigate this, one is by having water stored ahead of time and the second is by having a means to treat the water after.

In a survival situation the research I have done shows that an average person will use around two gallons of water per day, this includes drinking, for food preparation, and hygiene. I have seen recommendations that say from one liter to one gallon are enough. Here is a great place for “I would rather have it and not need it, then need it and not have it”.
 
 
Storage:

As mentioned above, store two gallons of water per person per day. I recommend having a minimum of at least one week worth of water stored for each person and pet in your family. This can be done with cases of water bottles, individual gallons or with multiple gallon containers like a 5, 15 or 55-gallon drum. For animals the amount of water needed is going to depend on the size, I would think a liter or so a day would be more then enough for most.

Water in bottles or single gallon containers will most likely have an expiration date. It’s not that the water goes bad, but the plastic can leech into it. For this reason, all water stored in plastic containers of any size, should be rotated every six months. If you want to just empty the container and refill that, I would think that should be just fine as any leeched chemicals will go out with the old water.

As I mentioned, water stored for any length if time won’t go bad (aside from leeching), but it could taste “flat”. To remedy this you can aerate the water by pouring it from one container into another and back a few times.

If you want to use recycled containers such as milk jugs, 2-liter or 5 gallon to55 gallon barrels, here are a few things to keep in mind. If the container is recycled then I would suggest first making sure the recycled container was food grade, look for recycle triangle (usually found on the bottom). Here is a website that explains what the different numbers inside of the triangle mean, anything with a 1 or 2 is good.

Be aware that the water can retain the smell and taste of what was originally stored in it. If you cannot tell what was stored in it, it might be best to buy new. It might cost a bit more, but at least your water won’t smell like pickles or something worse.

This is a barrel very similar to mine, but a bit cheaper. At the time I am posting this Amazon has a shipping option that is free, I do not know if this expires after Christmas or not. If it does not expire, then this is a very good price.

For the barrel to be usable, you will also need a bung wrench and a pump. The first pump listed is the one I have, I’m most likely going to upgrade to the second one, because the quality is just much higher.

If you choose a 55-gallon barrel keep in mind the weight when full. Answers.com says that “A gallon of water weighs approximately 8.34 pounds, 55 gallons weigh 55 x 8.34 = 458.7 pounds”

If you want to be able to move the barrel, then you’ll need to use a dolly. There are some made to fit a 55 gallon drum, like the first dolly listed. Or you can do what I did and save $30 and buy a furniture dolly with a high weight limit, either will support the weight of a full 55 gallon barrel.


Water Collection

Unless there is access to a well, no one can store enough water to last them indefinitely. As a result, water collection is something you should give some thought now. What natural or man-made bodies of water are near you? Lakes, rivers streams, ponds, swamps, swimming pools, hot tub, hot water heaters have depending on size, 40 gallons, the tank on the back of a toilet is another source. Not all of this water is fit to drink, but it could be used for other things such as hygiene, watering plants or a garden.

Another source of water, if you have the system in place ahead of time is rain catchment. Believe it or not, for every inch of rain that falls on a catchment area of 1,000 square feet, you can expect to collect approximately 600 gallons of rainwater. Ten inches of rain falling on a 1,000 square foot catchment area will generate about 6,000 gallons of rainwater! The supplies consist of a barrel, gutters a downspout and possibly an attachment for the downspout.

How much rain water can you collect in a storm?

Here are rain barrels similar to the ones that I use. The reason that I like these is that near the top there is an overflow opening that you can attach a hose to and connect it to another barrel. I paid less then half the price for mine, which I purchased at a farmers market. If you want to be able to have more then one barrel connected to the same down spout, then I recommend looking for one with a similar design. Here also is the rain diverter that I have.


Water Treatment

Purify and filter; are two terms that are often used interchangeably, but there is a difference. Both will remove bacteria (Campylobacter Jejuni) and protozoan cysts (Giardia Lamblia, Cryptosporidium) from contaminated water. Only a purifier will remove viruses (hepatitis A, meningitis) from contaminated water.
 
 
Filtration:
There are many types of water filters from personal bottle filtration units to large family size, multiple filter units. As mentioned above a filter will not kill viruses, after filtering water, it can be boiled to kill viruses.

You can also find instructions on how to make your own. I would only recommend this if you do not have any filtration system in a survival situation, you should also boil the water to kill any virus that it may contain. Here are instructions to make a home made filter.
 
 
Purification:

Boiling:
According to the Wilderness Medical Society, water temperatures above 160° F (70° C) kill all pathogens within 30 minutes and above 185° F (85° C) within a few minutes. So in the time it takes for the water to reach the boiling point (212° F or 100° C) from 160° F (70° C), all pathogens will be killed, even at high altitude.

Bleach:
Use bleach that has no added scent. Here are guidelines from the CDC on using bleach to make water safe.

If tap water is clear:
1. Use bleach that does not have an added scent (like lemon).
2. Add 1/8 teaspoon (8 drops or about 0.75 milliliters) of household liquid bleach to 1 gallon (16 cups) of water.
3. Mix well and wait 30 minutes or more before drinking.

If tap water is cloudy:
1. Use bleach that does not have an added scent (like lemon).
2. Add 1/4 teaspoon (16 drops or 1.5 milliliters) of household liquid bleach to 1 gallon (16 cups) of water.
3. Mix well and wait 30 minutes or more before drinking.

If you store water that you are adding water to the container from the tap. If you add the recommended amount of bleach for clear water, it will kill any pathogens that might sneak in, this is more of a concern if you have a well.

Iodine:
Iodine tablets are effective at killing many things except Cryptosporidium. Some people are allergic to iodine and cannot use it for water purification. Iodine tablets will also leave a chemical after taste and should be a short-term solution. With the drawbacks of iodine tablets, they’re not my first pick; if it’s a good fit for you then they might be a good addition to your BOB.

Chlorine:
Chlorine is one of the most common ways that water is purified, this is done by many municipalities. Chloramine or chlorine dioxides are some of the compounds that are used in water purification tablets.

Water purification tablets:
The active ingredient is often chlorine dioxide these are effective against bacteria, viruses and cysts, such as Cryptosporidium. Depending on brand, one or two tablets treat one quart of water, these also leave no after taste. These should be a short-term solution; this would be a good addition to a BOB.

Here are the Military Water Purification Tablets that I have.


Water Filters/Purifiers
There are a large number of products to treat your water, they range from sport water bottles with built in filters to large home systems.

Here is a water filter comparison chart . This shows a comparison of cost, cost of replacement filter, things that are filtered, price per gallon.

I don’t know what will work the best for you; all I can tell you is what I found in my research and what I chose to do.

We have a Berkey system at home, the gallons filtered per hour, the price per gallon and the fact that Berkey products are a purifier and not just a filter, make this an easy decision for me.

For our BOB’s I chose water purification tablets and the Berkey sport, but Katadyn has some nice filters to fit this need. The reason I went with Berkey is that it acts as a container and a purifier, not just a purifier.

SteriPEN is a technology that is new to me, here is what the manufacturer claims about it “SteriPEN products use ultraviolet (UV) light technology to purify water, destroying more than 99.9 percent of bacteria, viruses and protozoan cysts such as giardia and cryptosporidia.” I might look into getting one of these as well, it would be nice when needing to purify a lot of water quickly.
 
 
Random water information:

Well water:
Many people have a well as their primary source of drinking water. Well water is not necessarily safe, and should be filtered. Here is a good page from the CDC that explores wells and the concerns associated with them.

City water:
Here is an explanation on how many cities treat their water.
However, just because your water comes from the city, it does not mean it is always safe. There are many people that believe that fluoride is a poison in large amounts and that it should not be added to the water. I’ll let you do your own research, but I will say that Berkey makes a filter that will remove it if you want it out of your water.

Here is a recent report that shows that test’s in New York City recently showed elevated lead levels

City Officials: Tap Water Shows Elevated Lead Levels

Recycling water:
Water can often be recycled and used again.

Greywater is water that can be recycled from activities like bathing, laundry or food preparation and can be used for things like watering the garden.

Blackwater is water containing human waste. Even if there are ways out there to treat it, I’ll pass.

Here are some links that have a lot of miscellaneous information relating to water.

Preventing Travelers’ Diarrhea: How to Make Drinking Water Safe.

Water-Related Emergencies and Outbreaks

This page has a lot of links with random subjects relating to water .  It has everything from how to build a rain catchment system to building a fountain to a well drilling tutorial.

 
Please click here to vote for Prepared Christian as a top Prepper site!

If you liked this article please think about sharing it on the social media listed below, thanks!

Preparedness Club