May 10, 2024

Terrorists Making Dry Runs on Planes

Terrorists Making Dry Runs on Planes

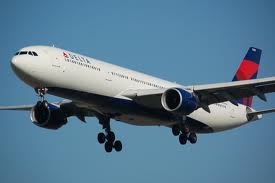
I read an article on article on October 11th that points out that terrorists are making dry runs to test airline security and procedures. The article points out that investigators obtained a memo that talks about recent probes or dry runs. From the report:

“A group of Middle-Eastern males boarded in DCA. Shortly after takeoff, one got up and ran from his seat in coach towards the flight deck door. He made a hard left and entered the forward lav, where he stayed for a considerable length of time! While he was in there, the others got up and proceeded to move about the cabin, changing seats, opening overhead bins, and generally making a scene. They appeared to be trying to occupy and distract the flight attendants.”

The article also says that investigators confirmed the incident with US Airways and the TSA, but that the TSA stated “the matter requires no further investigation at this time.”

The article goes on to say that several Air Marshals have said that the incident described above is serious, and that there have been several dry runs on other flights, but that “the TSA doesn’t want the flying public to be aware of the problems with terrorist probes.”

The article ends with a statement from an Air Marshal and industry insiders saying “We’re waiting for the next 9/11 to happen, because it’s not a question of if. It’s a question of when.”


What Can We Do?

I believe that terrorists are practicing dry runs to see where vulnerabilities are. I also believe that they would love to use planes in another grand attack. So what can we, the average person, do if we believe there is a terrorist dry run taking place on a flight we are on? I won’t tell you what you should or can do. That is for you to decide. I will just say what I will do. I will step in and help the flight attendants.

If we look back to the shoe bomber and the underwear bomber, they were stopped because passengers acted. If we go back to 9-11 and flight 93, because those passengers acted, they saved lives on the ground.

Sure, ideally there would be a police officer nearby every time one was needed to stop a violent attack. It would also be ideal if an Air Marshal was on every flight that had a dry run or an actual attack on it. Since that isn’t reality, I take personal responsibility for my safety and the safety of my loved ones.

Now I’m not saying to get physical with Middle Eastern travelers. In fact, I don’t believe racial profiling works. I do believe, however, that behavior profiling does work. I practice the Cooper Color Code on land and will continue to in the air. If I see people acting in a coordinated effort in a manner that passengers normally don’t act, I will be ready to act if the flight crew needs it or if I believe my safety is at stake.

I like to be as prepared for a violent confrontation as I can be. Sometimes this means I carry a firearm and sometimes, for various reasons, I can’t. Obviously, I can’t on an airplane. The TSA has limited what can be carried onboard, but there are still some options.
This link is to the Prohibited Items list on the TSA site. You’ll notice that most of the items listed must be checked, but some items that are allowed are:

• Scissors – metal with pointed tips and blades shorter than 4 inches are allowed, but blades longer than 4 inches are prohibited
• Tools – Wrenches/Pliers/Screwdrivers (seven inches or less in length). It might draw attention to board a plane with just one screw driver. Consider getting a small toolkit.

Some items that are not listed but should be perfectly allowable to carry onboard are:

(A disclaimer from the prohibited items page: It’s important to know that even if an item is generally permitted, it may be subject to additional screening or not allowed through the checkpoint if it triggers an alarm during the screening process, appears to have been tampered with, or poses other security concerns. The final decision rests with TSA on whether to allow any items on the plane. Also, please note that some dangerous items below are illegal in certain states and passengers will be subject to state law. It is a passenger’s responsibility to be aware that origination and destination cities may have local laws prohibiting the possession of these items.)

• Walking cane
• Flashlight; I would not try to bring on a “tactical” flashlight because of the disclaimer above. It should also probably be less than seven inches.
• Solid writing pen. Again I wouldn’t try to board with the tactical type pens.

If you bring a cane, you should probably be using it. I carry a flashlight often, if questioned about why I have it, I will give my honest answer; if something happens on board, I want to be able to see. A good solid pen with a notebook should not draw any undue attention.

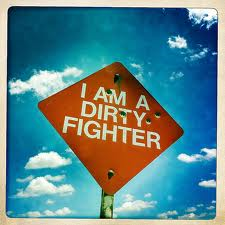
If you decide to travel without any of the above and must use force, remember that if you’re in a fair fight, your tactics suck.

I pray the Air Marshals and the industry insiders are wrong. I pray there is never another 9-11. However, like I said above, I believe the terrorists would love to have many more. It could fall to the passengers on board to stop it.

 
If you liked this article please think about sharing it on the social media listed below, thanks!

PreparednessClubOne

Living Off The Land: Delusions and Misconceptions About Hunting and Gathering

The Following article was written by Ross Gilmore and is reposted with his permission.  The original article can be found here at his site, Wood Trekker.

From time to time I will see someone say that their bug out plan is to head to the woods and live off the land.  I have always thought that this was a bad idea, but only had conjecture to back up my opinion. Rob has done a fantastic job of crunching numbers and shows just how much someone would have to hunt and gather to bring in enough calories.


Living Off The Land: Delusions and Misconceptions About Hunting and Gathering


Ah, living off the land. Thriving in the wilderness with the use of your skills. It is the ultimate goal of many bushcrafters and survivalists. Numerous posts have been written on forums about this subject, and as soon as one ends, another is started. Of course, actual evidence is rarely presented. We often fall back on positions such as “our ancestors did it, so clearly I can do it”, or “I was out last week and saw a bunch of cattails and barriers, so my food sources are secure”.

The problem is not made any better by so called experts in the field, who fuel the myth that they are feeding themselves in the wilderness. I vividly remember watching Andrew Price, host of A-Z of Bushcraft in one of the episodes, waking up in the morning, walking a few feet next to camp, gathering a few berries, and then turning the the camera and saying “breakfast is served”. Ray Mears, aside from his excellent series, Wild Foods, has numerous instances where he gathers meager resources and then implies that his food requirement have been met. Of course, none of them ever bother to calculate or present actual caloric values, or discuss the long terms consequences. Similarly, people like Dave Canterbury, who discuss at length hunting in wilderness living conditions, never actually do the math of how much game has to be killed to justify the weight of that shotgun being carried, or whether the numbers would work out at all.

For the past year I have been attempting to gather some actual numbers on the subject, so we can have a more meaningful conversation about what it would take to sustainably feed a person in the wilderness, and consequently, what tools may be suited for the task. I must admit, I have been slacking with the project because of its tedious nature. Last week however, a reader referred me to a source related to the Chris McCandless post, which provided me with some of the information I was searching.

Samuel Thayer, author of the books Forager’s Harvest and Nature’s Garden, wrote an essay related to the starvation of Chris McCandles titles Into the Wild and other Poisonous Plant Fables. While much of the essay focuses on disproving theories of poisonous plants, the last section discusses actual caloric requirements for a person living in the wilderness, and what resources that would require.

So, let’s assume a scenario where a person will be going into the wilderness with the intention of living off the land. He will practice wilderness self reliance, he will thrive in nature, and whatever other cliché you want to insert here. Let’s also assume for the moment that there are no hunting or fishing regulations that we have to comply with, and let’s assume that the person has all necessary equipment, including hunting and fishing tools. What would the person need to procure each day in order to live in a sustainable manner for a prolonged period of time?

Well, the first piece of the puzzle is the required calories. Citing Michele Grodner’s Foundations and Clinical Applications of Nutrition, Thayer calculates that a male who is physically active under wilderness living conditions would need approximately 3,300 calories per day. This number seems consistent with calculations done by long distance backpackers, who usually aim for a bit over 3,000 calories per day. So, to maintain one’s physical condition, and prevent weight loss, the person in question must consume about 3,300 calories each day. Of course, there are other nutritional requirements, but at a very basic level, to prevent death from starvation in the long run, this caloric minimum must be met.

The above caloric requirement for wilderness living should not be confused with accounts of short term survival, where a person stays in the wilderness, slowly losing body weight, until they are rescued. We have plenty examples like this from series like Survivorman, Naked and Afraid, etc. Those are not examples of sustainable hunting and gathering situations, and we should not have any delusions about the long term applications of such a starvation diet.

So, sticking with the 3,300 caloric requirement per day, what would it take to meet these caloric needs?


Sources of Calories

Meat

First let’s look at animal products, something to which I will jointly refer to in this post as “meat”, but should be understood to include both protein and fats. Meat can vary in caloric content anywhere from 40 calories per ounce for lean meat like squirrel and rabbit, all the way to 60 calories per ounce for very fatty meat like salmon. Using these numbers, we can roughly calculate the caloric value of each animal, and how much of it we would need to meet the our daily caloric requirements.

Red Squirrel: as Thayer calculates, at an average of 2.8 ounces of meat per squirrel (Michele Grodner’s Foundations and Clinical Applications of Nutrition), it would take 25 squirrels per day to meet the caloric requirements, or if also eating the internal organs and brain, about 16 squirrels per day.

Rabbit: at about 16 ounces of meat per rabbit (Michele Grodner’s Foundations and Clinical Applications of Nutrition), you would need about 4 of them per day, or 3 if eating all of the organs and brain.

Salmon: assuming you are catching Sockeye salmon, they average 6 pounds (96 ounces) (Kenai Peninsula Borough Commercial Fishing Industry State Records, 2012). Since salmon meat is rich in fat, we can assume 60 calories per ounce (USDA SR-21), which would mean one salmon would give you 5,760 calories, or a little under two days of food.

Clams: clam meat varies in caloric density from about 33 calories per ounce to about 42 calories per ounce. (Interstate Shellfish Sanitation Conference, 2013). To satisfy the required 3,300 calories per day intake, you would need about 5 pounds of clam meat per day (using 40 calories per ounce for the calculation). In order to get 5 pounds of clam meat, you would need about 320 medium size clams. For each ounce of meat, you need about 4 medium size clams. (Interstate Shellfish Sanitation Conference, 2013)

Raccoon: while many people would not eat raccoon meat due to its high content of parasites, it is technically edible. The meat is fatty, averaging about 72 calories per ounce. (USDA SR-21) The weight of raccoons varies widely from 10 to 25 pounds for adults. The average listed size is about 25 pounds for an adult. That should provide approximately 10 pounds of meat once it is gutted, skinned and deboned. At 72 calories per ounce, such a raccoon will provide about 11,520 calories. However, keep in mind that these numbers reflect the calories if the animal is cooked to preserve all of its nutrients. In order to make it more palatable, people usually cook raccoon meat to remove most of the fat. If you do that, the caloric content will drop significantly. Assuming you save all of the fat however, a 25 pound raccoon should provide sufficient calories for 3.5 days.

Turkey: a good size turkey will yield about 10 pounds of meat (160 ounces) when processed. The caloric value of processed turkey meat is about 45 calories per ounce (USDA SR-21). Therefore, a turkey will produce 7,200 calories in total, or a bit more than 2 days worth of caloric requirements.

Deer: a mature buck typically yields about 70 pounds of meat (1,120 ounces) (University of Wisconsin study 2006). Venison is a lean meat, with about 53 calories per ounce (USDA SR-21). The meat of a mature buck will therefore give you 59,360 calories, which will be sufficient for 18 days of food at the 3,300 calories per day requirement. If you are eating the internal organs as well, that will probably get pushed to about 20-21 days of food.

Black Bear: a large black bear will produce about 100 pounds of meat (1,600 ounces) once processed. Bear meat has about 43 calories per ounce. (USDA SR-21) So, a large black bear will give about 68,800 calories total. That would be sufficient calories to satisfy the caloric intake for 21 days. 

The table below gives a general summary of the results. The numbers you see in the last column for animals needed each day to meet the caloric requirement, the number in parenthesis represents what is needed if internal organs are preserved and eaten as well as the meat. 


Meat

   
Type of Animal oz of Meat/Animal cal/oz of Meat Total cal/Animal Animals/Day
Squirrel 2.8 47 132 25 (16)
Rabbit 16.8 47 790 4 (3)
Salmon 96 60 5,760 0.57
Clams 0.25 40 10 320
Raccoon 160 72 11,520 0.29
Turkey 160 45 7,200 0.46
Deer 1,120 53 59,360 0.056 (0.05)
Black Bear 1,600 43 68,800 0.047


Plants

Now, let’s move to plant sources.

Cattail Roots: cattail roots, will yield about 8 calories per ounce (USDA SR-21; Revedin, A., et al. Thirty thousand-Year-Old Evidence of Plant Food Processing, 2010). This means that about 413 ounces or 26.5 pounds of cattail flour would be needed to meet that daily caloric requirements.

It should be noted (as pointed out by a reader in one of the comments) that Table 2 of the above study, Thirty thousand-Year-Old Evidence of Plant Food Processing, 2010 provides that cattail (Typha) rhyzome flour contains 266 kcal/100g, or 75 calories per ounce. That is much higher than the 8 cal/oz provided by the USDA and other sources. It appears the difference occurs because that table speaks of the caloric value of already processed and cooked flour. The article specifies that “The flour would have undergone a multistep processing involving root peeling, drying, and finally grinding using specific tools. After this, the flour needed to be cooked to obtain a suitable and digestible food.” Cattail rhyzome contains large portions that are inedible, such as the spongy layer covering the rhyzome as well as the fibers from which you have to remove the starch. As such, the numbers don’t appear to be contradictory. You may very well have a caloric value of 25 kcal/100g (8 cal/oz) for cattail root and 266 kcal/100g (75 cal/oz) for processed cattail root flour where the outer casing has been peeled, the fibers have been removed, and the resulting starch cooked. In the table here I have used the number for unprocessed cattail root, and the quantity you would need to get the necessary calories.

Parsnips and Similar Wild Roots: according to Thayer, at approximately 23 calories per ounce (Michele Grodner’s Foundations and Clinical Applications of Nutrition), about 9 pounds would be needed per day to meet the daily caloric requirement of 3,300 calories.

Blueberries: again, according to Thayer, at about 16 calories per ounce (Michele Grodner’s Foundations and Clinical Applications of Nutrition), you would need 13 pounds of blueberries per day to meet your caloric requirements.

Lingonberries: at about 5 calories per ounce (USDA SR-21), you would need about 41 pounds of lingonberries to meet your daily caloric requirement.

Acorns: once processed into a flour, after leaching out the tannic acid acorns will provide about 110 calories per ounce (USDA SR-21). That would mean that 30 ounces, or a little under 2 pounds of acorn flour would be needed per day to satisfy the caloric requirements.

Burdock Root: at about 20 calories per ounce (USDA SR-21), you would need about 165 ounces, or 10 pounds of unprocessed burdock root to meet your daily caloric requirements. If cooked, a large amount of the water removed, the pounds one needs to consume may be significantly reduced, but would still constitute more than what a person can eat in a day.


Plants

 
Type of Plant cal/oz of Plant Material Pounds Per Day Needed
Cattail Root (Unprocessed) 8 26.5
Parsnips 23 9
Blueberries 16 13
Lingonberries 5 41
Acorns (processed) 110 2
Burdock Root 20 10*


The above represent average numbers, both for the calories required per day, and the amount of food which must be consumed to provide those calories. Variations should be expected. Even so, it is evident that a person attempting to live alone off the land in the wilderness has a serious challenge on his hands. The amount of food required seems absurd, but as Thayer explains: “If this seems like a high volume of food, that’s because it is. We have sought, developed, cultivated, and become accustomed to calorie-dense foods for so long that most of us have never been without them. We’ve never had to eat food in volumes like this. When you realize that a stick of butter has as many calories as two and a half quarts of blueberries or seven pounds of broccoli, you can see why the innate human desire for calorie-rich, low-fiber food developed.


Gathering

The gathering of food has become a great area of teaching for survival and bushcraft instructors. Unfortunately, much of the teachings create a false impression of what it actually takes to feed oneself through gathering of food in the wilderness. As Thayer also noted, many such instructors teach, or imply through their representations that a very small amount of food is needed for a person to sustainably live in the wilderness. Whether the misrepresentations are intentional, or due to lack of knowledge is hard to say, but the results are the same-people fail to realize how much food must be gathered to sustain a person long term.

We have to make a clear distinction between “edible” plants and “food”. Just because something can be eaten, does not mean that it contributes to your caloric requirements in any meaningful way. Many staples of bushcraft teachings, such as dandelions provide virtually no caloric value. You can easily starve to death with a stomach full of such plants. In fact, it is not unlikely that a person may spend more energy gathering edible plants, than the calories he will get from consuming them. To effectively gather food in the wilderness, one has to know not only what is edible, but also what provides meaningful calories.

From the plants available and listed in the above chart, not surprisingly acorns provide the highest nutrition. I imagine it will be similar for other nuts because of the high oil content. If processed correctly, a person can certainly provide enough food for himself using acorn flour. The other plants that are readily available, including the all too popular cattail and burdock roots, are far less than ideal when it comes to providing sufficient calories for a person attempting long term living. Not only would it be difficult to supply yourself with enough of the plant, but consuming such large quantities would be impossible. We should also keep in mind that the plants I have listed here are the ones with relatively high caloric value.

On that subject, Thayer writes with respect to Chris McCandless, “If he didn’t get any meat, couldn’t he just eat more lingonberries and get all his calories that way? Absolutely not. He would have needed to eat almost three gallons of lingonberries per day. He’d probably be vomiting before finishing the second quart. No matter how many lingonberries were available to him, his body would have only accepted them for a small portion of his caloric requirement. This doesn’t make lingonberries “poisonous”; the same is true of virtually every food, although the appropriate proportions vary… The concept that foods can be eaten only in appropriate quantities is taken so much for granted that, to my knowledge, it has never been given a name in the medical literature. I call it themaximum caloric proportion (MCP). Some foods have a very high MCP, such as milk, meat, and potatoes. They are easily digested and contain few antinutrients or toxins, thus they are suitable as dietary staples. Others, such as cabbage, rhubarb, and raspberries, cannot serve as staple foods and are only suitable to supply small portions of the diet. As one travels north, there tends to be fewer plants with a high MCP; this is why hunter-gatherers from northern latitudes ate meat for the great majority of their calories.”

As a result, if you can not find the right plants and gather it on a large enough scale, or have simply missed the gathering season, one typically has to resort to meat for the majority of the required calories. So, let’s look at some of what is required in terms of providing sufficient calories through hunting and fishing.


Opportunity Cost of Hunting and Fishing

Before we look at specific examples, it is important to note that when we speak of hunting and fishing, activities which require that you bring specific equipment into the woods, we have to look not only at what you can successfully hunt, but also at the opportunity cost of that equipment. What I mean by that is that for each pound of equipment which you bring with you, you have to forego a pound of some other resource which you could have brought with you instead. Since we are assuming a person who is otherwise prepared for the wilderness, the most immediate opportunity cost is food. For each pound of gear that you bring, you have to leave behind a pound of food. So, when you bring a 7 pound rifle with you, you could have instead left it behind and brought 7 pounds of food. So, when we look at the equipment one may bring for such hunting, we have to see not only if it can get us any food, but also whether the food we can procure with it is more than the food that we could have brought with us had we not brought the equipment.

To complicate things further, we have to look not only at the weight of the food, but more importantly at the caloric content of that food. So, a pound of squirrel meat will give us 752 calories. On the other hand a pound of instant mashed potatoes will give us 1,664 calories. For this post, I will use mashed potatoes as a base line for calorie dense food that could have been brought into the woods. 


Fishing

First, let’s look at fishing. Fishing is a good way to procure calories because the equipment required is not heavy, and is relatively reusable. A large net, fishing rod, reel, lures, and a sizable spool of line will only add up to a few pounds. You guys have seen my lightweight fishing kit, which came in under one pound. A more robust and complete kit can be estimated to around 3 pounds. 3 pounds of gear has the opportunity cost (using the above base line numbers) of 4,983 calories, or about day and a half of food at the required 3,300 calories per day. From a simple numbers standpoint, this means that the first day and a half worth of food that you catch will go to offset the weight of the gear (which you brought rather than bringing food). Everything you catch after that is surplus.

The downside of fishing of course is the limited availability of resource reach areas. For example if you are lucky, and are in an area and the right time for a salmon run, as we saw from the above numbers, a single sockeye salmon will give you about two days worth of food. That means that the first salmon would offset the opportunity cost of the fishing gear, and every subsequent one will be pure food value. If you can catch one every two days, you will be able to meet your caloric requirements. The problem of course is that you may be a week late, and not find a single salmon because the run has ended; or, you may be in an area where no such fish is available; or you may be in an area where there is no body of water which carries any sizable fish at all.

Remember, it takes about 3.5 pounds of salmon per day to meet a person’s caloric requirements. If instead of a 7 pounds salmon, you were pulling out 3 ounce sunfish out of the water, the calculations would be very different. At approximately 50 calories per ounce of fish meat, you can do your own math to see how much fish you would need. I remember an episode of Ray Mears Extreme Survival where he caught a small fish while he was in the Rockies, and prepared it with some plants. It may seem like he has prepared a good dinner, but the reality is that the meal probably contains less that 300 calories, about a tenth of what is needed for the day if we are facing a long terms sustainability situation.

Even with all those considerations however, if you have selected an area close to a sizable body of water for your long term wilderness living situation, fishing is a good way to procure food because of the low weight and reusable nature of the gear, as well as the low amount of energy expenditure required.


Hunting

Now, let’s look at hunting as means of procuring food. Obviously, a hunter needs his tools. There are a lot of misconception from people who do not hunt that you can use primitive weapons, constructed in the woods, to effectively hunt. The difficulty of such a task is nearly always underestimated. Thinking that a person can construct a stick bow, or carve a longbow in the woods from an unseasoned piece of wood, and then go hunting with it in an effective manner is wishful thinking. Keep in mind that a hunter with a modern state of the art bow, with modern optics and range finder, will rarely take a shot at over 50 yards. If you are hunting with an improvised bow, lower that range to about 25 yards. Now, go measure out 25 yards and try to think of what it would actually take for you to get to within 25 yards of a deer. Then, think of what accuracy would be needed to hit a squirrel at 10 yards with that same bow. You will quickly gain a healthy appreciation for modern weapons.

Most people who are contemplating long term wilderness living will use some type of firearm, much like Chris McCandless did during his attempt. In recent years, Dave Canterbury, former co-host of Dual Survival, has popularized the single show 12 gauge shotgun as a weapon for long term wilderness living. In this post I will not address any issues regarding whether I believe that to be the best choice, but I will simply use it as a base line for purposes of discussion. A single shot 12 gauge shotgun weighs approximately 6 pounds (H&R Topper Deluxe with synthetic stock). Using the number we previously calculated for calories per pound of food which we could have brought into the woods (1,664 cal/lb), we can calculate that a 6 pound shotgun has the opportunity cost in terms of food of 9,984 calories, or about 3 days worth of caloric intake. That would mean that the first three days worth of food which you kill will go to offset the weight of the gun (keeping ammunition weight aside for now). So, if your trip is less that three days, even best case scenario (you being able to successfully kill enough game each day to meet the 3,300 calories per day requirement), you would be better off simply bringing your food with you. That way the availability of food is guaranteed.

For trips longer than three days, the gun would theoretically be the better bet, assuming you can secure enough food with it. So, let’s look at what that would entail. Let’s assume that you are now hunting small game with lightweight shotgun shells (2 3/4 shells with 1 oz load). Each such shell weighs 1.4 oz. So, for each shell fired, we have to add that weight to the opportunity cost, meaning, for each box of shells, we could have simply brought food with us. We than have to see if the numbers work out.

As I was saying, let’s assume you are hunting small game. As we established earlier, it would take 25 squirrels to provide enough meat for a day’s worth of calories (3,300 cal). Killing 25 squirrels with the above ammunition would require 35 ounces of shotgun shells. Using our caloric value for instant mashed potatoes from above at 104 calories per ounce, the same 35 ounces if brought in the form of mashed potatoes instead of shotgun shells would give us 3,640 calories, more than what you would get from the squirrel meat. That means that if you are hunting squirrel with shotgun shells, you will never procure enough meat to offset the weight of the gear that you have to bring. You will be better off bringing food with you rather than the equivalent weight of ammunition. That is not to mention the weight of the shotgun itself, for which you could have brought an additional 3 days worth of food.

The numbers of course look much better when we consider larger game. If we are hunting rabbit, 4 of them would give us the caloric requirement for a day. That would mean we would have the expand 4 shotgun shells, at a total weight of 5.6 ounces. The equivalent weight of mashed potatoes will only give us 582 calories. In that instance, again, assuming perfect accuracy and availability of sufficient targets, the shotgun will be the better bet. The numbers of course look even better when hunting large game like deer.

A possible way to address the problem with small game hunting is to use different ammunition. While a shotgun shell weighs 1.4 oz, a .22LR cartridge weighs 0.1 oz. 25 squirrels will require only 2.5 ounces worth of .22LR cartridges, making it a viable option. The solution proposed by Dave Canterbury is to carry an adaptor, which inserts in the shotgun, allowing you to fire .22LR bullets. While the approach is viable in theory, if that is the route you chose to take, keep in mind that this is quite possible the least accurate way to fire a .22LR bullet. A non properly bedded, 10 inch rifled insert will give only marginal accuracy, made even more difficult by aiming only with the aid of a bead sight. You should adjust your ammunition count accordingly. After all, the goal here is to kill game, not to just fire ammunition.

Lastly, all of the numbers provided in this post assume 100% accuracy and unlimited availability of any particular resource. Obviously that is not the result in reality, but here I am assuming best case scenario. Success rates for hunting, or hunting strategies are beyond the scope of this post. The only thing I will say on the subject is to be careful when extrapolating success rates for a wilderness living situation based on anyone’s success rate when hunting closer to home. A lot of hunting these days is done on people’s personal property and close to civilization. That has a huge impact on game centralization. Food plots, open terrain of farms, fields, and roads are a great attractant to animals, which in turn become familiarized with people. Hunting in such an area is very different from going deep into the woods and attempting the same thing. One way is not necessarily better than the other, but there is a danger in trying to extrapolate your possible success rate when hunting in a wilderness living situation based on success rates in the woods behind the house.


Trapping

I have added a trapping section to the post since I first published due to several comments requesting information on the subject. The reason why I didn’t originally include a section on trapping is that an animal caught through trapping has the exact same caloric value as an animal caught through hunting. The ease of hunting, trapping, or gathering is beyond the scope of this post. For all of the numbers I have presented here, I have assumed 100% success rate and infinite availability of the particular resource.

I will discuss a few of the legal issue involved with trapping, but I will mention a few things here.

First, it is very hard to get data on trapping in the wilderness. The reason is that most trap lines are run close to home for reasons I will explain in the section on legal considerations. As a result, it is hard to find data from an actual wilderness trap line, so some of the aspects of trapping during long term wilderness living are hard to address.

Also, just like with hunting, be careful when extrapolating success rates for wilderness trapping conditions based on trap lines run close to home. Around where I live, there are large numbers of raccoons. I saw five of them walking through the parking lot two weeks ago. It is a different story when you are actually in the forests.

As I will explain below, trapping, just like hunting, requires gear. You will have to bring your traps with you. What traps you use and their size will vary greatly depending on what animal you are trapping and where you are doing it. Factor that weight into your calculations and determine the opportunity cost to see if the numbers work out under the specific conditions.  


Legal Considerations

Lastly, we have to get back to that issue which we put to the side earlier, the law. Assuming we do not wish to be poachers, and are actually contemplating living in the wilderness within the real world rather than some imaginary scenario, we have to comply with regulations. Hunting seasons will vary trough different areas, but for most species, especially large species, it will be quite limited. For example, in the State of New York (southern region), deer and bear seasons are from Nov 16 – Dec 8; turkey season is from Oct 1 – Nov 15 in the fall and May 1 – May 31 in the spring; cottontail rabbit is from Oct 1 – Feb 28; gray and fox squirrel is from Sept 1 – Feb 28; grouse is from Oct 1 – Feb 28, etc. There are a few species that can be hunted year round, such as red squirrel, porcupine, rock pigeon, and woodchuck. As you can see however, the limitations are severe.

Above we calculated that a mature white tail buck will give us about 21 days worth of calories if properly processed and preserved. Let’s assume that you can supplement it with other sources of food, and extend that time to a month. If you are hunting deer lawfully, that would mean that to provide sufficient calories for the full year, between the dates of Nov 16 – Dec 8, you will have to kill 12 mature deer in that 3 week period. You have to average 4 deer per week. The practical difficulty with such a task is not the only problem. Most states have restrictions on the number of deer that can be harvested. In NY it is usually 1 or 2 per year.

Now, using New York State as an example, let’s see if the necessary calories for a person for a period of one year can be legally acquired through hunting. The generally available large game would be deer, bear, and turkey. In certain areas, the hunting of other large game like elk, moose, duck and geese may be legal and available. In NY we have good access to duck and goose hunting, but no elk or moose hunting. So, let’s look at the generally available game. Let’s assume that you have two buck tags, one bear tag and four turkey tags (two spring and two fall).

One black bear gives us 68,800 calories. Two bucks, at 59,360 each will give us 118,720 calories. Four turkeys at 7,200 calories each gives us 28,800 calories total. Combined, the bear, deer, and turkey give us 216,320 calories for the annual hunting season.

The caloric requirements for one person for one year based on the 3,300 daily requirement we used above, would give us 365 days times 3,300 calories per day, for a total of 1,204,500 required calories per year.

So, assuming you are a skillful hunter, and luck was on your side, and you managed to fill all of your tags (one black bear, two deer, and four turkey), that will still leave you at a caloric deficiency for the year of 988,180 calories. In other words, you will have no food for 299 days out of the year. If available in your area, you may be able to decrease the deficit by hunting other large game if available, like elk, moose, and duck, although, it appears that a large deficit will remain.

Just to give some perspective, assuming that a duck or goose provides the same amount of calories as a turkey, it would require 137 ducks or geese to satisfy the above caloric deficit (assuming no legal limit on the number you can harvest). Assuming you are hunting those ducks with a 3 inch shotgun shell with a 1 3/4 load, which weigh 2.2 oz each, and assuming perfect accuracy, that would require about 19 pounds of ammunition.

On the other hand, you will have to kill or trap a whole lot of squirrels to make up for the deficiency, approximately 7,486 squirrels, which if hunted with .22LR ammunition, and assuming perfect accuracy, would require about 47 pounds of ammunition.

Trapping is also an option, but you have to keep a few things in mind. First, trapping, just like hunting is regulated and only allowed during certain seasons. Second, the way you can trap is heavily regulated. Deadfalls, snares, hooks on trees, and virtually all DIY traps are not allowed. The regulations are very specific as to exactly what trap you must use for each animal. Third, trapping is generally only allowed for furbearers. In most areas you are not allowed to trap game animals. Some furbearers like beaver are edible, others not so much. Last but not least, regulations typically require that you check all of your traps every 24 or 48 hours. For most people that places serous restrictions on where traps can be placed and limits the size of the trap line. The result is that most trap lines are run close to home with the few exceptions for people who travel deep into the woods and then live there for the trapping season.

The alternative is that you need to systematically exploit another abundant resource such as large scale gathering and processing of acorns when in season, or moving to take advantage of large scale fish migrations and then catching them with nets, fishing wheels, etc. where the law allows.

Do the numbers work out? You do the math. I think we get a better appreciation for why high calories foods such as pemmican and corn meal were so highly valued and commonly carried by woodsmen in the past.  

I don’t write this to discourage anyone from attempting the challenge, nor do I believe it to be impossible. In this post I am simply attempting to provide some more solid data that can be used to make a realistic evaluation of exactly what it would take to thrive alone in the wilderness. As Thayer writes: “In a long-term subsistence situation, food is the priority. In former times, the native people of the Far North planned each move according to food availability… In a short-term survival situation, food is of minor importance. However, in long-term survival or “living off the land,” it is of paramount importance.”

There was a time when men who ventured into the wilderness knew what resources were required, and how much of them had to be brought along. Their accounts often refer to base camps, cabins, and food stocks being carried on horse back, mule train, or by dog sled teams. Somewhere along the way we seem to have lost the realistic grasp on those requirements, and were left with nothing more than romantic musings and conjecture. 


Propane for Fuel Storage

Propane for Fuel Stroage

 
Energy is one of the five basic human needs. We use it to cook, to see and for power, among other things. For many reasons, propane is my fuel of choice to store and use if/when the grid goes down for any length of time.
 
Storage

Propane does not go bad like some of the other fuels and has an indefinite shelf life. There are multiple storage sizes; the 1lb, the popular 20lb and even some 200lb tanks that are available at various hardware stores. Many use propane for their primary fuel source and have the much larger tanks that are filled only once or twice a year. Before you decide to store larger tanks of propane, you should check local laws.
 
Availability

I’m sure this is not the case everywhere, but where I live there are two propane companies within walking distance, and a couple more within twenty miles. That’s not counting all of the self-serve propane stations scattered at various gas stations and other businesses. A note about these self-serve stations; they are much more expensive here than taking the tank to a company to have it refilled. They are, however, a good way to trade in your older tank for a new one.
 
Utility

This is one of the major reasons I decided to go with propane. There is just so much you can do with it. There are camp lights, camp stoves, grills, portable heaters, generators and even some appliances that can run on propane. Here are some instructions on filling the smaller 1lb tanks from a 20lb tank.
 

Power

As stated, there are some generators that run on propane and some can also be retro-fitted to accept propane as a fuel source. I have heard that generators will use more propane than gas. If that’s true, in my opinion, the point is negated because of how much easier it is to store large amounts of propane versus gasoline. I checked on the conversion for our generator and was told I needed to send them the carburetor, that they would modify it and send it back for $150.
 

Final Thoughts

I personally believe that if we were to see a prolonged grid down event, propane would be available longer than gasoline. The main reason for this is that gas would be used to run most generators and to fuel vehicles (if they’re running). In suburbia, people generally only use propane for their grills and usually have just the one tank.

 
If you liked this article please think about sharing it on the social media listed below, thanks!

PreparednessClubOne

Preparing You Family For Combat

If you carry a firearm for self-defense, have you prepared your family for what they should do if you have to use it to protect them or yourself? I don’t know about you, but to me, having to use deadly force is definitely a version of the stuff hitting the fan. Making sure your loved ones know what to do, before, during and after can protect them from many negative impacts. Here are some general thoughts on how you prepare your family.
 

Before

My wife and I both have our permits to carry. When we got them, I came up with some tactics for us. If there is a deadly force encounter, I am the one to respond. My stepsons lost their father at very young ages. They cannot lose their mother. Whether I were killed or, for some reason jailed, she would still be able to care for them. I know there are police officers who put their homes in only their wives’ name for similar reasons. If they are sued they can’t lose the house.

When we go out to eat, I sit facing the door. This way I can stay in condition yellow and be aware of who is coming in. If we sit on the same side in a booth, I sit on the outside just in case I need to act.

There are a couple different companies that offer a type of “carry insurance” that can aid in legal and other expense incurred from the need to use deadly force. There may be others, but the two I am aware of are, US Concealed Carry Association (USCCA) and Armed Citizens’ Legal Defense Network, Inc.. I’m not endorsing either one but simply making you aware of available options. I had USCCA coverage for a while but, for financial reasons, no longer carry it. When I am better able to afford it, I’ll look at both options again. I note this here because a legal defense could be a bank-breaking financial burden.

Our home security plan has modified over the years as the kids have gotten older but the core is essentially the same. Trudee calls police while I lock, load, watch and listen. If the kids need me, I fight to them. Otherwise, everyone stays put and we wait for police. The oldest child isn’t old enough for a firearm, so he has kept a bat by his bedside for years. This helps him feel safer and better prepared, just like a firearm at my side does for me.
 

During

I am right handed, so I try to keep Trudee on my left side. If I need draw my firearm, I can do so and she won’t be in the way. I can also use my left hand to tuck her behind me if needed. That way she can look for cover while I engage the threat. We have talked to the kids as well and they understood that if either of us ever had to use force, they were to immediately get to cover and concealment as safely as possible. I explained what cover and concealment are to them, and gave them examples of each in some of the places we go.
 

After

If you have to use force, your family should tell police or anyone else that they will need to speak to either you or your lawyer. If police request to search your home, your family should tell them “not without a warrant”. They should then alert you or your attorney.

The entire family might go through a rollercoaster of emotions after a critical incident. There is nothing wrong with seeking counseling for the entire family to help you all process what has happened.

Some might think I’m instilling fear in the kids but I disagree. By knowing that bad things happen and teaching them how they can and should respond, they are empowered, more inoculated and better prepared should, God forbid, any of these things actually ever happen.

 
If you liked this article please think about sharing it on the social media listed below, thanks!

PreparednessClubOne

Learning as We Go

My wife Trudee wrote the following article.

Learning as we go

As some of you already know, Chris and I live in Minnesota. What some may not know is that it gets pretty warm here in the summer. At the time of this writing, it’s 94 degrees with 37% humidity. I’m very grateful for the low humidity level, as our central air stopped working properly on Thursday! Unfortunately, I don’t tolerate ANY heat very well.

Chris and I decided to purchase a portable air conditioning unit this past spring, to keep our room cooler while we sleep. Little did we know at the time that the AC unit would end up being one of our best preps yet! (Okay, that’s MY opinion! hehehe)

We’ve talked about what we would do to keep the house warm in the winter if our furnace wasn’t working for whatever reason. We never gave much thought to what we would do if our central air stopped. Thursday night, we found out!

It was just after supper and I had just finished cleaning up the kitchen. I hadn’t had the oven on and couldn’t believe how warm it was in the house. The thermostat read 81 degrees and the outside AC unit sounded like it was running normally. I checked a few of the air vents to see if there was normal air flow. The crankiness started upon realizing there wasn’t much air movement at all.

Ladies, I don’t know how many of you have experienced hot flashes but that’s where I’m at in life right now and I don’t like being hot on a NORMAL day. I’m sweating from being in the kitchen, discovering that the AC isn’t working properly and having a hot flash on top of it all. This is one of those times when I have to be so grateful for God’s beautiful grace because I have NONE.

We’ve had a service plan through our natural gas supplier for years and years. We’ve had to use it enough that it has been worth the $17.95 per month and then some! We consider that plan a prep. It covers our furnace, gas drier, water heater and stove. We added our AC unit to it a few years back, thankfully.

I tried to schedule a service appointment online but the soonest was 5 days out and the next day was supposed to be 92 degrees! They’re usually so much faster than that but I’m guessing budget cuts have dwindled their service technician staff. I tried calling, hoping they would have something different. No such luck! I set the appointment up for 5 days out and set about the task of trying to get the house cooled off.

Chris and I share a home office. It’s on the top level of our small 4-level-split entry home. That top level is ALWAYS the warmest. Hot air rises and all that! (You can’t see it but I snarled when I said that.) Our bedroom is at the end of the short hallway that our home office shares. I decided that since we spend the most time in those rooms, I would do what I could to cool only those rooms.

I knew I had a spare shower curtain tension rod and I had just seen some black landscaping plastic in the garage. Remember now, we’re both unemployed and practicing making do with what we have. We have duct tape! hehehe I set the tension rod up to fit between the walls of the hallway and duct taped the black landscaping fabric to the tension rod. It proved to be a good makeshift barrier to keep the cooler air in our bedroom and office.

The portable AC unit is set up to vent out our bedroom window. Leaving our bedroom door open with a fan blowing the cooler air into the office helped Chris be able to work on the blog and me to be able to study. Once we were done for the day, we closed our bedroom door to keep it nice and cool for bedtime.

I’ve had to spend today in the bedroom as well. I’m thankful we have the option and I’m thankful for being a prepper. I knew what we would do to keep a room warm and similar principles are used to keep cool!

Thank you, Chris, for taking such good care of me while I hid from the heat!!
 
Chris says: We made it through the last five days or so and the AC is now fixed. Living in Minnesota, I have given a lot of thought to what we would do if we lost heat for an extended period. I’ve thought about how to keep cool in a general sense but never came up with a plan. Trudee knocked this out of the park, hanging that black plastic up kept the two rooms cool enough for me to work in the office.

To me, the two biggest assets a prepper can have are: thinking ahead and making do with what you have. We can’t think of everything but we can figure out how to get by!
 
 
If you liked this article please think about sharing it on the social media listed below, thanks!

PreparednessClubOne

Are You Prepared to Use Violence to Stop Violence?

Fight Violence with violence

Are You Prepared to Use Violence to Stop Violence?

If asked, “are you willing to use violence to stop violence against you or a loved one?” many of us would answer “yes”. I know I would. The truth is, unless you’ve been tested, you really don’t know. During the last couple of months, I have put in a lot of drive time, listening to the audiobook “On Killing” by Lt. Col. Dave Grossman. This book helped firm up my understanding of humans and their capacity and willingness to use violence. In short, the vast majority of human beings are not wired to use violence on one another.

Lt. Col. Grossman goes into great detail to explain how, through the earliest of American wars; the Revolutionary War, the Civil War and the World Wars, the majority of the men fighting them would purposely miss what they were shooting at. He explained how the aversion to killing another human was so strong that a trained soldier often times would not shoot another, even if it meant losing his own life.

Leading up to the Vietnam War, great effort went into figuring out how to train men, not only to kill but to do so without hesitation. Today’s military are some of the most efficient warriors in the world’s history.

Someone might say that an aversion to violence is a good thing and that Jesus said, “Those who live by the sword, die by the sword”. I would agree with Him, but He did not say we should never use the sword. In fact, I believe that if we willingly decide not to act in our own defense or in the defense of another innocent person, we have sinned. We now bare blood guilt and are accountable for all of the future acts of violence our attacker commits. We also bare the guilt of all the good that we or the person we did not defend would have done.
 
 
Less Than Lethal Force

It is my belief that the majority of humans have an aversion to using any form of violence against one another. I’ve mentioned before that I took a real world martial art called “Haganah”. I noticed that almost all new students hesitated using even minimal force to strike their partner. These are people who are aware of the need to learn to defend themselves but have to be trained that it was acceptable to strike another person. I was a wrestler in high school and had a few minor altercations as a young adult. Physical violence wasn’t completely new to me. I still had to retrain myself that using force was not only acceptable in this setting, but encouraged. I trained with some students who hesitated striking with even 10% of their force even after months of training.
 
 
10-80-10 Rule

In the book The Survivors Club, author Ben Sherwood explores a theory developed by a man named John Leach called “The 10-80-10 rule”. In summary, the rule states that the top 10% of people in a crisis excel; they think clearly and take immediate action. The middle group comprises 80% of people; they are “quite simply stunned and bewildered”; “reasoning is significantly impaired and thinking is difficult”. The last 10% of people are the “ones you definitely want to avoid in an emergency”.

A few pages later, he explains something called ‘behavioral inaction’; “The current theory of behavioral inaction goes like this: As your frontal lobes process the site of an airplane wing on fire, they seek to match the information with memories of similar situations in the past. If you have no stored experience of a plane crash, your brain can’t find a match and gets stuck in a loop trying and failing to come up with the right response. Hence: immobility.”

While he was talking about a plane crash, I believe the theory carries over to any type of critical incident. In terms of violence I think that the first 10% are capable of violence, either to harm or to defend. The middle 80% of people are those who will freeze either initially and then take action or remain frozen. The last 10% of people are made up of those who just shut down.
 
 
More Than Fight or Flight

You’ve probably heard of “fight or flight”, but there are at least five possible responses. They are fight, flight, freeze, posture and submit.

Fight – This is a group of people who have a capacity for violence, either to hurt or to protect. Sheep, Wolves and Sheepdogs is an excellent depiction of those who’re willing to use violence. The wolves are those who prey upon others (the sheep). Sheepdogs are those who’re capable of using violence in protection of themselves and in defense of the sheep.

Posturing – Posturing is combat without making contact, using intimidation. This is frequently seen in the animal world but can be seen in humans as well. Posturing comes easy to those who fight but I have seen some who were not typically thought of as fighter’s posture enough to prevent an attack and back a wolf down.

Flight – This is a group of people who have an innate urge to flee from harm. There are some who might initially flee, only to change to another behavior.

Freeze – People who freeze might do so for mere seconds while their brain catches up to the reality of the situation. They could also be people who are so completely overwhelmed that they simply shut down. People in this group can slide to other groups. For instance, someone might freeze for a second before being able to use violence to defend themselves. Another person might freeze before running away or submitting.

Submit – Submitting is totally giving up to an attacker. There is evidence in the FBI’s annual uniform crime report to suggest that submitting is more dangerous than fighting back. However, feigning compliance and submitting temporarily can give a person the upper hand.
 
 
Putting it all Together

I believe that the 10-80-10 rule and the five possible responses to violence can be combined. The first 10% are the people who are ready and willing to use violence and obviously have no aversion to it. The last 10% are made up of those who flee (and continue to flee), and those who submit. They are so incapable of violence they would rather perish than use force, even to save their own lives. I think that the middle 80% is on a sliding scale of sorts. There are those who, under certain conditions, are capable of using violence. There are also those who might initially freeze and later panic.

Since the majority of us fall into the middle 80% of people who freeze for some length of time, how can we make sure we override any aversion to violence? How can we make sure we don’t remain frozen? How can we make sure we snap out of it and are willing to use violence to stop violence being used against us or another human being?

Remember that the reason people in the 80 portion of the 10-80-10 rule freeze is because their minds can’t quickly latch onto something from their stored experience. What we need to do is make sure there is something in that stored experience.
 
 
Overcoming the Aversion to Violence

As I mentioned, in the book “On Killing”, it is noted that trained soldiers from much of America’s history missed their shot on purpose, even if it meant their own life. If a trained soldier had difficulty overriding the aversion, what hope can the average citizen have?

If you’re not intellectually, emotionally or spiritually averse to the idea of using violence to save you or a loved one, there are some things you can do to train yourself to act in self-defense and in the defense of others.

Lt. Col. Grossman listed several things modern training has done to make the modern warrior act, often without hesitation. I’m not going to cover them in detail, as some just wouldn’t and shouldn’t apply outside of a military setting. Many of the things that we can do are intellectual and psychological.
 
 
Visualization

No, I do not mean that touchy feely, self-affirming “I’m good enough, I’m smart and doggonit people like me” crap. I mean visualize different scenarios and what you might do and say when a threat causes you to go to code orange or red. (If you don’t know what the Cooper Color Code is, follow that link and learn to incorporate it into your daily situational awareness.) For instance, thinking through the following scenario; if this person following me follows the next three right turns I make (walking or driving), I am going to do “x”.

I haven’t ever had someone kick down my door and come in with a weapon. I have thought about what I would do in many different variations of that, and Trudee and I have discussed them.

Visualization is more than just thinking through imaginary scenarios that could happen. I also think about how I would respond to violent encounters I read about, see in the news or even in TV and movies.

By mentally preparing my mind for situations where violence is an acceptable response, I am overriding the natural aversion to violence. This is something that should be done on an ongoing basis, much like weight lifting to build and keep strength.
 
 
Training

Less Than Lethal – I am a big supporter of real world self-defense for multiple reasons. Watching a fist fight on TV or movies is a completely different thing than actually being in one. Of course, not just the physical aspect of it, but also the mental. When you’re on the receiving end of violence, there is a mental shock, which is probably why 80% of people freeze. As I mentioned earlier, there is often a hesitation to strike someone. While it’s possible to overcome that in an actual fight, I suppose, repeatedly striking someone and defending against various attacks gets one used to the initial shock and you learn how to override it and defend.

Lethal Force – If you haven’t taken a handgun training course, take one. If you’ve taken one, then take another. There are some training companies where you enter a “shoot house” and fire at multiple types of targets. There are also some places that use simunition (simulated munition), which is a paint tipped round. They put you in various real world situations and have Joe Dirtbag enter and do dirtbag stuff that you have to react to. Some places also have force on force training with Airsoft or paintball. If you can do those, great! If not, when you’re at your local range, visualize the target as the threat you visualized in the above scenarios.

The goal is not only to excel with your firearm, but also to train you to respond with violence to stop violence.
 
 
If you liked this article please think about sharing it on the social media listed below, thanks!

PreparednessClubOne

The Pantry Primer: Building Your Pantry on a Budget with Home Canning

This article was written by Daisy Luther the Organic Prepper and was originally posted here.

home canning

One of the best ways to build your healthy stockpile is to preserve local organic foods when they are in season.  My favorite way to do this is canning.

When you can your own food, you can make delicious entrees and side dishes that can be served as quickly as you can boil water – and the best part of all is that you know exactly what is in those shiny jars. (See The Canning Manifesto to read more about why I choose to can so many foods!)

Making home-canned foods can be a great way to cost-effectively build your pantry for several reasons:

  • You can buy in bulk
  • You can take advantage of good sales, like “last day” sales
  • You can buy what is in season at better prices than when it is out of season
  • You can put together “quick meals” far less expensively than buying processed foods by doing a big batch of home cooking to be reheated and eaten at a later date
  • You don’t risk losing your stockpile to the vagaries of the power grid like you would by using your freezer

When my daughter eats a biscuit with jam, I know that it only contains organic peaches and sugar. There are no GMOs lurking, no High Fructose Corn Syrup, and no artificial colors and flavors.

Lots of meals for very little money

You can get a lot of bang for your buck by home canning. I recently canned some “meals in a jar” – check out what I spent:

$10 = 7 quart jars of spaghetti sauce with meatballs

$4 =  6 quart jars of Boston Baked Beans

If you were to purchase those items in grocery store cans you’d be spending far more money for far less quality.

This week I have been concentrating on building my pantry with home-canned goods.  I’ve made:

I made all of the above for about $35 not including snap lids and spices, which only add nominally to the cost.

Here are some ways to save money by canning

garden exchange

  1. Don’t decide ahead of time what you are going to can.  It’s okay to have a general idea, but if you have specific recipes that require specific ingredients beyond your pantry basics, you may end up spending a lot of money. For example, yesterday I went to a garden exchange and swapped some money and some home-canned goodies for other people’s surplus produce.  When I got the items home, I took a look at my bounty and decided what to make based on that.  Had I gone to the store or market specifically looking for certain things, I would have spent far more.
  2. Always fill your canner.  If you only have enough ingredients for 5 jars of whatever your making, but your canner holds 7 jars, fill the other two jars with beans.  You’re using the same amount of electricity or gas whether the canner is full or not.
  3. Buy as much as you can when things are inexpensive.  Today I’m heading to a local orchard that has a huge sale on just-picked pears.  They’re selling boxes of pears (about half bushel sized boxes) for $9 – and it gets better – they’re buy one, get one free!  So this means we have some delicious local fresh fruit and enough left over to fill many jars.
  4. Cook in bulk and can your leftovers.  The holidays can supply an enormous amount of ingredients for your home canning endeavors.  Also, as the weather cools off, make double batches of chili, soups, and stews and put the leftovers into jars for later use.
  5. Learn to can with what you have on hand.  Going along with tip #1, be flexible and learn to adapt the ingredients you have on hand in canning.  Here are some instructions on how to can your own recipes and how to make jam from whatever fruit you have in abundance.

canning

Here are some helpful links:

Go HERE to find tons and tons of my canning recipes and how-tos.

Go HERE to learn about water bath canning.

Go HERE to learn about pressure canning (a necessity if you are canning anything besides fruits, salsa, pickles, and jam).

Go HERE to learn how to sanitize your jars.

Go HERE to learn how to adjust for the altitude where you live.

Also, check out these great websites for more canning ideas:

Ready Nutrition

Simply Canning

Prepared Housewives

Food Storage and Survival

The Survival Mom

Pick Your Own

If you have any questions about canning, please don’t hesitate to ask – canning one of my favorite things to do and I could talk about it endlessly!

canned food

If you liked this article please think about sharing it on the social media listed below, thanks!

PreparednessClubOne

If You’re in a Fair Fight, Your Tactics Suck

Dirty fighter

What I mean by “If you’re in a fair fight, your tactics suck” is that if you’re attacked, there is no such thing as a fair fight. You should do what you need to do to ensure you walk away, even if that means “fighting dirty”.

A disclaimer of sorts: Violence should only be used to stop violence directed at you or a loved one. Once someone puts their hands on you or a loved one, they have given you consent to defend yourself and/or the ones you love.

If I am forced to use violence, the goal is to end the threat and get away to safety. The goal is not to beat the attacker to a pulp, though that might be needed to get away. Some of the things I will explain are not going to neutralize an attacker by themselves. Some may just “short circuit” them for a short time. When the attacker is short circuited, you can either use that brief pause to use another attack or to get away.

I often carry a firearm for self-defense but there are times when I can’t. There are also situations, such as being within arm’s reach, which might not permit drawing a firearm, making hand-to-hand necessary.

None of the techniques I am explaining need any training to learn, though training will help you and the techniques be much more effective. Many of them will work for people of smaller stature against larger attackers.
 
 
Eye gouge/eye flick

I have seen this tactic mentioned several times over the years and it is often explained as pushing your thumbs deep into the eye sockets of the attacker. There is a problem with this explanation however; doing so is repellent to human behavior. In his book “On Killing,” Lt. Col. Dave Grossman explains the following:

“The single most effective mechanically easiest way to inflict significant damage on a human being with one’s hand, is to punch the thumb through his eye and on into the brain.”

He goes on to explain that even though this attack would be extremely effective, it goes against human nature. He also says that during the filming of a movie that was rated X because of it’s violent content, an actress who was to portray stabbing a man in the eye with a rat tail comb, passed out twice during filming.

“This is a professional actress, she can portray killing, lying and sex on the screen with relative ease, but even the pretense of stabbing someone in the eye seems to have touched a resistance so powerful and deep seeded that her body and emotions, the tools of the professional actress literally refuse to cooperate. In fact I cannot find any references of anyone in the history of human combat ever having used this simple technique.”

As we can see, a gouge is not something many people can do. Because of that, here is a different method of attacking the eyes: keep your fingers limp and flick your wrist, aiming your fingers at the attacker’s eyes. This will short circuit them and cause the eyes to water, enabling you to assess and flee or attack again, if needed.


Box the Ears

Boxing of the ears can be very painful and can inflict severe damage to the ear drums. To box the ears simply slap the ears with your palms. This is another means of short circuiting the attacker, enabling you to assess and flee or attack again, if needed.


Crush the Windpipe

To crush the windpipe, keep your four fingers together and fully extend the thumb making a V with your hand. Aim at the attacker’s throat, trying to have the thumb and fingers on opposite sides of the throat. Depending on the force, this attack can be a short circuit, causing the attacker to gasp for air. It can also be fatal.


Punching or Smashing the Nose

Punching or smashing the nose can cause blood loss and the eyes to tear. Sometimes, seeing their own blood takes the fight out of the attacker. Also, if their eyes are watering, you can either take advantage and attack again or flee. I say “smash” because, due to body position, sometimes you can’t truly punch but you may be able to smash their nose with the palm of your hand.
 
 
Groin Attacks

I think everyone knows a groin attack on a man can shut down a fight quickly, but it can be very painful to a woman as well. When attacking the groin, you don’t have to aim directly for it. If you attack the high leg, momentum will bring the attack to the groin.


Brachial Plexus

The brachial plexus is a bundle of nerves running from the spine and through the neck. This is another short circuit, with the potential to be a finisher. While doing gun disarms with a partner a while back, I hit him with roughly 50% strength. This was enough force to cause him to drop the blue gun, even though that wasn’t the portion of the move that was to strip the gun. I have a friend who has done training in the past where a blow to the brachial plexus caused someone to lose consciousness. To initiate this move, simply strike the crook of the neck by punching or chopping. Chopping works really well for shorter people who might not be able to punch effectively on a taller person.
 
 
Head Butt

I am not talking about the traditional WWF head butt. This head butt is accomplished by facing the attacker, grabbing their head with both hands and squatting, slamming their face on the top of your head. This obviously isn’t an attack you would start with. Since your hands are already on their head, this is an excellent move after boxing their ears.


Elbow and Knee Strikes

Many of the attacks listed above are great ways to short circuit an attacker but many are just that, only short circuits. A fantastic closer is an elbow or knee strike. When striking with the elbow, do so with an open hand. This causes you to strike with the bare ulnar bone. If you do an elbow strike with a closed fist, the ulnar bone is covered with muscle, which is softer than bone and causes less damage to your attacker. Strike with elbows instead of fists whenever possible. The bones in your hands are far less forgiving. A broken hand can take you out of the fight.


Closing thoughts

Since we only use force in self-defense, the rule of thumb is to keep attacking until either your attacker stops or you are able to get away. It could take multiple attacks for either of those to be a viable option. An engagement drill we practiced in Haganah chained many of the attacks listed above; it went something like this: The attacker comes at you. You kick them in the thigh, aiming for a nerve in the thigh. This is followed by a punch to the brachial plexus, boxing their ears, head butting, lifting their head and delivering an elbow strike to the brachial plexus. We would then put them in a type of hold, deliver three knees to the legs, swing them to the ground and feign breaking their ankle.

That is one example of chaining attacks, but doing an eye flick, punch to the noes and an elbow to the jaw might work just fine. Do not stop fighting until they give up or you have an opportunity to retreat.

 
If you liked this article please think about sharing it on the social media listed below, thanks!

PreparednessClubOne

Preparedness and Batteries

battery

Have you ever considered how many things you come into contact with every day that use a battery?  How about the items that are in your various preparedness kits?

I remember reading a few news stories that spoke about cities providing generators so people could recharge their cell phones.  Because we have become so dependent on technology and the items that use batteries, both in normal times and when “it’s hitting the fan”, not having the ability to use an item can make a bad situation worse.  Whether it’s a remote control, weather radio, cell phone or flashlight, these devices only work if they have a charged battery.  Below are some things I have discovered over the years.  If you have something to add, please do so in the comments.


Disposable Batteries (Alkaline)

We try to keep a good supply of the various sizes of batteries.  Over the years, I have heard various prepping tips about batteries and have looked into them.  Unfortunately in my experience most have turned out to be false.

For example, have you heard that storing your batteries in the fridge or freezer can prolong their life?  According to Energizer, this isn’t the case!  In this FAQ on Non-Rechargeable Batteries:

“No, storage in a refrigerator or freezer is not required or recommended for batteries produced today. Cold temperature storage can in fact harm batteries if condensation results in corroded contacts or label or seal damage due to extreme temperature storage. To maximize performance and shelf life, store batteries at normal room temperatures (68°F to 78°F or 20°C to 25°C) with moderated humidity levels (35 to 65% RH).”

I also read on a Prepper site that someone said they had compared the life of name brand batteries against the cheaper batteries found at dollar stores.  They said the life of the batteries was relatively the same.  I mentioned this to Trudee, who then purchased some batteries from the dollar store.  It was our experience that they only lasted from ½ to 2/3 as long as the better known, name brand, batteries.

How often have you reached for the remote or another electronic only to discover the batteries were dead?  Something you might not be aware of is that batteries don’t necessarily lose their charge at the same rate.  There could be one battery that is dead and another with ½ a charge left.  To remedy this there are several inexpensive battery testers on the market that will show you how much life is left on a battery.  I haven’t purchased on yet, so I won’t make any recommendations, but make sure that the one you buy will test a variety of battery sizes.


Rechargeable Batteries

The technology and terminology can quickly get over my head, so here is a novices explanation: There are six types of rechargeable batteries.  Only the following three; Nickel Cadmium, Nickel metal hydride, and reusable alkaline are found as replacements for AAA, AA, C, D, and 9 volt batteries.  Since these are the most commonly stocked battery types, I will give some pluses and minuses of using them.


Reusable Alkaline

Reusable Alkaline batteries hold their charge longer than any other type.  However, they have the lowest amount of charge/discharge cycles of any other reusable battery.  (A charge/discharge cycle is one complete depletion and recharge of the battery.)


Nickel Cadmium (NiCd)

This is the oldest type of rechargeable battery.  The technology has been improved over the years.  A nickel cadmium battery has a long shelf life and can be stored in a discharged state for long periods of time.  When it is needed, it is recharged quickly.  It also has a high number of charge/discharge cycles, numbering over 1,000.

Nickel Cadmium batteries have a high rate of discharge.  Just while sitting on the shelf, they lose 1% of their charge per day.  Due to this, batteries would need to be recharged after storage.  Nickel Cadmium is also subject to memory effect.  According to Wikipedia, memory effect is an effect observed in nickel cadmium and nickel–metal hydride batteries that causes them to hold less charge. It describes one very specific situation in which certain batteries gradually lose their maximum energy capacity if they are repeatedly recharged after being only partially discharged. The battery appears to “remember” the smaller capacity.  This has been corrected with newer technology.


Nickel Metal Hydride (NiMH)

This is probably the most available and lowest-cost option of the three.  They have 30-40% higher capacity than a NiCd battery and are less prone to memory effect than NiCd batteries.

NiMH batteries have a high rate of discharge losing up to 4% a day, more in warmer climates.  It also has a limited service life, probably around the 500 charge/discharge cycle range.


Low Self Discharge Nickel Metal Hydride (LSD NiMH)

This type of reusable battery loses significantly less charge than any other type, roughly only 15% a year.  They also have a high charge/discharge rate.  LSD NiMH batteries can be charged with a NiMH battery charger.


Battery Chargers

There are many different ways a battery can be recharged; trickle, simple, timer based, fast and pulse.  There are also battery chargers that are intelligent.  These should not be confused with “smart chargers”.  A Smart charger has a microchip, as does the battery, from its manufacturer and they are designed to work together.

A charger that is intelligent can monitor the temperature, voltage and other characteristics and stop charging when the battery is fully charged.

There are chargers on the market that accept not only the 110 volts from your home, but also 12 volts DC from your car lighter or from a solar charger.


Final Thoughts

In my opinion, I think a good set up for Prepper’s might be to keep some disposable alkaline batteries on hand, and a battery tester to go with them.  It’s also a good idea to have a supply of LSD NiMH batteries with an intelligent charger and a small solar panel to go with it.  There are also solar chargers that can charge your cell phone as well.

The power these batteries provide might not cover all of your needs in a blackout, but it could very well provide for a radio, flashlight, cell phone and other small electronics. This would be enough to keep you informed and your loved ones in another part of the country updated. If you store LSD NiMH batteries charged and top them off once a year, they’ll always be ready for use!


If you liked this article, please think about sharing it on the social media listed below, thanks!

PreparednessClubOne

8 Major Differences Between Freeze-dried and Dehydrated Food

Chris Say’s: While freeze-dried food does have many pluses over dehydrated food, I don’t agree with everything in the article. One of the major pluses of dehydrated food is that you can do it yourself at home and at a fraction of the cost of freeze-dried food. I think both have their places in food storage and it is important to know the pluses and minuses of each.

8 Major Differences Between Freeze-dried and Dehydrated Food

1. Processes. First of all, the process by which each is made is different. Freeze-dried food is flash frozen and then put in a vacuum container causing the water vaporize, and leaving the food item with 98% of its water removed. Dehydrated products are heated and water evaporates, leaving the food item with 75% of its water removed. These differences in process mean that they both have different functions in your food storage.

2. Shelf-Life. Freeze-dried food lasts a lot longer without expiring because it has hardly any water left in it. On average, they tend to last between 20 and 30 years. Dehydrated foods still have 25% of its original water left in it, so they cannot stay good for nearly as long. They typically last between 1 and 8 years.

3. Additives. Freeze-dried foods don’t have any additives, but dehydrated food does. They usually need to add salt, sugar, or other preservatives to make dehydrated food.

4. Nutrition. Food retains all the nutrients that it had in its original form after the freeze-drying process. In the dehydration process, however, up to 50% of the foods’ nutrients can be lost because of the heat that the food is put under in the process.

5. Taste & Texture. Freeze dried food has a muted coloring and a dry, powdery texture before it is prepared, but once water is added the food has its’ original look, texture, and taste. Dehydrated food looks and tastes different than it was before the process. It also usually has a chewy texture.

6. Re-Hydrating. Since freeze-dried food was made to be re-hydrated, it is very easy to do. It can be done with cold or hot water, and after the water is added the food is just like the regular food item was frozen and then thawed. Dehydrated food wasn’t made for re-hydration, so it is extremely difficult. An example of doing this would be trying to turn a raisin back into a grape. If you do want to attempt this, it must be done with hot water.

7. Uses. Freeze-dried food is great to use as a substitute for fresh ingredients when cooking. It also comes in pre-made packaged meals like lasagna or orange chicken. There are limitless possibilities with freeze-dried; they even make freeze-dried icecream! Dehydrated food is a little more limited. It’s great as a snack by itself, but it doesn’t really go with recipes very well. The products that are dehydrated are mostly fruits, vegetables, and meats.

8. Cost. Because of the many benefits, freeze-dried food costs more than dehydrated food.

Both freeze-dried and dehydrated foods have their ups and downs, and they are both very good options for your home food storage. Click here to learn more about freeze dried food from Food Insurance.

Author Bio- Chett Wright is an emergency preparedness expert, and loves educating others on the how-to’s of food storage.