December 21, 2024

Ten Foods to Include in Your Emergency Food Storage Supply

This article was guest written by Lee Flynn.


Keeping your body fueled in an emergency isn’t the same thing as eating a typical daily diet. In an emergency type situation, you’ll probably be using a great deal more energy than normal, which is why you’ll need more high-protein, high-energy type foods. Furthermore, because your food storage supply is limited, you need to eat better quality foods overall. In an emergency or disaster, those extra calories will come in handy. Eat foods high in nutrients as well as fiber to keep your system running smoothly.


  1. Whole-Wheat Crackers

Crackers are not only a comfort food, but make a great replacement for bread as well as good substitute for making a quick sandwich. Because whole-grain/wheat crackers have more fat content, their shelf life isn’t particularly long. But, the extra dose of fiber is appreciated if you’re really hungry. Store any opened crackers in an airtight, food-safe container after opening the box.


  1. Bulk Nuts

On your next visit to your local grocery store, look for bulk nuts/seeds, especially for the un-shelled, un-salted varieties. It’s best to pick emergency foods low in sodium since salt will only make you thirstier. Sunflower seeds, almonds, peanuts, and many other seeds and nuts generally sold in grocery stores are very high in vitamins, minerals, protein, and essential fatty acids.


  1. Dried Beans

Pinto beans, lima beans, garbanzo beans, black beans, kidney beans, and other beans have a high calorie content, contain a good amount of protein, and also have many essential vitamins overall. Dried beans are available in packages that are bigger than canned beans but weigh a great deal less for the amount you actually get.


  1. Peanut Butter

Peanut butter is known for packing essential fatty acids and proteins as well as several key vital minerals including iron and copper. For ideal health, choose ‘natural’ peanut butter. Just a few tablespoons a day of natural peanut butter can help someone adequately survive a relatively long period without any ‘normal’ food.


  1. Trail Mix

A classic favorite among hikers, tasty trail mix has various ingredients, including peanuts, raisins, and other nutritious nuts along with dried fruit and sometimes chocolate. The simple sugars the dried fruits, chocolate, and raisins provide are a short-term energy and mood booster that tend to satisfy in a crisis situation.


  1. Power Bars

Filling and nutritious, portable power bars and granola bars usually retain their freshness for six months or more. They’re a superb source of energy-boosting carbohydrates. Foods high in carbohydrates provide more energy than eating foods with none.


  1. Instant Coffee

Instant coffee may not seem like a survival food, but try telling that to someone who’s been drinking it for years throughout the day. Not only is coffee good for your morale, but helps boost your energy level as well. In an emergency situation, it could be considered a “godsend” to some people.


  1. Powdered Super Greens/ Sea Vegetables

Some of the most popular items found in health stores today are the pill or powdered form of sea vegetables. In times of disaster, it’s likely that fresh produce will be nowhere to be found. Sea vegetables are considered a ‘superfood’, chock-full of nutrients, vitamins, and offer incredible health benefits that boost your immune system, provide wound healing and tissue repair, and even have key anti-bacterial and anti-fungal properties.


  1. Beef Jerky

Natural varieties of beef and turkey jerky no longer contain any or at least as much of the harmful ingredients they add while processing it. Basically, jerky is a kind of dried meat. And, dried meat has long been a survival food used by American pioneers and Native Americans alike.


  1. Canned Tuna, Turkey, Salmon, or Chicken

Various canned meats have vital protein and can last as long as two years on the shelf, although the vacuum-packed pouches only last about six months. They’re the ideal food in an emergency situation since they pack a lot of punch in terms of nutrition for such a small, inexpensive, convenient food.

Overall, when choosing which foods to incorporate into your emergency food storage supply, think about the ease of preparation, calorie count, shelf life, and of course the taste of the food before you buy it. Consider these 10 best survival foods to get you started building your emergency food stockpile.

Review of Valley Food Storage; Irish Pub Style Cheddar Potato

I was offered the chance to sample and review Irish Pub Style Cheddar Potato Soup, and it’s unlike me to turn down free food (lol) so I said, “yes”.

Valley Food Storage started in 2005 after they purchased some LTS food. Upon checking it a few short years later, they discovered it was all rancid. Bear in mind this was food claiming to have a 25 year shelf life. They teamed up with food scientists and worked to come up with a viable solution to this problem.

What they found was that other companies had included ingredients that wouldn’t last more than a few years. It also seemed that every company out there packed their food with preservatives and hydrogenated oils.

They vowed to only use ingredients with a long shelf life, and do not use GMO’s or MSG.

I also appreciate that they put their entrees into a Mylar pouch instead of a #10 can.
 
 
Irish Pub Style Cheddar Potato Soup

Pub-Style-Ched-Potato

I was presented with a few options. This one sounded really good. As you can see in the image on the left (click to enlarge), none of the ingredients need a PhD to pronounce. Also, the directions are easy enough for me to prepare!

I got the water to a boil and added the mix. I stirred it in and walked away for a bit. What I didn’t expect was the smell when I came back. I didn’t care for it. I actually planned on eating this for lunch and told my wife I would taste it, eat enough to review, but that if it wasn’t good, I was finding something else.

Soup boiling

I like thicker soups and was a little concerned about how watery it was about half way through. I figured it would thicken up and it did, as you can see in this photo.

I was blown away by how good it tasted, as was my son, who can be picky at times. He actually finished it off! I don’t like the taste of cooked peppers, and was a little leery, but could hardly taste them!

Spoonful

The consistency of freeze dried foods might be an issue for some people, as they are often mushy. The texture of the potato was interesting, and not like I had expected. It was firmer than what I thought it would be. It reminded me of what a hard marshmallow might be like biting into; not hard, but not squishy either. I didn’t mind it, but thought it was worth mentioning.

I had two scoops with a punch bowl sized ladle. I ate two dinner rolls with my bowl of soup and was full. I would guess that I ate two of the five servings.

The price for one pouch is $11.95 or $203 for a case of 20.

All in all I was very impressed with the company. I don’t do many affiliates on this site, but like what I see with this company and have applied for their affiliate program, and was accepted, so if you click on one of the images and purchase anything, I will get a small commission. I am also impressed with the food, and when I add more freeze dried foods to my pantry, they will most likely be coming from Valley Food Storage!

Click here to see a chart comparing many of the top food storage companies to Valley Foods; look into this before you make a purchase from another company.

 
Please click here to vote for Prepared Christian as a top Prepper site!

If you liked this article please think about sharing it on the social media listed below, thanks!

PreparednessClubOne

Building Food Storage

Building Food Storage

In terms of cost and scope, food storage is probably the biggest branch of preparedness. The larger your family and the more food you want to store, the costlier and more complex planning how to build your food storage can get. Having been at this a while, I thought I would give some advice that some of you might find useful. I’m also hoping some of you who have been at this a while as well, will chime in with your $.02.

Food storage might not be the most exciting topic but it is an important one. The stuff hit the fan for us when I lost my job a couple years back. Because of our food storage, we were able to get by on $50 some weeks at the grocery store.
 
 
How Much Food Should I Store?

Because of family size, budget, space and other concerns, this is completely subjective. Please forgive this lame answer but; as much as you can! I used to set goals; 90 days, 6 months, a year and so on, but have changed my thinking since then. I still think those goals are great and, if possible, we should strive for them, but why stop when you reach one goal?

If you’re following the “golden rule of food storage”; eat what you store, store what you eat, the majority of food you store will be consumed on rotation, so it is not money wasted.

You will also have the added comfort of knowing you can provide for one of your family’s five basic human needs for an extended period of time. If you choose to share, it will give you that much more to assist those you choose to bless.
 
 
Expiration Dates

Most expiration dates you see on packaging is a marketing ploy. Pay heed if it is perishable food, but my research has shown that the dates listed for canned goods, most dry goods and bulk staples are, as I said, marketing ploy. I wrote two articles touching more on this. Feel free to read Expiration Dates; Fact or Fiction? and Shelf Life of Comfort Foods for more information.
 
 
Getting Started

Getting started with food storage can seem overwhelming, but if you keep the “golden rule of food storage” in mind, it becomes much more manageable a task. What I recommend is that you start a food log. Any time any shelf stable food is used in the kitchen, you enter it in the log. A shelf stable food is one that can last for months without refrigeration. After a couple weeks, you will have a good idea of the storable foods that your family eats on a regular basis.

I recommend setting a low, very achievable goal to start with. Go for two weeks of shelf stable food on top of what you’re consuming regularly. For example, if you eat green beans for meals twice a week, you would want four cans total; the two for normal use, and two for storage. You’ll lump them all together and rotate through them.

Once you have two weeks of food stored, aim for a month, then two and so on. A great tip for building food storage is called “copy canning”. When you take one can of green beans for a meal, buy two instead of one when you go to the store next. Remember to put it at the back of the row in the pantry!
 
 
Adding Bulk Staples

Once you’ve got two to three months of the foods you normally eat stored, you can really increase your food storage by adding bulk staples. Things like the various kinds of rice, beans, wheat and so on. Rice and beans are a prepper staple, but if the stuff hits the fan and your food storage is primarily rice and beans, well let’s just say I hope you stocked up on the Pepto and the BeanO! However, if you have three months of foods that you normally eat, and add in beans and rice or other meals made from bulk foods once or twice a week, you’ve now greatly extended that food.

One other thing you can do is see if there are long term substitutes for meals you regularly eat. For example, a favorite here is Trudee’s chicken stir fry. She used to buy fresh chicken breast, but once decided to try it with canned chicken and we actually liked it better. That is a meal we enjoy, and is primarily from our LTS (long term storage) foods.

I think continuing to add to your stockpile of foods you normally eat is a good idea, but adding in bulk staples can help you reach up to six months or more of food stored easily.
 
 
Long Term Food Storage

By this I mean freeze dried or commercially dehydrated food. These types of foods replace the oxygen in the food with nitrogen, thus giving the food a very long shelf life. Many manufacturers claim 20+ years.

Because this food isn’t consumed on a regular basis, it can seem quite expensive. However, it isn’t that much more than if you were to prepare the dish fresh.

I don’t recommend buying a #10 can of something you haven’t tried. Many manufacturers offer pouches that are 1-3 servings and are far cheaper.

Depending on the entrée, many #10 cans have 10 or so servings in them. Once opened, the can must be consumed relatively quickly. This isn’t something you would eat every day, but would add once or twice a week, again extending the “eat what you store” foods.

I know various manufacturers have sales throughout the year. Mountain House, for example, allows vendors to have a 25% off sale once a year. If you plan to buy cases, I would recommend saving up and taking advantage of a sale of this kind.
 
 
Storage Examples

Finding room to store everything can be a challenge. A very common way to store bulk foods is in Mylar, and then in food grade buckets. However, Mylar is food grade, so you can store it in other containers. I have some in buckets, but I wrote a post about storing food in 31 Gallon Garbage Cans. I can fit roughly the same amount of food in them, but they are a heck of a lot easier to find and are far more rodent resistant.

If you have any other tips or ideas please post a comment.

 
Please click here to vote for Prepared Christian as a top Prepper site!

If you liked this article please think about sharing it on the social media listed below, thanks!

Preparedness Club

How to Grow Red Mustard in your Home Garden

How to Grow Red Mustard in your Home Garden

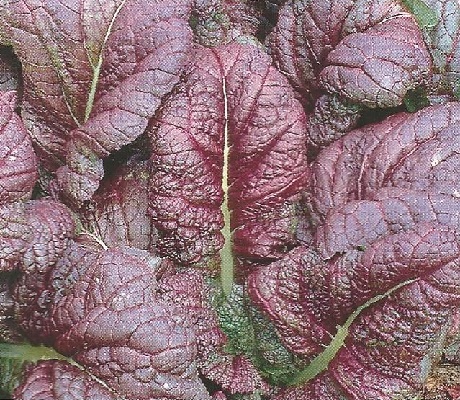
Mustard is a delicious leafy vegetable that is easy to grow. Mustard is also an excellent nutritional choice as it is a great source of vitamins and minerals your body needs. Mustard is cold tolerant, a prolific producer and when you grow one of the red varieties; it is aesthetically pleasing as well. That makes red mustard perfect for all you front yard gardeners.

The taste of mustard leaves, in my opinion, has a mild to slightly spicy flavor that is just as enjoyable raw as it is cooked or steamed. My personal favorite is to eat it raw mixed with other greens such as spinach, chard or lettuce. Here is a really good step by step red mustard recipe.
 
 
WHEN AND WHERE TO PLANT

You will want to select a sunny location and sow your seeds as soon as the ground can be worked when you are starting them in the spring. If red mustard is going to be part of your fall garden, you will want to plant your seeds 30 days out from your first frost. If you are closer to your frost than 30 days, be sure to start your mustard in a cold frame. Mustard is perfect for cold frame gardening.

For the best results for germination and plant growth, loosen your soil to help with aeration. This also makes it easier for your red mustard’s roots to grow and spread.
 
 
CARING FOR YOUR RED MUSTARD

Red mustard likes the soil to be moist at all times. A moderate watering every other day should suffice. You want to make sure you are not overwatering though. You do not want to saturate your soil. Be sure to keep the garden bed weed free and feed your mustard plants with a good organic fertilizer every couple of weeks.
 
 
HARVESTING

Red mustard (and other varieties of mustard) is a great vegetable to harvest. You can harvest mature leaves, leaving the rest of the plant alone to continue to produce. You can keep doing this so as long as the weather stays cool.

On a final note, as noted before, if your red mustard is going to be a part of your fall garden, be sure to use a cold frame once temperatures drop below freezing. This will help you extend your red mustard season through a good part of the winter.

Enjoy!
 
 
About the Author

mike_bio_picMike Podlesny is the author of the book Vegetable Gardening for the Average Person as well as the creator of the Seeds of the Month Club where members receive non gmo, heirloom variety seeds every month. You can listen to Mike each week on the Vegetable Gardening Podcast where he interviews gardening industry experts.


Please click here to vote for Prepared Christian as a top Prepper site!

If you liked this article please think about sharing it on the social media listed below, thanks!

Preparedness Club

3 Tips to Fix Blossom End Rot

Todays article is written by Mike the gardener from the Seed of the Month Club.
 
backet_of_veggies


Blossom end rot is one of the easier vegetable plant diseases to spot and the most asked about as well.  A few times each week someone will post a picture on our vegetable gardening Facebook page asking “Why are my tomatoes doing this?”


When your tomatoes have blossom end rot, they look great at the top, but on the bottom of the fruit, is a dark, mushy spot, that makes the tomato look inedible.  Blossom end rot typically looks like the picture below.  Along with tomatoes, blossom end rot also affects peppers, squash, cucumbers, and melons.

 
OLYMPUS DIGITAL CAMERA
 

THE CAUSE OF BLOSSOM END ROT

In short, blossom end rot occurs when your plant is not getting enough calcium.  However, it could be because your plants are not getting enough water either.   While your soil may have ample amounts of calcium in it for your plants, there still needs to be sufficient water in order for the plant to carry the calcium to where it needs to go.


Before you start heavy watering your plants though, it would be best to check the type of soil that you have and take a reading of your soil to see if it has the nutrients, in this case calcium and pH level that your plants need to avoid this disease.


Typically, soils that are acidic, sandy, or coarse often contain less calcium.  Also, overusing fertilizers can cause calcium deficiency as well.   Overusing fertilizers can increase your phosphorous levels which creates an environment where the calcium that is present is unusable by your plants.


FIXING BLOSSOM END ROT

Now that you know what blossom end rot looks like, what it is and what can cause it, the next logical step would be to understand how to fix this issue.  Your first step with blossom end rot, and just about any plant disease, is to mix in plenty of organic material, i.e., compost.  By mixing in plenty of compost, you are keeping your soil healthy and that creates a well suited environment for your plants.


The next step would be to check your soil’s pH level.  If your soil is too acidic you can add some lime to it to bring the pH level up.  The pH level of your soil will depend upon what you are growing, but you are shooting for 6.0 to 6.5 which is an ideal range for most plants in the home vegetable garden that are susceptible to blossom end rot.


Unfortunately, once your fruit has blossom end rot, that particular fruit cannot be reversed back to a healthy fruit.  Therefore you have to take steps to ensure that future fruit on that plant do not meet the same fate.  An immediate solution, so as to not lose your harvest for the season, is to use a liquid fertilizer that is enhanced with calcium.  There are plenty of organic options on the market.    Also, be sure to water daily so that your plants can actually move that calcium throughout the plant.


Again, blossom end rot cannot be reversed on particular fruits.  Once the fruit has it, it has it.  That does not make the fruit inedible though.  Just cut off the end that is dark and mushy.  To me, the fruit tastes the same.


mypicAbout the Author

Mike Podlesny is the author of the bookVegetable Gardening for the Average Person as well as the creator of theSeeds of the Month Club where members receive non gmo, heirloom variety seeds every month. You can listen to Mike each week on theVegetable Gardening Podcast where he interviews gardening industry experts.

Simple and Straightforward Tips For Keeping Food Fresh

Today’s article was written by Lee Flynn

Simple and Straightforward Tips For Keeping Food Fresh

If you’re sick of noticing your food go bad in what seems like the blink of an eye, you don’t have to sit back helplessly. A few handy tips can go a long way in keeping your food fresh for a longer period of time.


Fresh Onions and Pantyhose


If you’re a big onion household, then you might want to consider stashing these veggies away inside of pantyhose, oddly enough. If you do so, they’ll be able to stay good for upward of 8 months. Make sure all of the onions are apart by tying knots in the middle of them.


Routine Refrigerator Cleaning


Regular, thorough fridge cleaning can be beneficial for keeping your food fresh. If you allow any rotten food items to linger inside of your refrigerator, they’ll rapidly get to all of your other food. Always throw rotten food away immediately. Keep all of your food in top-notch condition by routinely disinfecting your refrigerator.


Berries and Vinegar Solutions


As soon as you purchase berries from the supermarket, cleanse them using a vinegar solution. After you do this, you can store them. Make your solution using 10 parts H20 and a single part vinegar. Whirl them around in the blend, drain them, clean then off and finally place them inside of the refrigerator. Thanks to the dilution, you don’t have to fret about an unpleasant vinegar flavor taking over your delicious berries. If you love strawberries and raspberries, this easy-peasy technique can be extremely useful.


Freezing Bread


It’s common for people to purchase loaves of bread only to notice much of it going to waste in the end. Bread goes stale extremely quickly, after all. If you’re tired of squandering perfectly good food, start freezing your bread. As soon as you bring home a loaf of bread, cut it in half and place the rest inside of the freezer. Once you’re ready to eat the frozen bread, thaw it. Say goodbye to hard, moldy bread for good.


Crispy Lettuce


If you enjoy nothing more than the taste of a salad full of crispy, fresh lettuce, then you can accomplish that quite easily. When you store lettuce, wrap it up inside of tinfoil. Doing this will ensure that it remains crisp and delicious for a longer time.


Mushroom Storage Etiquette


Refrain from stashing mushrooms away inside of plastic. When you do this, you confine moisture which then leads to spoiling. Instead of using plastic for mushrooms, opt for a paper bag. Put your mushrooms in a paper bag in an environment that is both dry and cool. If you put your mushrooms in a paper bag, you can also keep them in the refrigerator.


Suitable Potato Storage


Maintain the freshness of your potatoes by never storing them alongside onions. If you store potatoes and onions together, your potatoes will go bad markedly quicker. If you store potatoes alongside apples, on the other hand, you’ll stop sprouting from occurring.


Prompt Fruit Storage


Fruits such as cherries, pineapples, citrus, watermelons, raspberries, grapes and strawberries never become riper post-picking. Because of that, leaving them outside is a pointless effort. If you leave them out, they’ll simply spoil. If you want to keep these fruits fresh for as long as can be, store them inside of your refrigerator as soon as possible.


No Cheese in Plastic Wrap


Refrain from storing your cheese by wrapping it up in plastic wrap. Instead of going for plastic wrap, opt for either wax paper or cheese paper. Wax paper and cheese paper will both keep your cheese good for a longer time. After you wrap it in wax or cheese paper, insert it inside of a plastic bag.


Meat and Produce Belong Apart

As far as freshness goes, keeping meat and produce in one drawer together can be a bad idea. If you do so, that can bring upon frustrating cross-contamination. If you want to refrain from practically throwing food out the window, store your meats and produce separately all of the time.


These easy and straightforward food storage tips can be extremely beneficial for ensuring that valuable food doesn’t go to waste quickly. Start using them today.

Food and Money Preservation for the College Student

This article was written by Lee Flynn
 
Food and Money Preservation for the College Student

 
We typically associate the term “college student” with words like “poor” and “broke.” Students usually have to work part-time and go to school full-time, simultaneously juggling two different realities and still having to manage finding the amount of time needed to study for tests and having a social life. The life of a student shouldn’t be harder than necessary; finding a way to eat healthy and preserve food can drastically benefit a student’s overall health, performance and stamina during the school week!


Most college students deem properly storing food as a thing their parents do; however, learning how to master this art is crucially important to learning how to live independently. There are many things we can learn to live without, such as saying “no” to that new pair of shoes, limiting the amount of eating out we do each week and limiting the amount of junk food we inhale on a daily basis. When you’re a college student, however, learning to incorporate the things we should be living with is so important! Eating healthy while maintaining a budget is simpler than you might think – and a supply of food storage is essential to this practice!
 
Planning

 Forget all the images that might be running through your mind right now: food preservation doesn’t require storing giant bins of food for an end of the world scenario! Think of it more as ensuring that your limited financial resources receive the maximum amount of return for the trips you take to the grocery store. And if you’re the typical college kid and pizza is you main course on a daily basis, even that can be preserved. Each small amount of money that is wasted can easily add up – imaging how much more socializing you could do on the weekend if your money wasn’t being wasted weekly!
 

Think about the type of foods you love to eat and begin to plan on ways you can easily preserve leftovers. If you’re the type that needs assistance in planning food preservation there are a number of online sites that can help you determine factors such as budget and food preferences to create a custom storage plan for you! It will require very little time and effort!
 

Building
 

Building a supply of food can be a little intimidating at first, especially if you’re on a tight budget. Starting small is the best approach to building up your personal inventory. Begin purchasing food that you’re familiar with and would want to eat if necessary. Keep track of the typical types of foods you eat weekly and start by picking up just one or two of those items every time you go to the store. If you’re a macaroni and cheese junkie and notice a sale at the store take advantage of it and purchase a few extra boxes for your pantry!
 

Storing
 
In a temporary housing situation there is a limited amount of storage available and having roommates can complicate things even more! There’s always a solution, however! Purchase some bed raisers and begin to store your items underneath; use an extra dresser drawer for a couple items; utilize that hard-to-reach high shelf in your closet that you can never reach for extra storage. Remember that when there’s a will there’s always a way!
 
Here’s an easy way to begin the process:

  1. Week One – Begin to cut out eating out for just one day a week; set that money aside.
  2. Week Two – Use the extra money you saved last week to purchase two inexpensive items from the store to set aside in your pantry.
  3. Week Three – Begin to search for sale ads at the grocery store. If you don’t have the extra time to incorporate this habit simply glance at the store’s weekly flyer next time you shop! Purchase a few items for your pantry.
  4. Week Four – For items that can’t be preserved such as pizza, purchase a few storage containers and begin to save your leftovers. You’ll be amazed at how much money you save by simply doing this!

Favorite Posts From Are We Crazy or What?

I’ll be honest, food storage isn’t one of my strong points. Sure, I know how to put up food in Mylar with O2 absorbers, but putting up fresh food is another thing. That’s why I like sites like Are We Crazy or What? Jennifer shares a wide variety of information, but some of my favorite posts of hers are on growing and preserving food.

These are skills I think every prepper should at least understand, and Jennifer has some great ideas. Here are some of them; posted with her permission.
 

How To Sprout Seeds: Storing Seeds To Sprout Means Fresh Food Is Only Days Away!

Sprouting seeds is one of the easiest and best things you can do for your health. Seeds that sprout are also some of the best food items to store for preparedness.


Food Storage: Storing Herbs and Spices for Long Term Storage

Herbs and spices are an important part of food storage. Many of the food items that store well in long term storage are a bit bland in taste. Although, beans, rice, and grains might be enough to sustain life they definitely need a little something to make them taste good. Considering a lot of preppers have picky eaters in their hoard, making food taste good can allow you to turn your attention to other aspects of survival. Picky eating is not such a big problem when there are a lot of choices but in a survival situation it can become a big problem really fast. I know there are those who are of the “if they’re hungry enough, they’ll eat it,” school of thought. But there are individuals who will compromise their health before eating something they don’t perceive as tasting good. Also consider your family: do you have kids and elderly you’d like to keep well feed because they are the ones who are at high risk of disease or other hunger related issues? Making your food taste as good as you possibly can is important for health as well as morale.


How To Dehydrate Garlic — Plus Making Garlic Powder

Dehydrating garlic is simple and completely straight forward. All you need to do is peel the garlic, chop it and then place it in the dehydrator. Let me show you how to dehydrate garlic step by step, give you a few tips and then show you how to make garlic powder, which is also super simple.


Dehydrating Potatoes – Plus a Secret Revealed!

Dehydrating potatoes is fun and easy! If you let the dehydrator run all night you wake up to the smell of potatoes in the morning. My husband says it reminds him of hash-browns cooking… I still prefer waking up to the smell of bread baking but the smell of dehydrating potatoes comes in a close second. The practical side of dehydrating potatoes is that you can almost make a meal out of potatoes so to have them on hand to cook up at a moments notice is super convenient. Dehydrated potatoes also make a great addition to your food storage as they will last for years if stored properly. We usually buy the huge bag of potatoes from our local big box store, eat half and dehydrate the other half.


What to Do When You Have 50 Pounds of Potato Pearls That Expire This Year

Today’s article was guest written by Lee Flynn
 

What to Do When You Have 50 Pounds of Potato Pearls That Expire This Year

Knowing that you have emergency supplies on hand is reassuring. When faced with potentially long periods without adequate power or access to outside help, having a fully stocked pantry and ample water supplies, along with a power source, is calming. Whether you’re preparing for a prolonged winter power outage or economic breakdowns, emergency food storage is something you want to build up and maintain properly.

The drawback to having lots of stored food on hand is the eventual expiration date for everything. You will have to use up all that food before it goes to waste, and when you have something like 50 pounds of potato pearls sitting in a cabinet, the task can seem daunting. But over the course of a year, you can use up much of what you have and temporarily freeze the rest. Depending on the size of your family and the sizes of food servings that you eat, polishing off 50 pounds of mashed potatoes and other stored goods isn’t that difficult.

Get perspective, first. While 50 pounds seems like a lot of food, when you divide it up by serving size and number of people, it suddenly isn’t that insurmountable. 50 pounds of potato pearls, for example, equal over 1,030 half-cup servings. Assuming a family of four is eating these, that’s enough for almost 260 meals. If you and your family tend to eat a cup of mashed potatoes instead of 1/2 cup with a meal, that’s 130 meals you’re looking at. So depending on serving size, you’d have to eat mashed potatoes with dinner for about 10 to 21 days per month. 10 days a month is easy. 21 days is doable, but it could get a little boring after a while. Luckily, there are several options for you.

If you don’t already plan menus, start now, and include either mashed potatoes or something like shepherd’s pie, which has a mashed potato topping, with two or three meals each week. Mashed potato recipes can be plain or fancy, so your meals won’t lack flavoring. Also start setting aside baking time and making recipes like potato rolls and pasty or empanada dough, all of which can use mashed potatoes in place of part of the flour. In fact, research World War II rationing recipes, especially from Great Britain. Several recipes for pasties—not pastries, but pasties, which are like hand pies—use mashed potatoes in the dough. The recipes are easy to double. These can be frozen for future lunches. Potato rolls and potato bread can also be frozen, saving you some money on lunch bread and dinner rolls for the next few months.

While frozen food eventually has to be eaten, lest the quality start to go downhill because of freezer burn, the food will remain safe if you have it in temperatures close to zero Fahrenheit. So you will have to eat those rolls and pasties, but you can keep them for several months.

As you get closer to the end of the year, ramp up bread-product production and freeze. Remember that the potatoes won’t automatically expire at midnight on their last day if you have them frozen properly. Also start looking at recipes like potato candy and potato fudge. As strange as those sound, they can taste incredibly good. Online searches will reveal several recipes.

If you reach the end of the year and still have potato pearls or other food left over—a possibility if you haven’t had time to bake, or if you’re the only one trying to eat all this—separate what’s left into smaller bags and freeze the pearls. Or, schedule one or two specific days to go nuts with baking and use up the rest. You can use a similar strategy with almost any food that has an expiration date if you give yourself enough time.


Please click here to vote for Prepared Christian as a top Prepper site!

If you liked this article please think about sharing it on the social media listed below, thanks!

Food Boredom

Food Boredom

The rabble with them began to crave other food, and again the Israelites started wailing and said, “If only we had meat to eat! We remember the fish we ate in Egypt at no cost—also the cucumbers, melons, leeks, onions and garlic. But now we have lost our appetite; we never see anything but this manna!” Numbers 11:4-6

Most of us have never experienced food boredom, at least not on the level mentioned above. Those of us in first world countries are so blessed to have just about anything to eat in close proximity. I experienced food boredom a time or two in the service, but it was always short lived. Image only having the same 2 or 3 meals available to eat for the next six months to a year. Do you think you would get bored? How about your family? I have read about some children who simply refused to eat due to food boredom.

I think there are two types of artists; one who can look at various paints and see the individual colors and another who looks at the same paints and sees a finished painting. I think the same can be said for people who cook. I think people who can look at their pantry and food storage and see meals have it much easier.

If you’re kind of person who sees the individual items, my only recommendation is to make sure you have an abundance of a variety of foods that your family actually eats. This way people won’t have to eat rice and beans, beans and rice, rice with a side of beans, you get the idea
 
Picky Eaters

I’m not nearly as picky as I was as a child, but having been a picky eater, I understand it. I have Asperger Syndrome and people with Asperger’s often suffer from sensory issues. There are some foods that either because of how they smell or taste, I just can’t handle.

If you have a picky eater at home, you need to consider that when building your food storage. Their eating habits aren’t going to change just because the stuff hits the fan. In fact, because of the stress of the situation, they’ll probably cling to them even more.
 

Treats

I made two “cruises” into the Persian Gulf on the Abraham Lincoln aircraft carrier. Don’t get me wrong, we ate pretty well, but after a month or two of “boat food,” we really looked forward to pulling into the UAE and eating those small overpriced goat cheese pizza’s. My point is that having treats and comfort foods stored away can help break up the boredom.
 

Final Thoughts:

Rice and beans do make up a portion of my food storage but we won’t be eating them for every meal. We’ve also got an assortment of spices and herbs to alter the taste as well.

What other ideas do you have to help avoid food boredom?
 
Please click here to vote for Prepared Christian as a top Prepper site!

If you liked this article please think about sharing it on the social media listed below, thanks!

PreparednessClubOne